Apr 19, 2023
Churn Management: Detecting Low Product Usage With Make
In this tutorial, we’ll show you how to manage churn by automatically detecting low product usage to and sound the alarms so you can save the relationship with your customers before it’s too late.

Churn - the percentage of customers who cancel their subscriptions or stop using your service - is the perfect example of a recurring nightmare for businesses.
It can have a severe impact on revenue and profitability, and that is why its management should always be top of mind.
But what is churn management? In little words, it is the process of identifying and anticipating customer defections to keep them loyal to the brand, service, and product.
“Anticipation” is the most important word in this definition, as it’s the key to reducing churn.
It’ll always be twice as hard to convince someone to return after they’ve left than to do so while they’re still with you.
This raises an important question: How to anticipate churn?
Data-wise, one of the most important signs is product usage.
Low product usage often leads to churn - and in this tutorial, we’ll show you how to automatically detect it, and sound the alarms so you can save the relationship with your customers before it’s too late.
That’s right: Automation can help businesses reduce churn and improve customer retention.
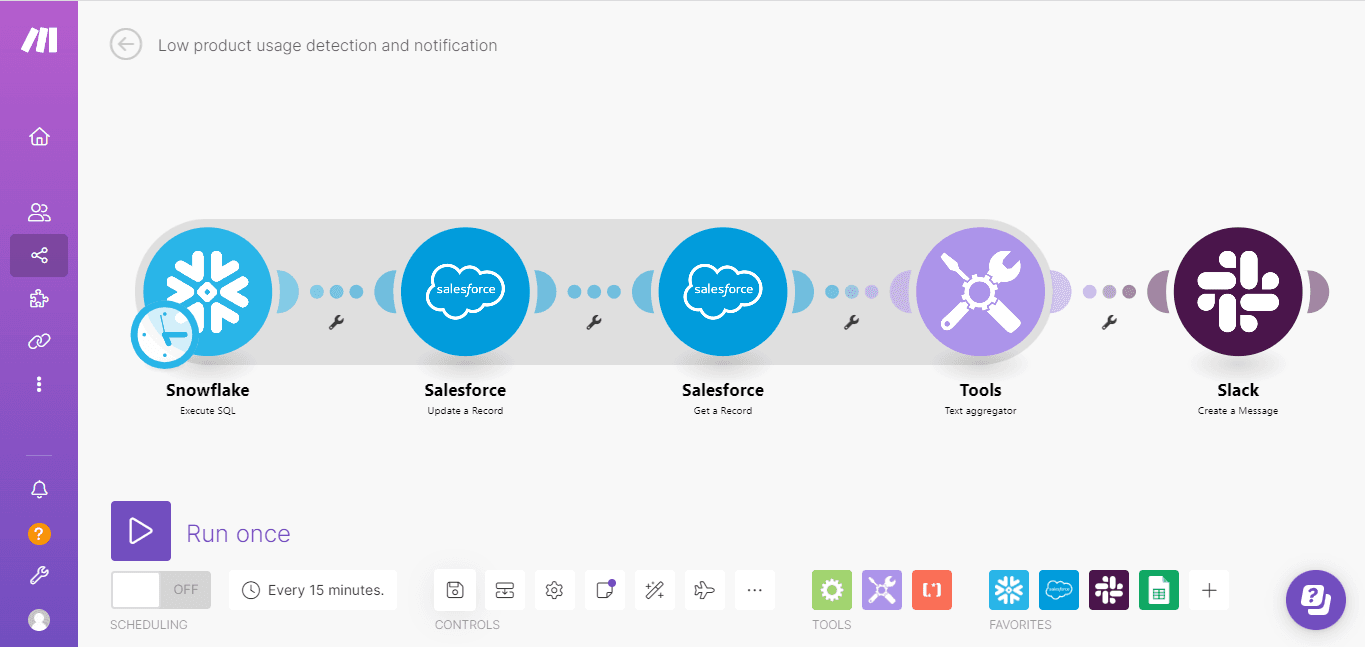
Before we jump into details, let’s take a look at the solution, and the tools required to create it.
For proactive churn reduction, automate account monitoring
There’s a linear correlation between product usage after sign-up and churn: When customers sign up for a product but do not use it (or reduce the usage over time), they will likely end up churning.
This is one of the leading reasons why 80% of app users churn within 3 months (and to make things worse, almost all users churn silently).
As a result, a successful churn management strategy must be fully aware of product usage.
The solution we'll build below starts at that exact point by proactively monitoring a database of product usage statistics in the initial 3-month period. We've used Snowflake in this example, but you could be using any internet API-accessible database.
If usage falls below a certain threshold, notifications are sent to the sales or customer success teams so they can act upon the hard (and concerning) data right away.
To create this solution, we’ll use the following apps:
Salesforce (You can replace it with another CRM as long as it’s supported by Make).
Slack (Other options are available)
Snowflake
Make
Now, it’s time to create the solution, which will allow us to recognize soon-to-be churners and notify sales/support so they can convince them otherwise.
Step 1: Create a new Make scenario and add the Snowflake app
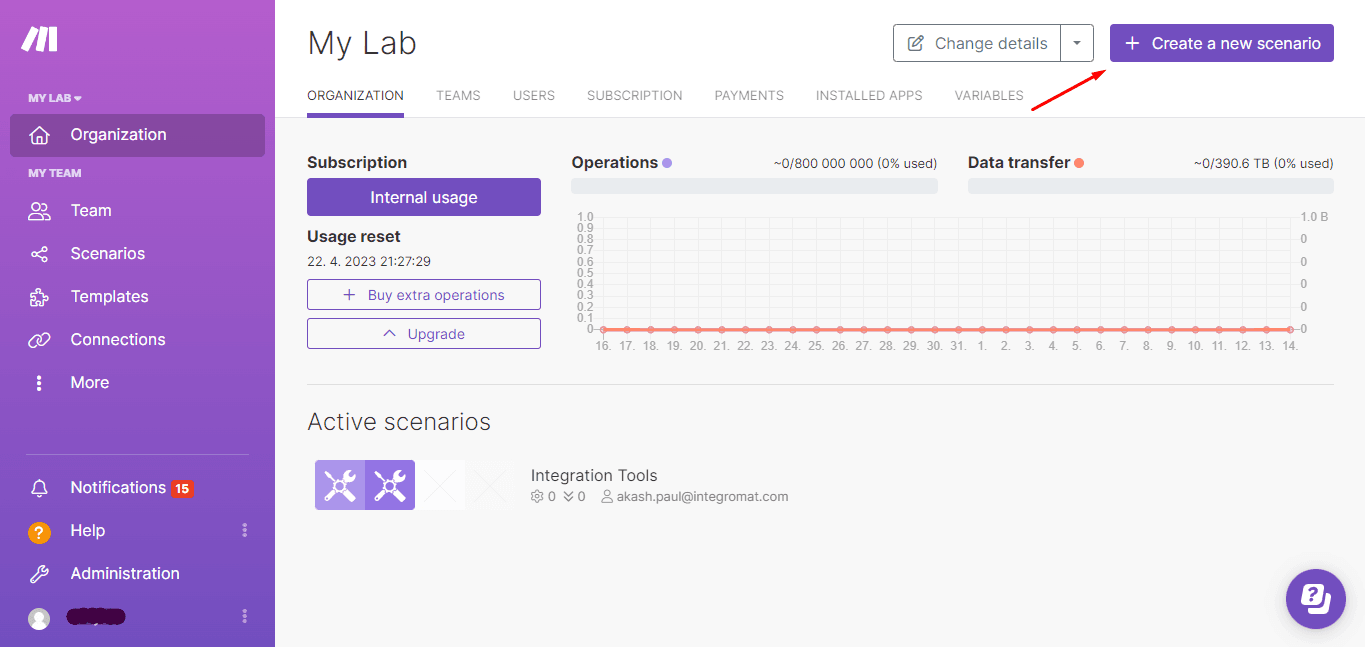
Start by logging into your Make account and navigating to the Scenarios menu. Once there, click the Create a new Scenario button, which will land you on the visual canvas.
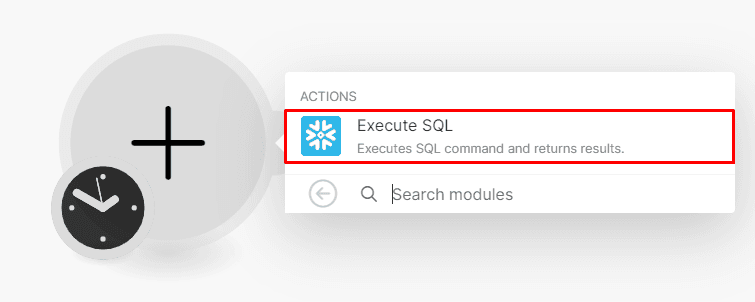
In the visual canvas, click the plus sign, search for the Snowflake app, and select the Execute SQL module (the only one available).
Note: Ensure that the Snowflake table you’re extracting data from has fields for the Salesforce data points you’ll need, such as “record ID”, “created data”, “app usage”, and so on.
Step 2: Configure the Snowflake module
We’ll start configuring the module by connecting your Snowflake account to Make.
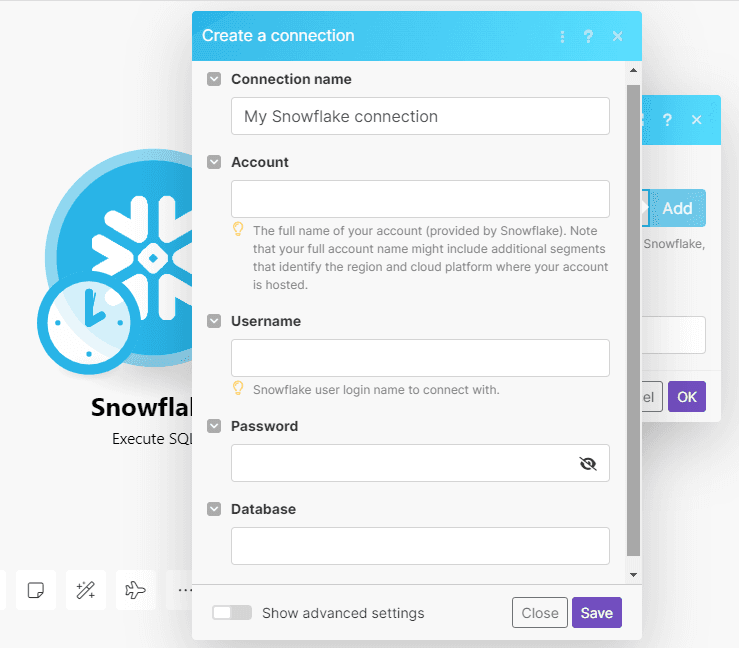
Click the Add button, connect your account to Make by completing the fields, and then click Save.
Once your connection has been established, you’ll be able to configure the module.
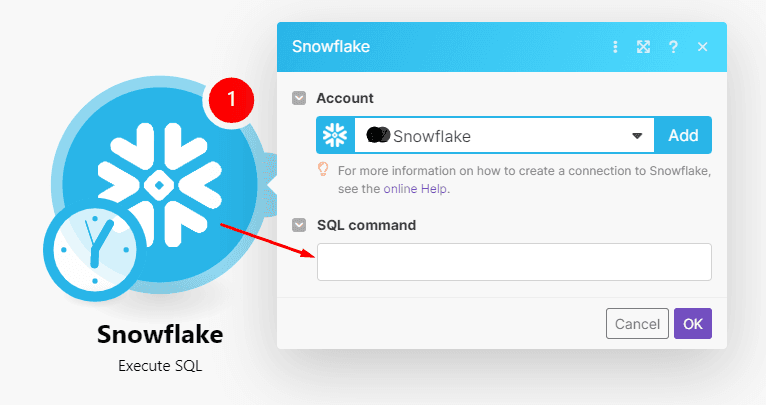
Enter the SQL command that retrieves accounts that are less than 90 days old with low usage according to your requirements.
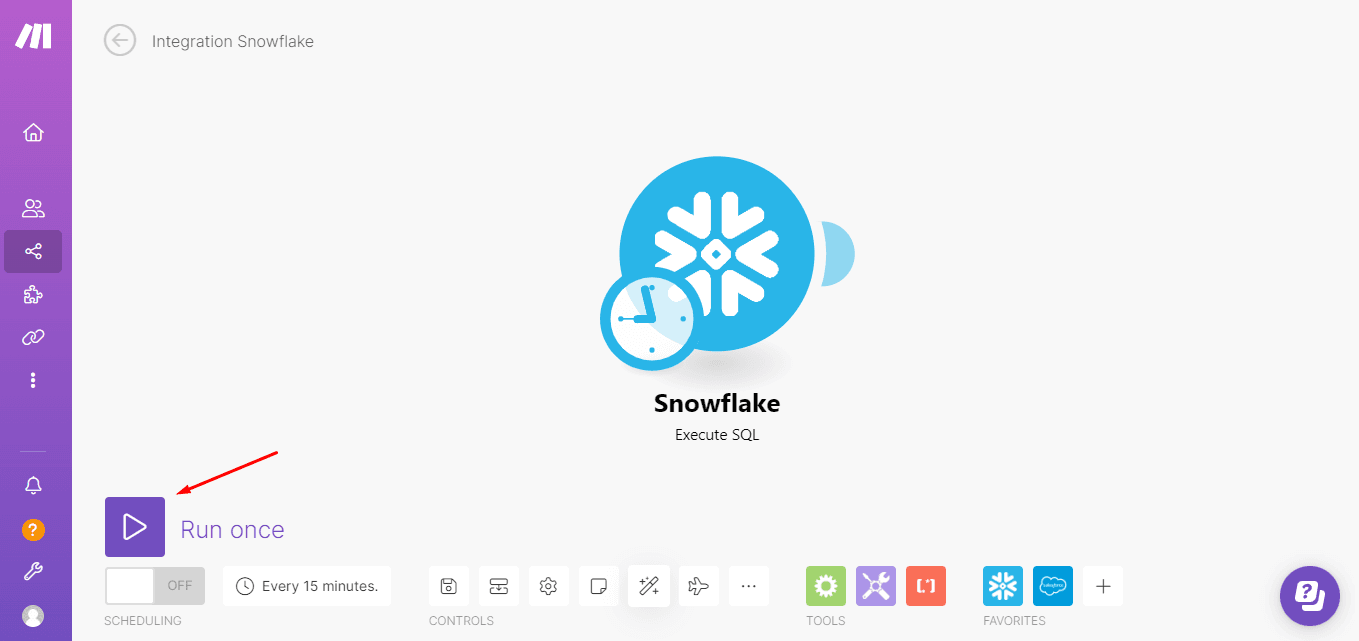
Once you have the SQL command, click OK and run the module by clicking on the Run once button at the bottom of the builder.
We’re doing this to test the module. If it works correctly, there won’t be any errors outputted by the module.
Step 3: Add the first Salesforce module
The next step is to update the status of the accounts in Salesforce as a “high” priority.
Important: Before proceeding, make sure that you have a custom field in Salesforce for this.
Now it’s time to add the Salesforce > Update a Record module to your Make scenario.
Simply click the button on the side of the Snowflake module (which appears when you hover your cursor over it), search for Salesforce, and choose the Update a Record module.
Now it’s time to configure the module. First, you’ll have to connect your Salesforce account to Make (click Add in the module to do this).
Note: Remember that the Snowflake table containing all the data that you're extracting will differ from user to user. This means that the data elements used for mapping will be different as well.
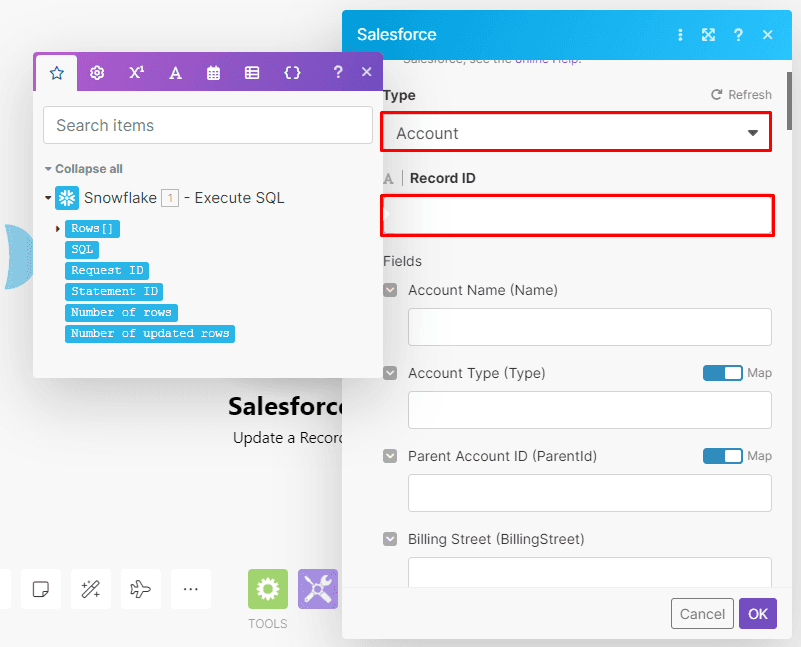
First, select Account as the Type, and from the Snowflake module, map (drag and drop) the data element that contains the Salesforce record ID to the Record ID field.
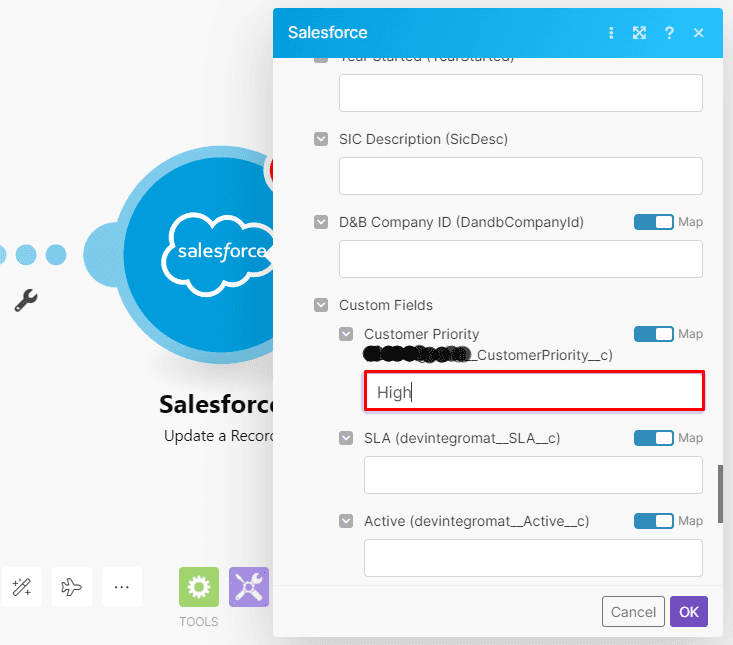
Once you do this, scroll down the module and locate the custom field that you created for the priority status of the account.
Enter/select “High” in this field so your sales/support team knows which accounts require the most attention.
You can also update other fields if you need to; if you don’t need to do this, click OK and move on to the next step.
Step 4: Add the second Salesforce module
Here we’ll add another Salesforce module to retrieve the details of the accounts that require our attention before churning.
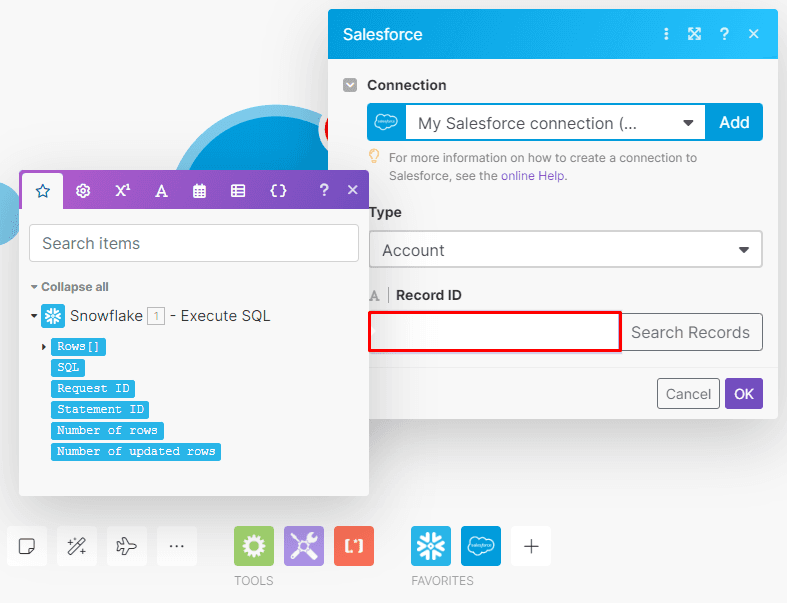
Add the Salesforce > Get a Record module to your Make scenario, and once again, map the record ID element from the Snowflake module that contains the Salesforce record ID. Then, click OK (see the image below for reference).
Step 5: Add the Text aggregator module
It’s safe to expect several accounts that need to be sent over to the sales reps or CSS agents - in the end, that is one of the main reasons we are automating this process!
However, there’s one thing you’ll want to avoid, and that is sending each of these accounts as a new message when you can send all of them in a single message.
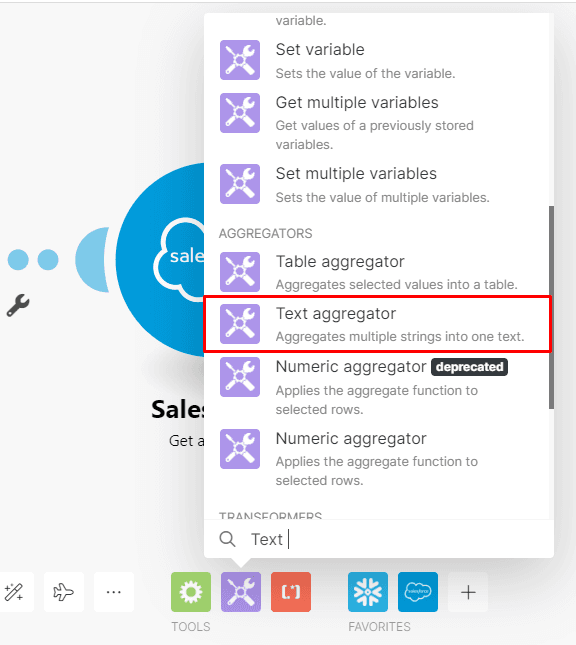
To avoid this (and consolidate communications), we will rely on a module that is exclusive to Make: the Text aggregator.
You will find it at the bottom of the scenario builder; add it to your scenario, next to the Salesforce > Get a Record module.
Now, we have to configure this module.
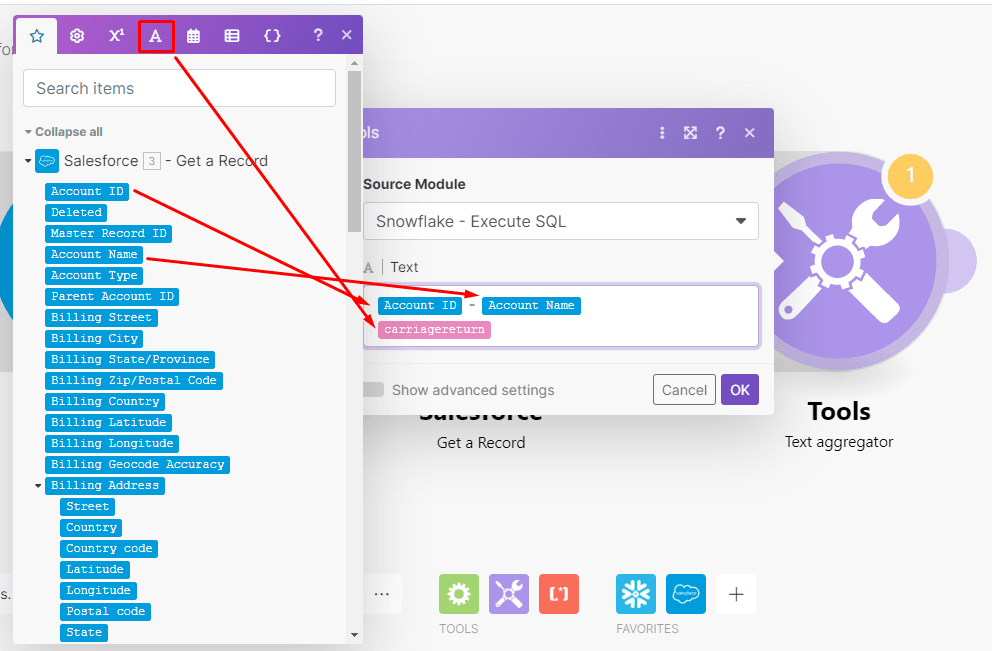
Start by selecting Snowflake as the Source Module.
Next, map all the data elements you want from the Salesforce > Get a Record module (this is the data that you feel the sales reps/customer support will require before making contact).
To keep it simple here, we’ll just map the account ID and Name.
Then, add the “carriagereturn” function to the field; you’ll find it under the Text and binary functions tab.
This function will ensure that each account with the details will be on its own line. Once done, hit OK.
Step 6: Add the last module
Now that Make will monitor and retrieve all the accounts that require attention, it’s time to send them to the person (or team) that will engage with these accounts and prevent them from churning.
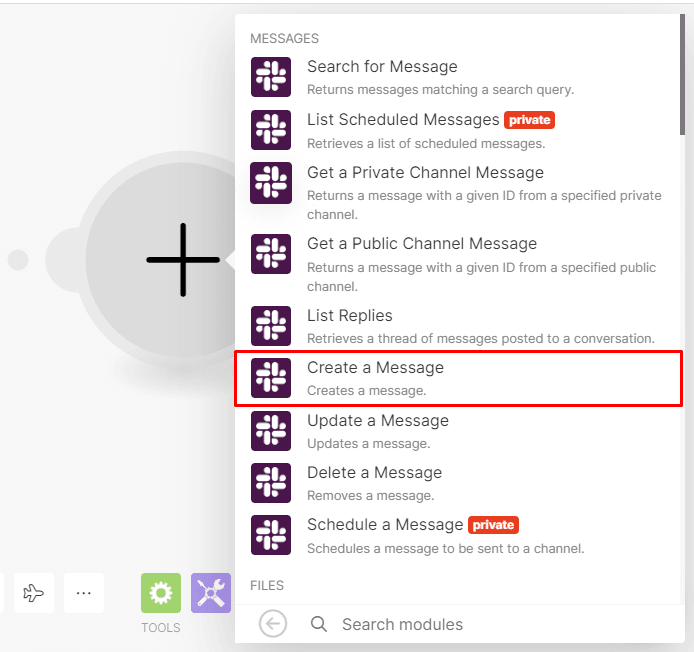
To send the notifications, we’ll use the Slack > Create a Message module.
As you did with the other modules, add it to your scenario and connect your Slack account to Make.
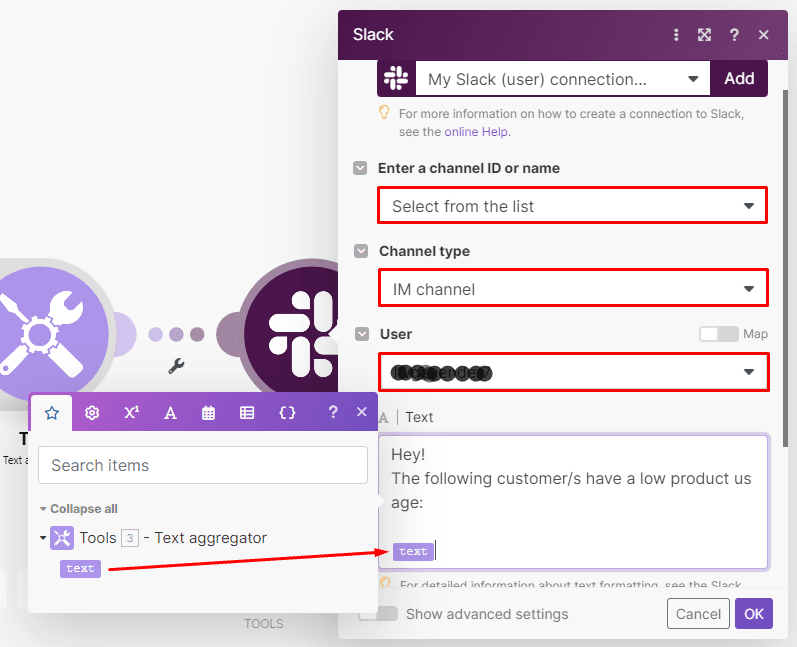
To configure the module, start by choosing the “Select from the list” option under Enter a channel ID or name field.
Then, select the Channel type (public/private/instant message/multiple instant message channel) to where you want to send the notifications and pick the User/channel that will receive the notifications.
In the Text box, enter the text you want, and simply map the Text data element outputted by the Text Aggregator.
Then, hit OK - we’re almost done!
Here’s a look at the fully configured scenario:
Step 7: Test and save to start preventing churn!
Test your scenario by hitting the Run once button once again.
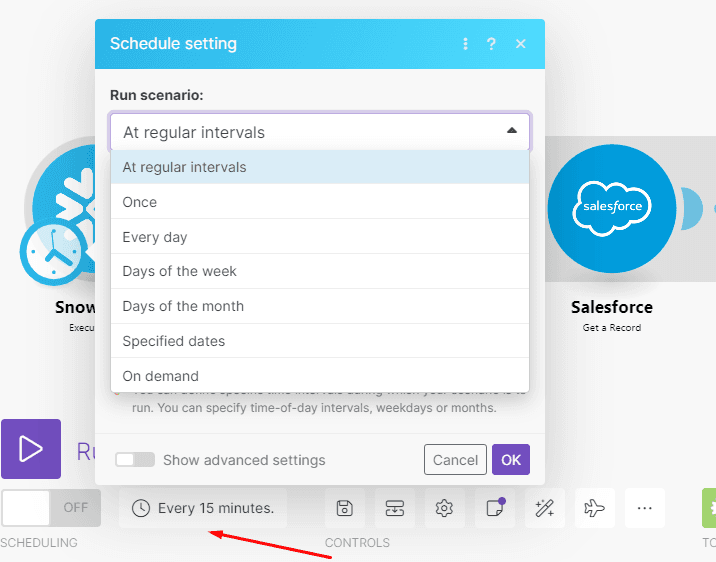
If it executes without errors, you’ll need to save it - but first, set up the scheduling by opening the scheduling setting box located next to the switch.
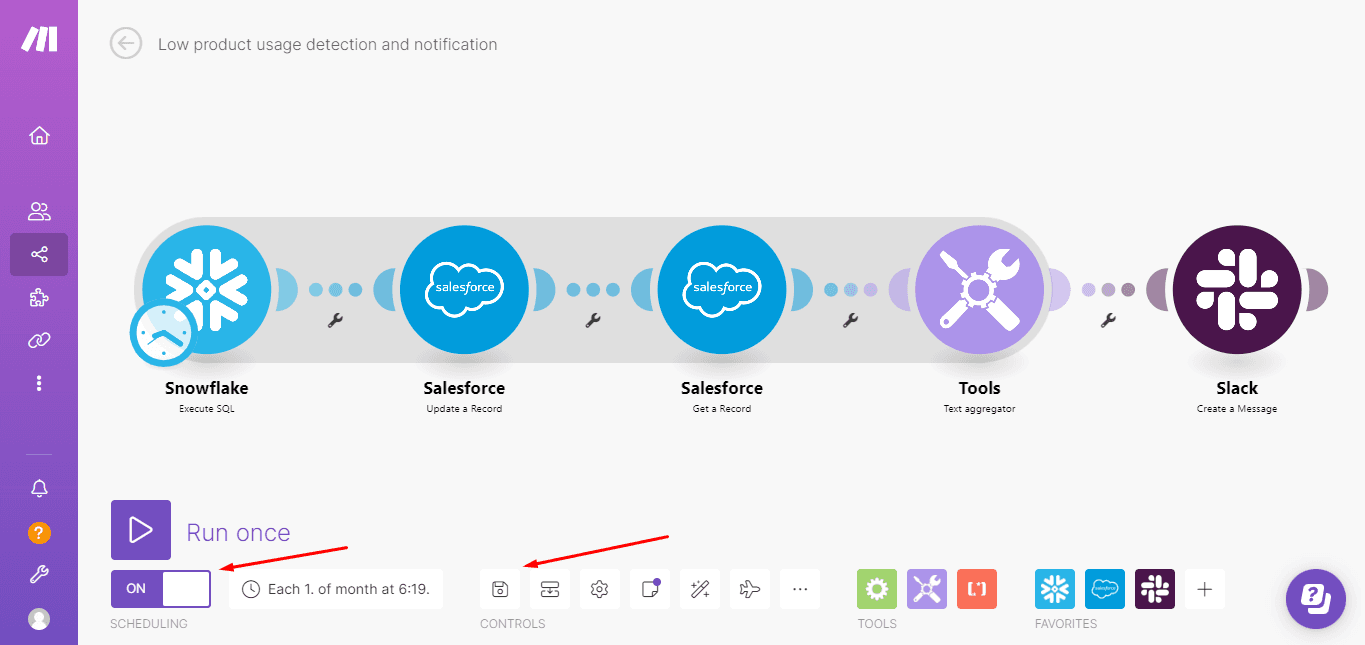
For this demo, we have set it up to execute on the first day of every month.
After scheduling your scenario, just save it and turn it on - and that’s all!
Final thoughts: On key accounts and scenario variations
In this article, we’ve shown you how to reduce churn rates and increase the retention of key customers by automating the monitoring of key accounts.
But most importantly, this tutorial will hopefully help you grasp the power and flexibility of Make.
For instance, let’s imagine for a second that you don’t have a sales team, or even key accounts that require this kind of personalized attention.
Instead, you need an email campaign for accounts with a low product or app usage.
You could easily automate this with Make.
Instead of using Salesforce and Slack modules, you can add an email marketing tool to the scenario, feed it with the email addresses of those who aren’t using your product, and reach out to them with a drip campaign to prevent churn.
Interested in these and other solutions? Get your Make account, and get inspired by more automation use cases today!
Ready to make the automation revolution happen?


