Mar 11, 2021 | 8 minutes
The Easiest Way to Integrate GitHub and Jira [Step-by-Step Guide]
In this guide, we will show you how to create GitHub - Jira integrations that lessen the burden on project managers and developers.

GitHub and Jira are two names anyone in the software industry can instantly recognize without needing extra information.
Developers and project managers lean on these tools to build software, using GitHub for version control and source code management, and Jira for tracking and solving issues.
Naturally, the need for GitHub - Jira integrations is prevalent, as linking both tools together can solve problems related to communications, delivery times, and redundancy.
While there are a few solutions to connect GitHub and Jira, none seems to have the leading hand in terms of simplicity and power.
Today, we are here to change that.
In this use case, we will show you how to create GitHub and Jira integrations that lessen the burden on project managers and developers.
Before we get started, let’s go over a few notes to keep in mind.
Connecting Jira to GitHub: Initial considerations
Jira currently features three different editions:
Jira Software
Jira Core
Jira Service management
In this article, we’ll focus on the Jira Software version (aka Jira Server), for which Make provides full API access.
Secondly, a word about the integration itself.
In this guide, we will show you how to create not one, but two types of GitHub - Jira integrations:
One-way integration: sends data from one application to another. Either Jira to GitHub, or GitHub to Jira
Two-way integrations: sends data from one app to another and vice versa automatically
For example, when an issue is created on GitHub, a task/issue is created on Jira. Then, when that same issue is closed on GitHub, the corresponding task on Jira is also closed. This is how two-way integrations work.
Sticking with the example mentioned earlier, we’ll take you through a step-by-step process of how to set up the GitHub - Jira Software integration.
Savoring the time savings already? Let’s keep moving forward then.
Note: You will need an Make account to create the integration. If you don’t have one yet, please register for free.
Note 2: You will see the word “scenario” thrown around a lot. This is a synonym to “automated workflow”, and our setup will require two of them. For more information about basic Make terms, please refer to this page.
Connecting GitHub with Jira software: A step-by-step guide
Now that you have an Make account, it’s time to make the most out of it. Let’s jump right into it.
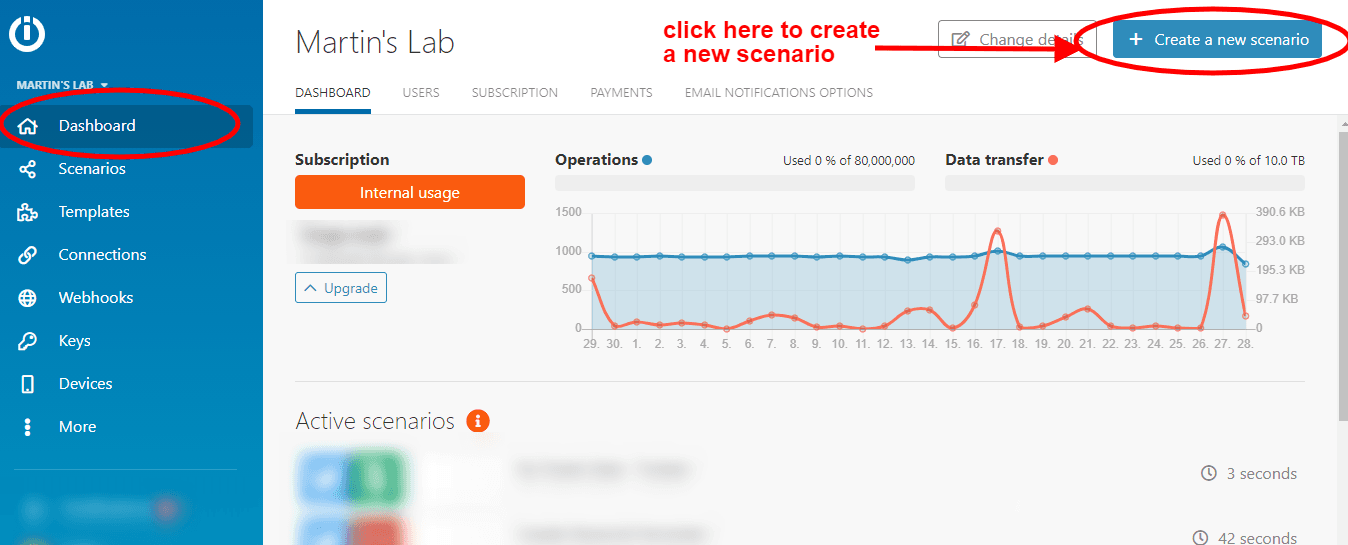
1. Creating the scenario
Starting from your dashboard, you will create a new scenario from scratch:
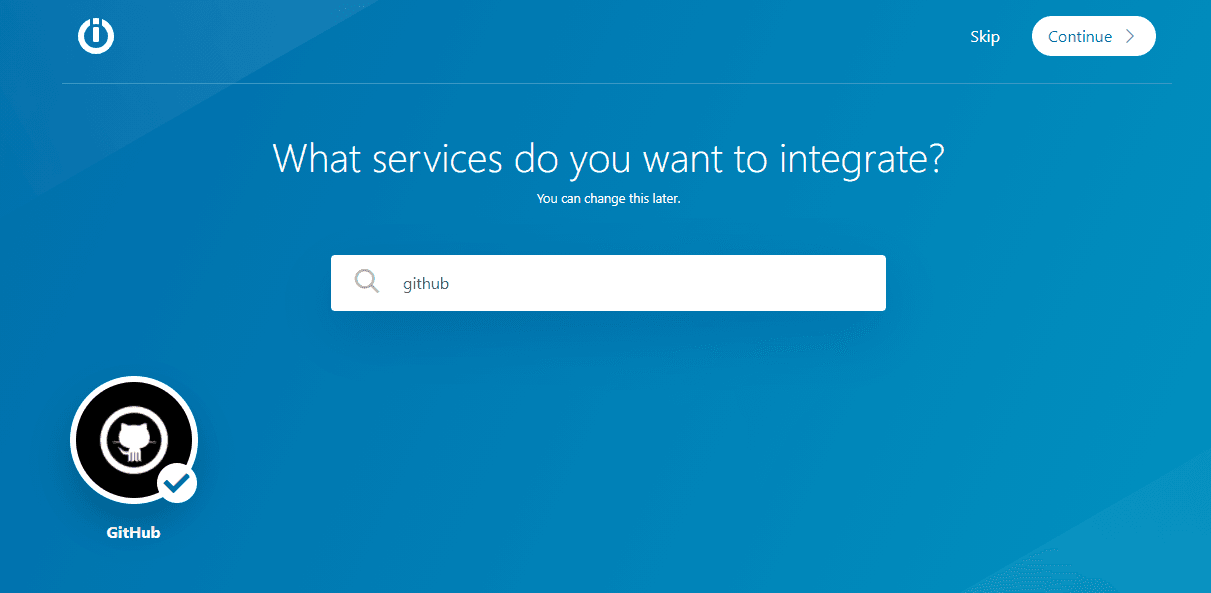
After you do this, please pick the first app you will use in your scenario: GitHub. Then, click the “Continue” button on the upper right side of the screen.
This will land you on the scenario builder (aka visual canvas) which is what you will use to integrate GitHub with Jira.
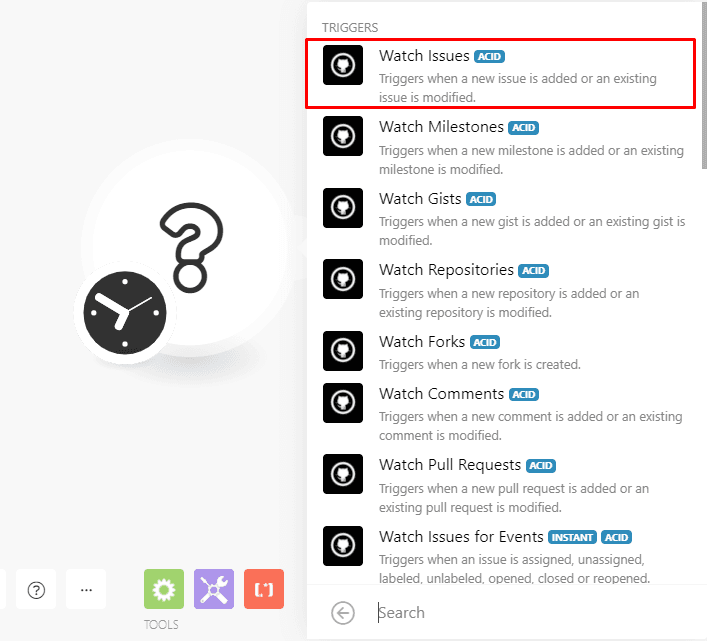
In the visual canvas, you will see that the GitHub app has been pre-loaded as your first option. Click on it, and select the “Watch issues” module from your options.
This module will kick off the automation.
2. Configuring the GitHub module
Once you select the module, you will need to connect your GitHub account to Make and grant a few permissions.
Click the “Add” button and click “Continue”.
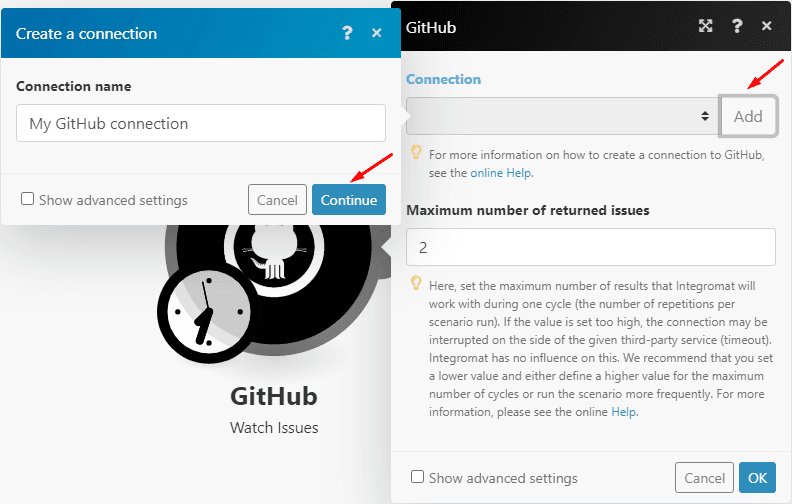
In the pop-up screen, enter your GitHub credentials and sign in.
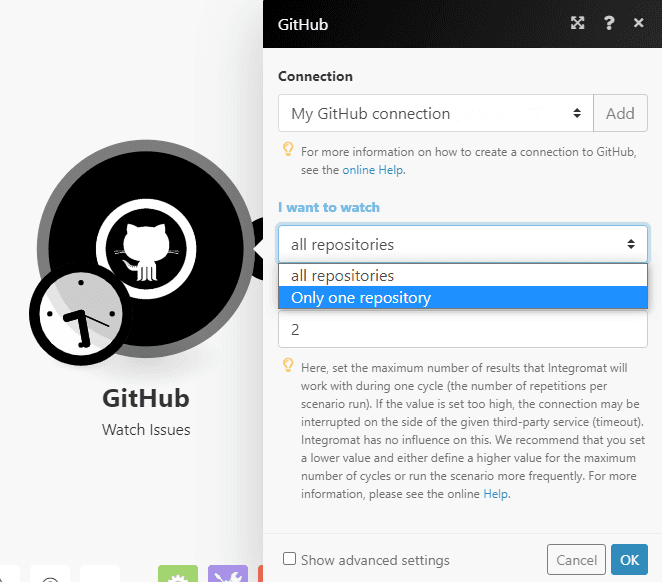
After you do this, you will see the “I want to watch” field, which gives you the option to watch just one or all repositories in GitHub.
For this automation, just choose one repository. Another field will appear to select the specific repository Make will watch for you.
Now, it’s time to choose when to start processing data. For this use case, select the “From now on” option to watch for new issues.
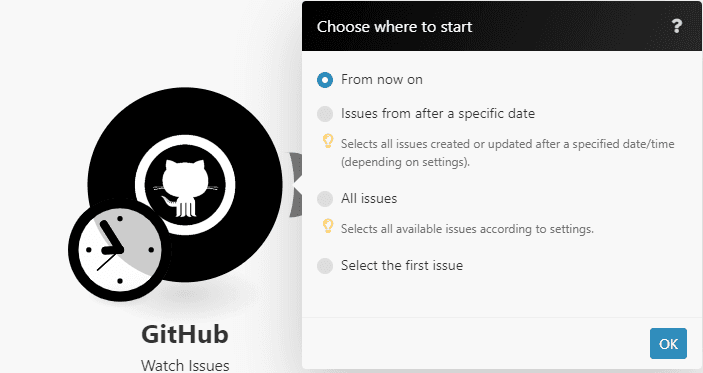
Great, you have successfully configured the Github module!
3. Configuring the Jira Software app
Next step is to add the Jira app to the scenario and configure it.
When you hover over the Github app, you’ll see a little plus sign, which allows you to add another module.
Click on the sign, an app search box will appear in front of you.
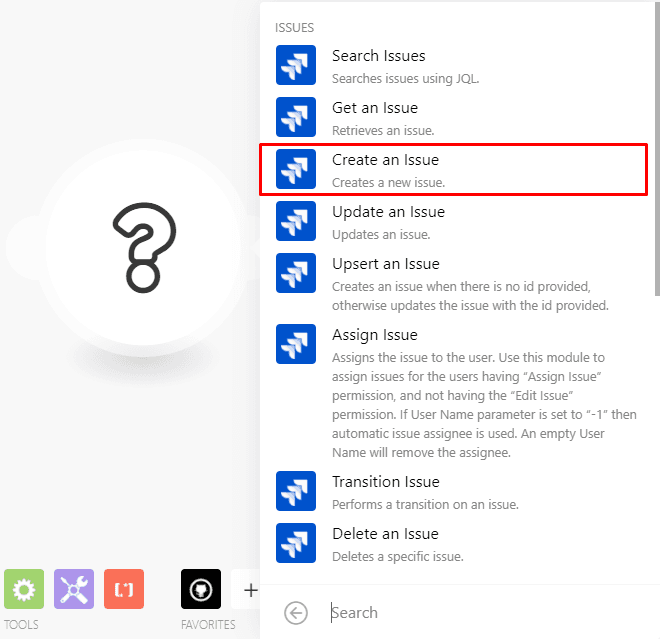
Here, you need to search for Jira and select the Jira Software app.
As we know, the goal is to create an issue on Jira Software from issues previously created in Github.
With this in mind, select the “Create an issue” module.
Just like with Github, you will have to connect your Jira account to Make to proceed.
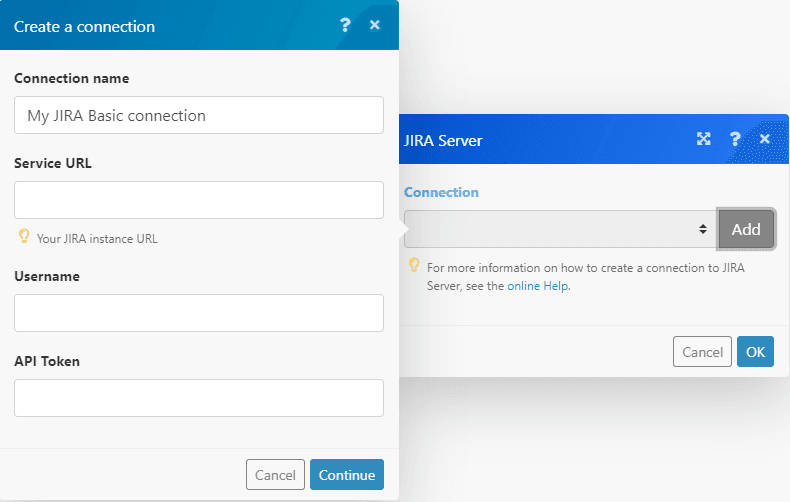
When you click the “Add” button, you will notice that it requires the following information:
Service URL
Username
API token
For the Service URL, go to your Jira account, copy the URL ending in .net and paste it in the Service URL field.
Then, enter your Username in the field below.
What about the API token you ask? Don't worry, we got you. Just follow the steps below.
Creating an API token in your Jira account
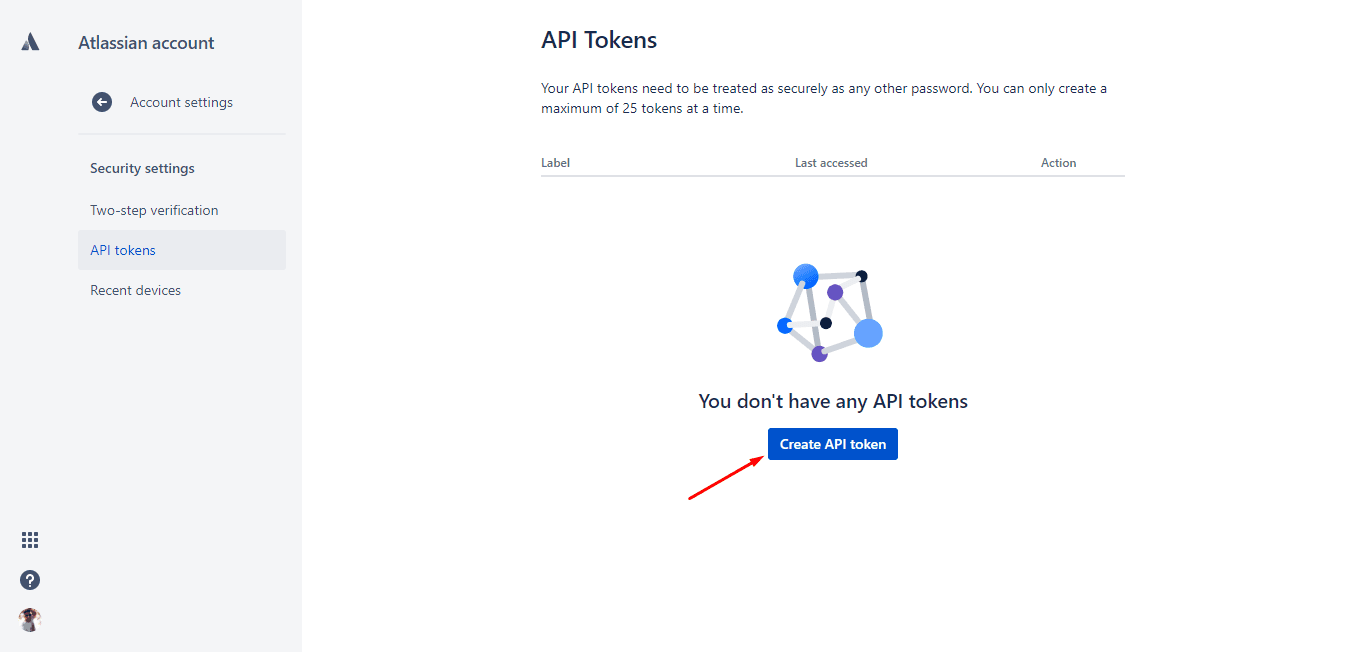
Click this link and log in to your account
Click the Create API token button
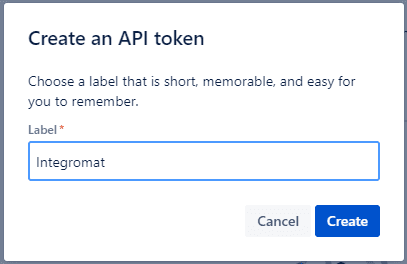
In the popup window, enter a name for your token.
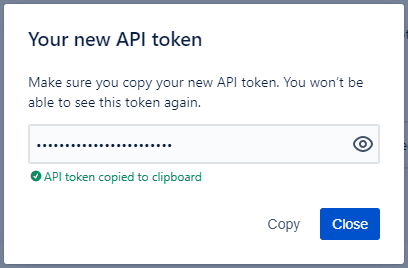
Next, copy the token, head over to Make, and paste it in the API token field.
Now, it’s time to finish the configuration of the Jira module on Make.
First, you need to create a custom field on Jira and call it the GitHub Issue number.
As the name suggests, this field will contain the GitHub issue number, which is important for the synchronization to work correctly.
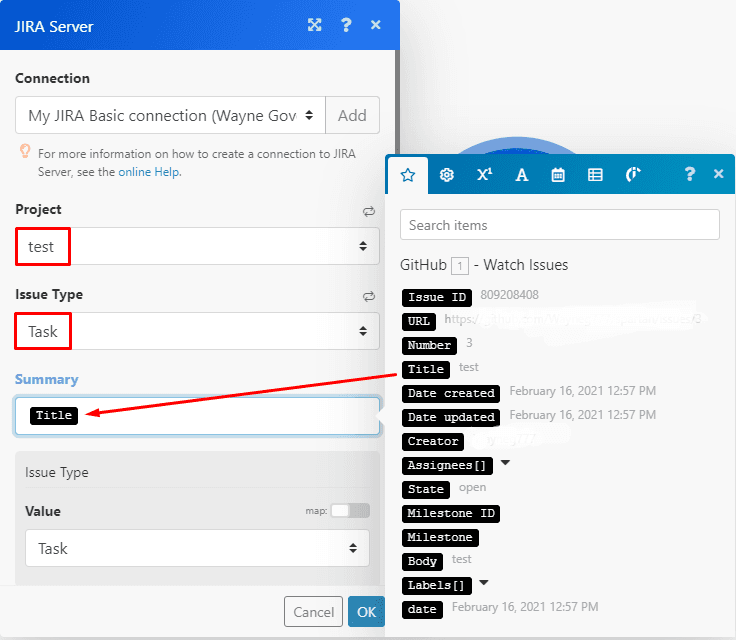
Next, select the project that you want to create the issue in. You will see many fields appearing on the module. Here’s what you need to do with these:
In the Issue type menu, select the Task option
Next, map (drag and drop) the Title element from the Github module to the Summary field
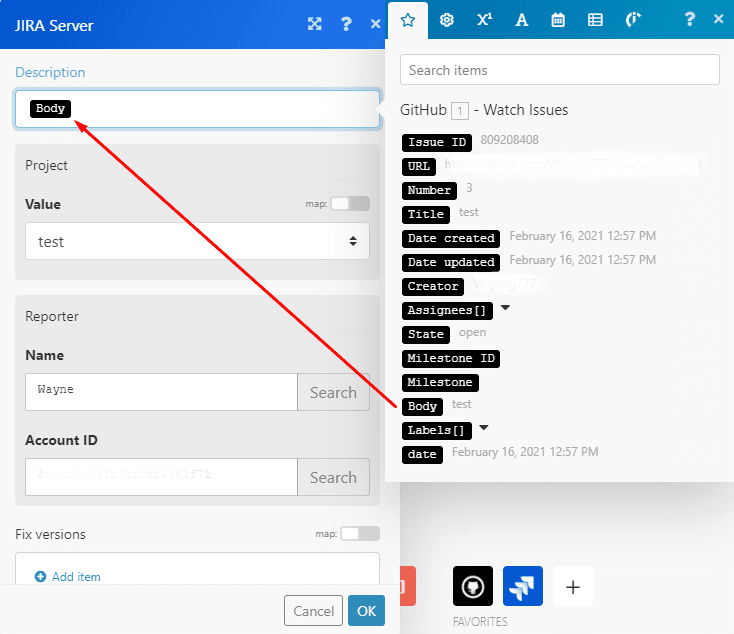
Scroll down until you see the Description field and map the Body element
Enter the name and account ID of the reporter in the corresponding fields below
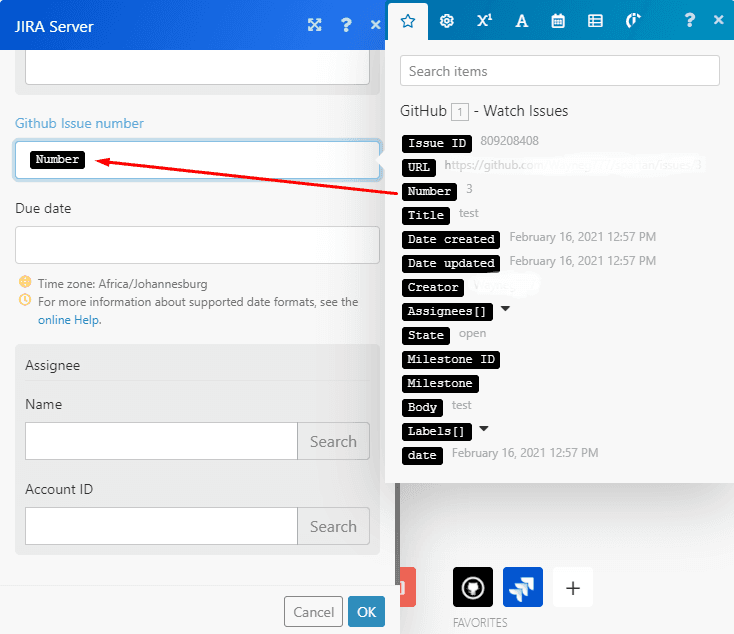
Scroll down one more time until you see the Github Issue number custom field that you created. Here, simply map the Number element to this field
If there’s a specific assignee for these issues, you can enter the name and account ID in the fields below. Hit OK after doing this
Hit the “Save” button and switch the scenario on by toggling the switch on the bottom left.
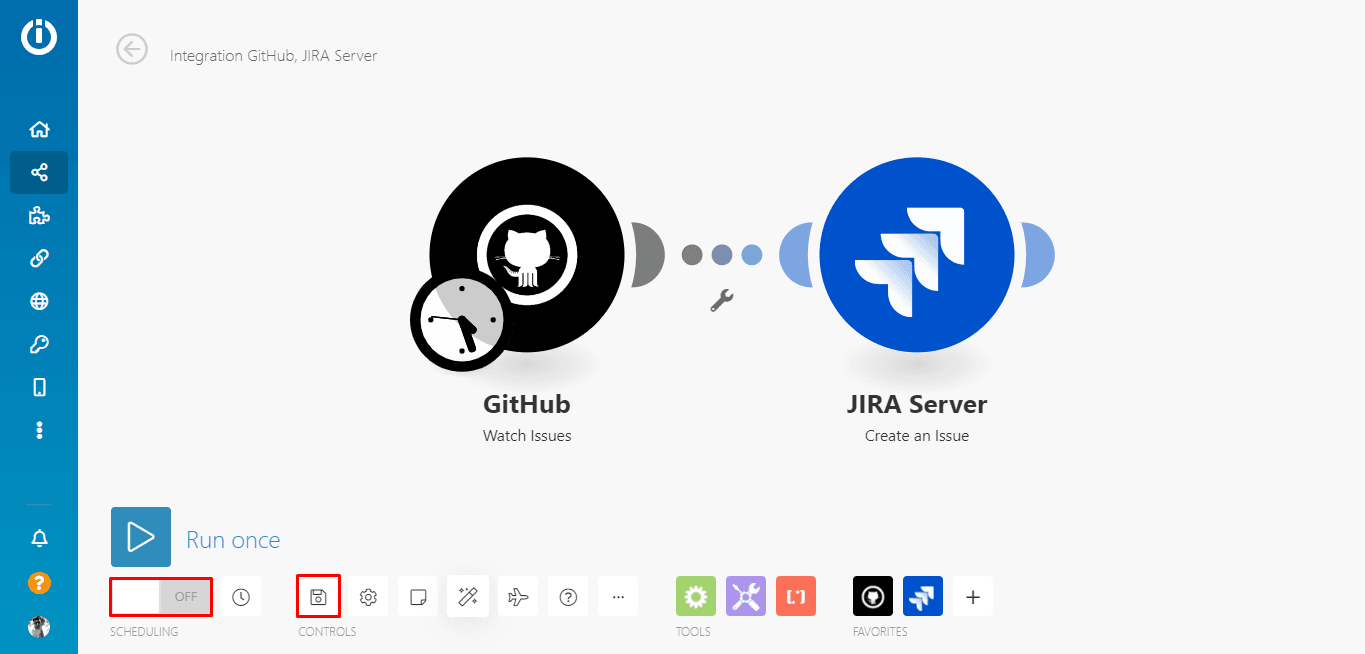
At this point, the “Schedule setting” menu should appear on your screen.
Make gives you the option to schedule your scenarios to run whenever you want them to. In case it doesn’t, you can always access this menu by clicking on the clock icon.
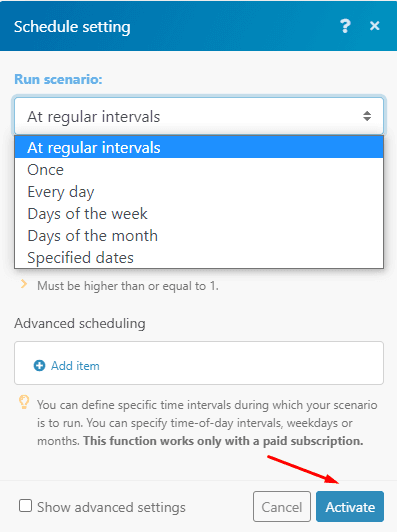
Here, you can choose the intervals at which Make will monitor GitHub for new issues (and consequently, pick up new issues and create them on Jira).
Once you’ve chosen the one that fits your needs, click “Activate” at the bottom left.
Congrats! You’ve just created the first scenario.
4. Scenario execution
Before we move on to the second scenario, let’s first test this one.
Head over to GitHub and create an issue. Once completed, go back to the scenario and hit the “Run once” button. This is what it should look like:
The scenario should pick up the new GitHub issue, and create a Jira issue with it.
Let’s move on to the second scenario, and unlock the full potential of Jira - GitHub integrations.
Second scenario: Two-way synchronization between Jira and GitHub
A quick recap before we continue: In the first scenario, when an issue is created on GitHub, an issue is also created in Jira.
In the second scenario, when an issue is closed on Jira, the corresponding issue will be closed on Github as well.
Here’s how to do it.
1. Connecting the Jira Software app (instant)
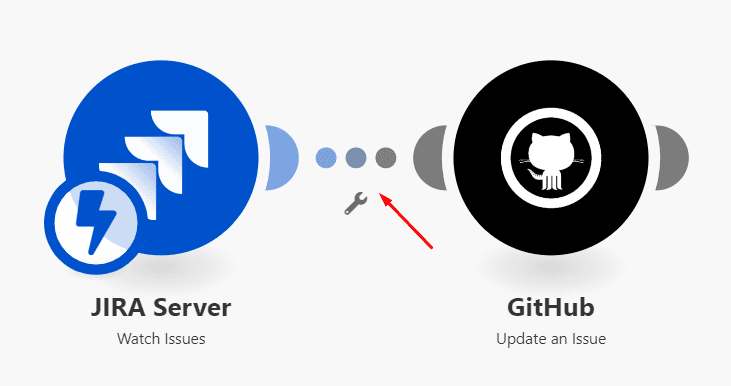
This time, the Jira Software module will appear first in the automation but with an important difference.
Remember in the first scenario, when you scheduled it to run at certain intervals? Well, Jira Software has an instant trigger module.
This means that whenever an issue is changed in Jira, the information is picked up instantly by the module, triggering the scenario without delay.
Now, into the action. You will need to create a new Make scenario. After that is done, you will have to search and select the “Watch issues - instant” Jira module (you can do this straight from the scenario builder).
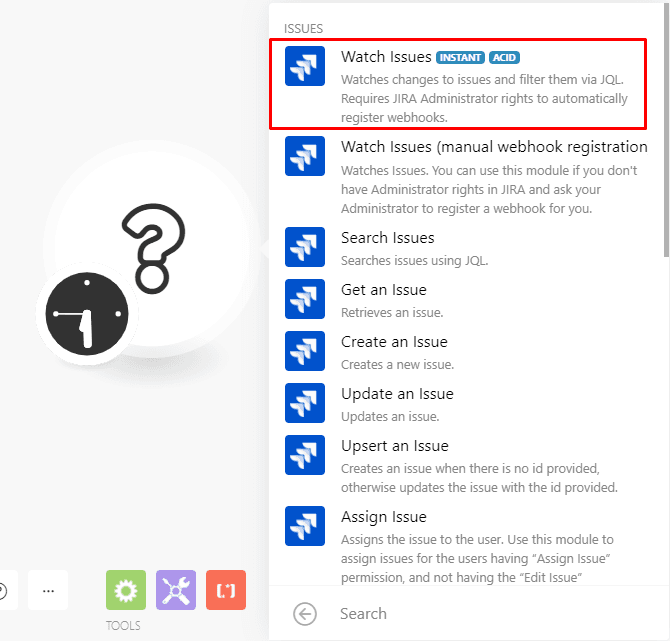
Next, you need to add a webhook, which allows Make to receive the data instantly. To do this, please follow the steps:
Click “Add” and give it a name
Select “Issue” as the Hook type
Tick the “Updated” option under “Events” and hit “Save”
Once added, Make will automatically attach the webhook to Jira for you.

With the webhook, Make needs to learn the data structure before you can map the data elements in the GitHub module that we will use afterward.
To do this, please follow these steps:
Hit the “Run once” button on your scenario
Go to Jira and change the status of the issue you created in scenario 1 to “anything” (besides “Done”).
You’ll see a number in the little bubble above the module if successful

2. Connecting the GitHub app
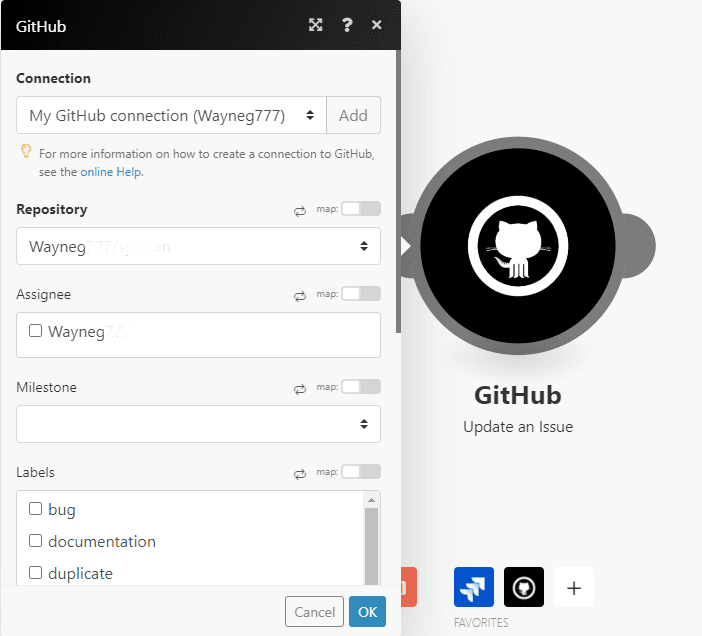
Now, you will have to add the GitHub “Update an issue” module to your scenario.
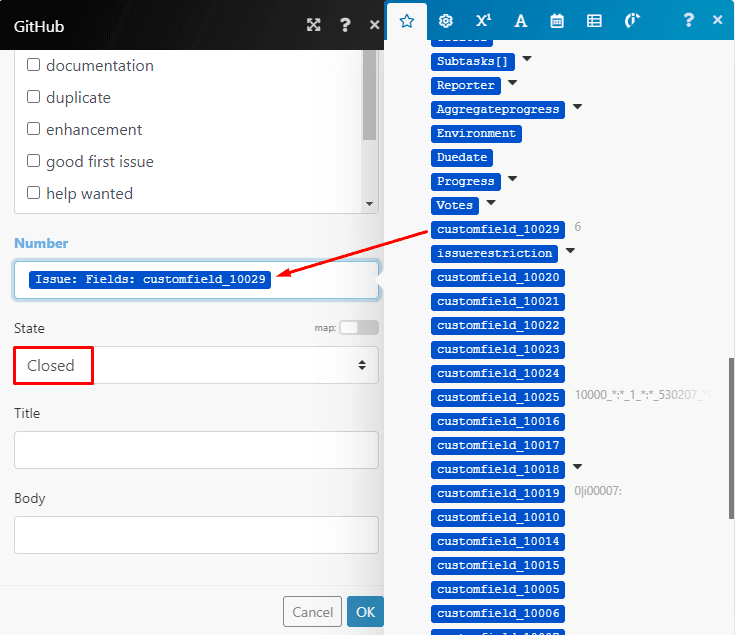
Once you do this, scroll down and map
Scroll down, map the Issue: Fields: customfield element (name may vary but you will see a number next to it) to the “Number” field and select the “Closed” status. See the image below for reference.
You probably noticed that this scenario watches for any status change in an issue on Jira, and then closes the issue in GitHub.
So as it stands, if the status changes to let’s say, ‘TO DO’, it will still close the issue in Github.
But don’t worry, there’s a solution to avoid that.
You will use a filter. This is an exclusive Make feature that allows data to pass through only if it meets a certain criteria.
To add a filter, click on the route between the two modules to bring up the filter settings.
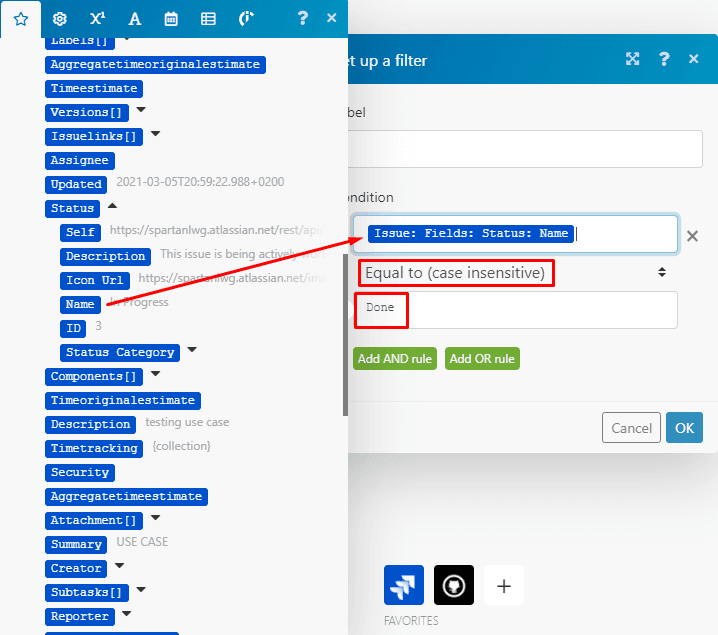
To set up the filter, simply:
Map the Issue: Fields: Status: Name element to the top field
Select the “Equals to (case insensitive)” text operator
Type the word “Done” in the bottom field
This filter ensures that only issues with statuses set to “Done” will be closed on GitHub.
3. Scenario execution
Since it's an instant trigger scenario, you need to hit the “Run once” button first, and then change the status of the issue to “Done” in Jira to trigger the scenario.
You won’t have to do this every time, as this is just to check that the scenario works correctly.
Conclusion
Setting up these scenarios is a huge time and money saver for projects that live both on Jira and GitHub.
In addition, these integrations help you reduce the odds of miscommunications among team members.
How many times did the lack of communication between team members block a project?
How many times did someone forget to update either Jira or GitHub?
These are common occurrences that you can put an end to here and now with Make.
Just like time, don’t let this opportunity pass you by.
Happy automating!
Ready to make the automation revolution happen?

Wayne Govender
Solutions Architect at Make who loves all things tech with a focus on workflow automation. Also enjoys fitness and spending too much time on YouTube.