May 10, 2023
How to Automatically Save Customer Orders into a Database
The capacity to automatically export and store orders in a database is one of the things that turn your ecommerce business into a well-oiled machine - and we’ll show you how to get there in this tutorial.
Whether you’re starting an ecommerce business or bringing a legacy one into digital readiness, saving orders to a database is one of those things you wouldn’t want to forget about.
There are multiple reasons why you’d want to automate this as well, such as:
Being able to access every order on the spot.
Improve customer response times when there’s trouble with an order.
Gain a better understanding of how the business works from the demand side.
In short, the capacity to automatically export and store orders in a database is one of the things that turn your ecommerce business into a well-oiled machine - and we’ll show you how to get there in the tutorial below.
Before we jump into it, here’s what you’ll need to create this solution:
A Make account (Core plan or above).
An ecommerce platform (we’re using WooCommerce, but you can replace it with any ecommerce platform featured by Make, including Shopify, Etsy, and more).
A database app (depending on your needs, it can range from Google Sheets to an SQL database; we’re using Airtable in our tutorial).
Last but not least, this is not a complex tutorial - you won’t find a single line of code here, nor complicated functions to deploy.
The benefits for your ecommerce operation will definitely outweigh this small sacrifice though!
Step 1: Create a new Make scenario
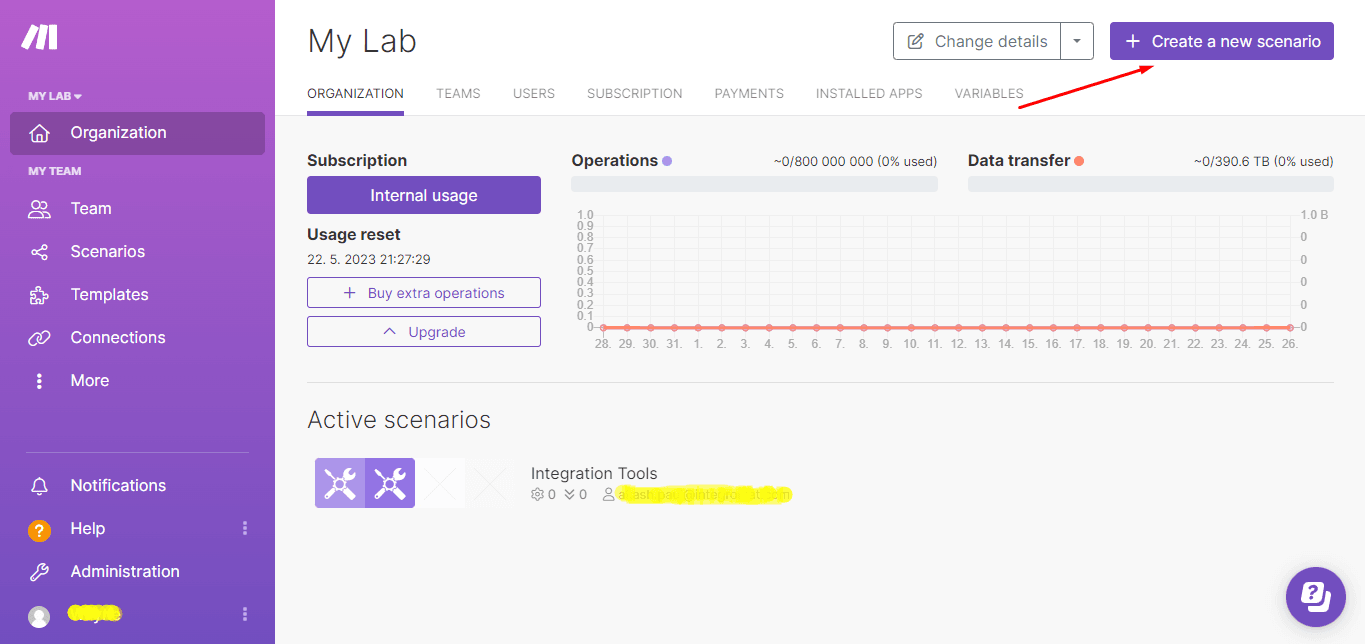
Log into your Make account and you'll be directed to your dashboard.
On the panel to the left, navigate to the scenarios tab, and click the Create a new scenario button on the upper right corner of the screen.
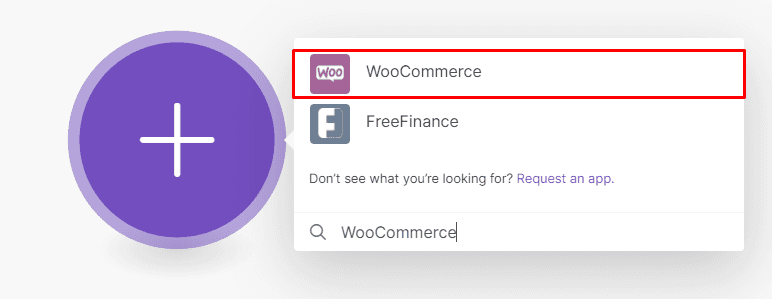
This takes you to the scenario builder, where you need to search for the WooCommerce app.
Step 2: Configuring the first WooCommerce module
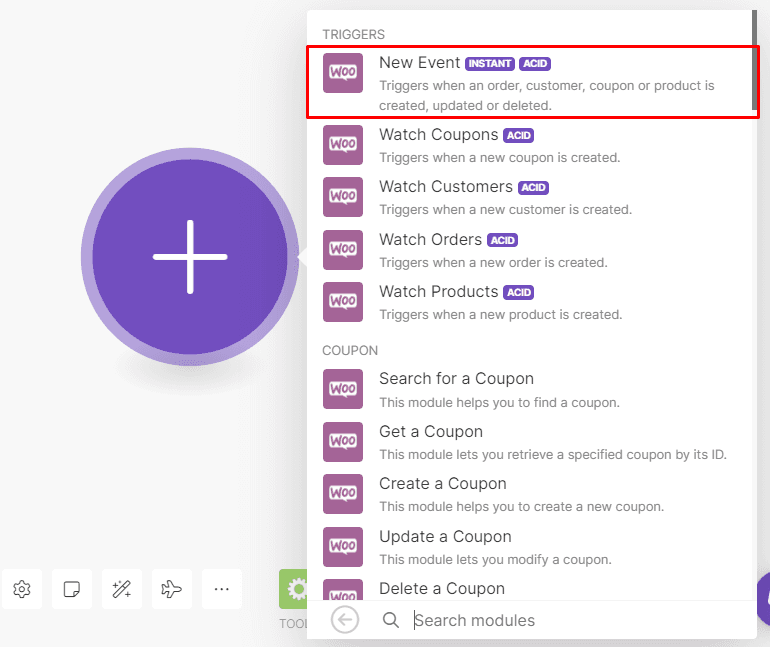
We want our Make scenario to receive new customer orders instantly, so select the New Event module, which uses a webhook to achieve this.
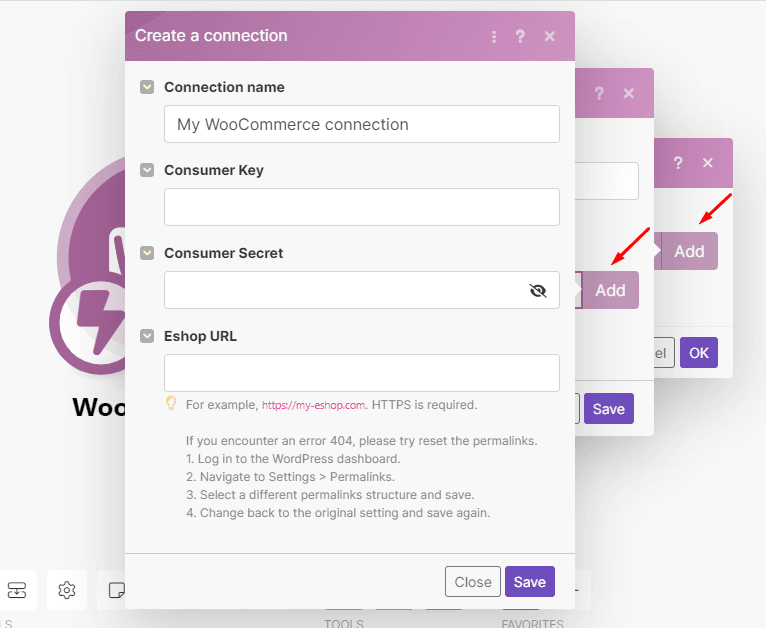
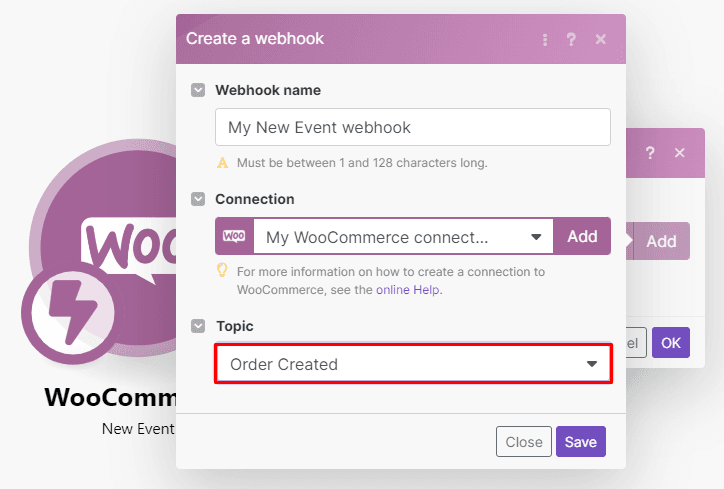
The first step to configuring this module is connecting your WooCommerce account to Make. To do this, click on the Add button and enter the details as required.
You can give your webhook a name if you want to - this is good practice, but not mandatory.
However, the important thing is to select Order Created as the topic, since this is the data the webhook will receive. Once ready, click Save.
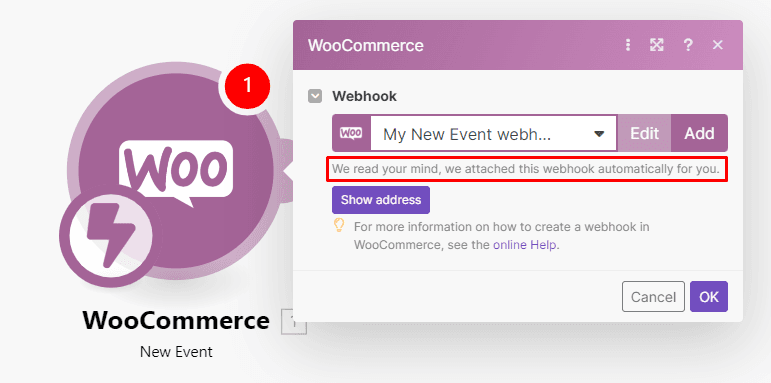
You don’t need to do anything else with the webhook since Make automatically attaches the webhook for you in WooCommerce. To proceed, just click OK.
Step 3: Configuring the second WooCommerce module
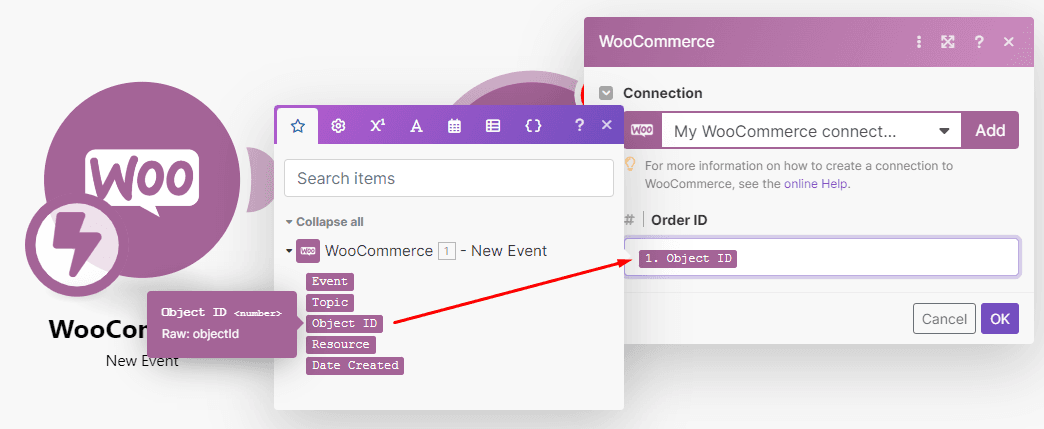
When the data (i.e. a new order placed by a customer) is received by the webhook, it brings in the Object ID, which you need to use to get all the details of the order.
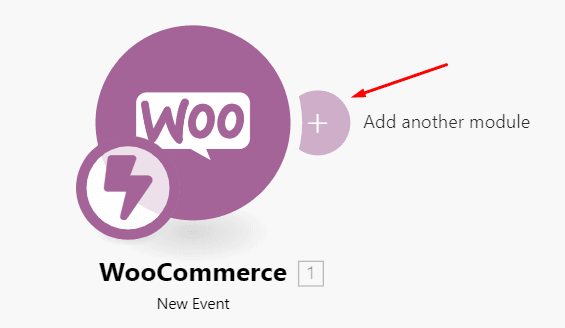
To get this information, we’ll use another WooCommerce module - click on the plus sign next to your first WooCommerce module to add it.
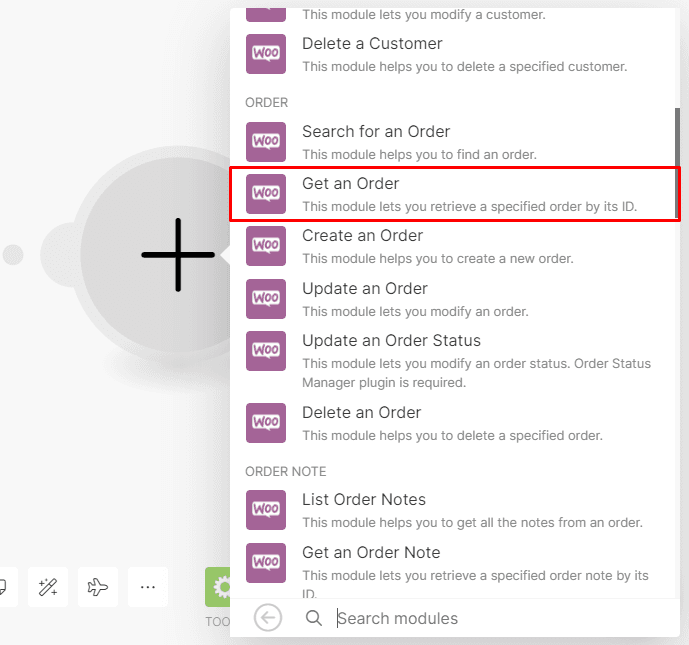
Once you do this, search for the Get an Order WooCommerce module, which will retrieve order details for you every time a new order is placed.
Make automatically selects the WooCommerce account you just connected, so all you have to do to configure the module is map the Object ID element to the Order ID field.
Once ready, click OK.
Step 4: Adding an Iterator to handle multiple items
Many orders will contain multiple items (hopefully!) that need to be separated so that they can be added to the database base individually.
Make has a native tool called Iterator that will separate the items from you.
In your scenario, head over to the Tools menu (located at the bottom of the scenario builder), open it, and select the Iterator.
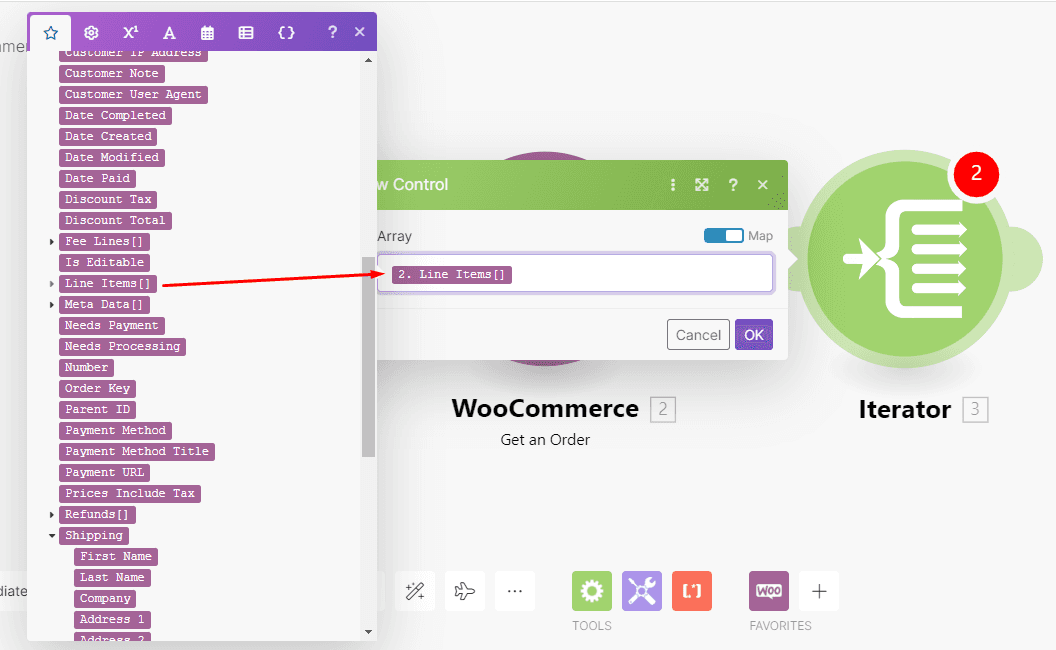
Attach the Iterator to the right side of the Get an Order module (just drag it), and then map the Line Items [] element to the Array field.
And that’s all you need to do here. Once ready, click OK.
Step 5: Adding the database module
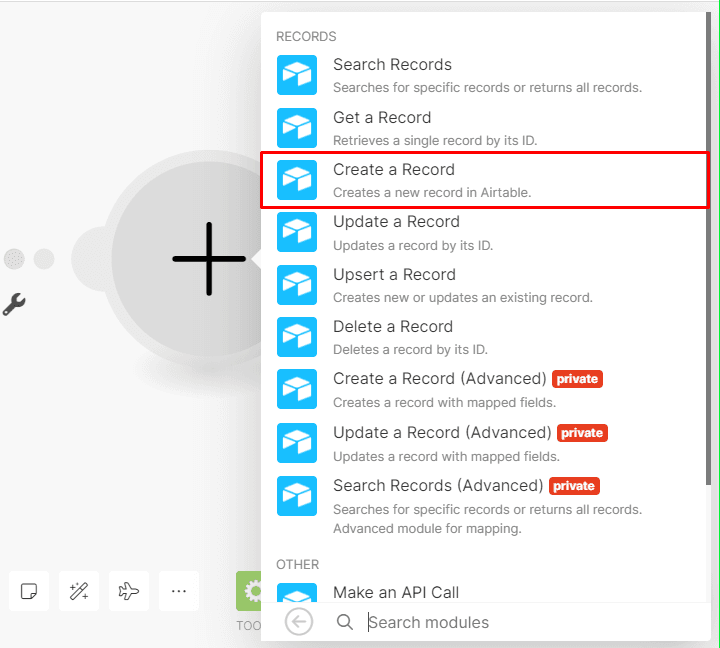
The last step is to add the database module; in our case, this will be the Airtable > Create a record module, which will allow you to automatically add new information to the database.
Before you configure the module, make sure that your database is ready. The Airtable database we’re using has the following columns in it:
Name
Item
Email
Product ID
Price
Quantity
Your database will probably have different columns (or not), but ensure that a column for email is present since that is the data point we’ll use to group by.
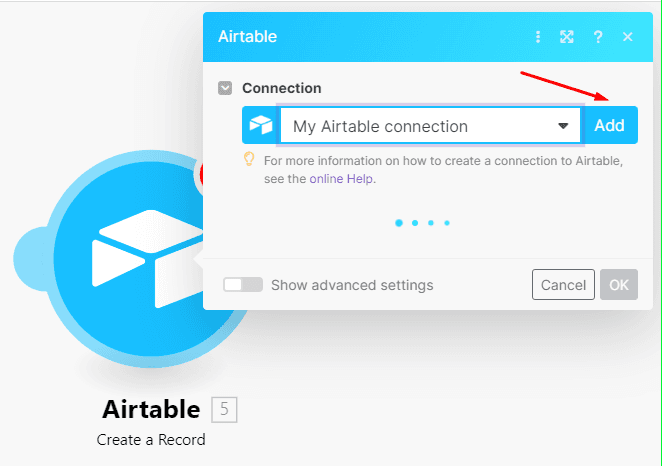
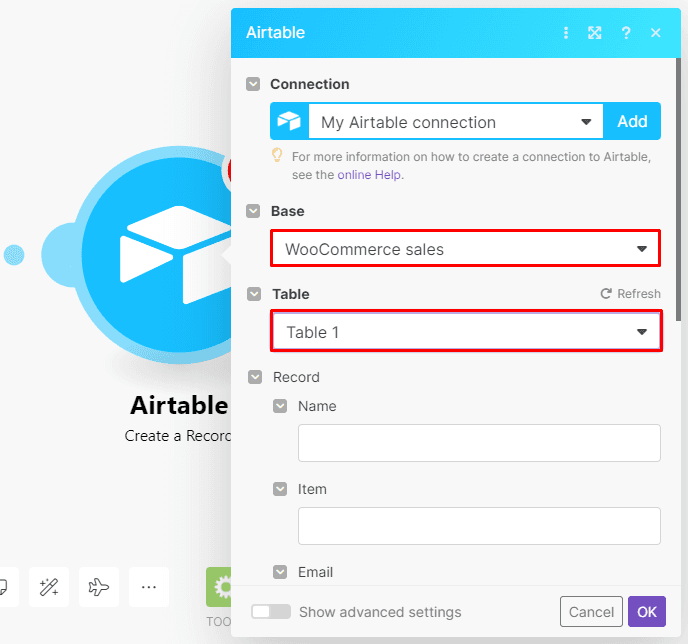
To configure this module, start by connecting your Airtable account to Make.
Simply click on Add, and follow the prompts.
After connecting your Airtable account, the Base field will appear in the module’s configuration box.
Select the Base and Table you want to add the information to.
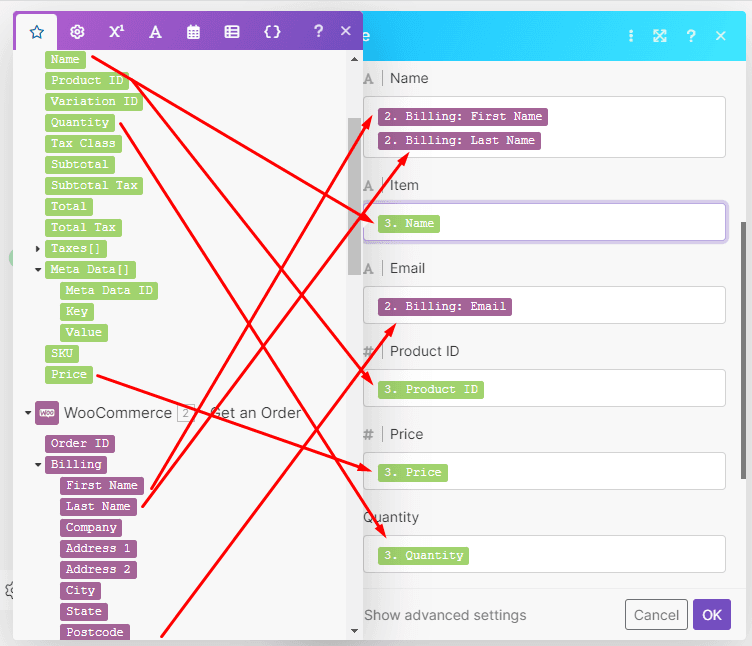
Next, map the Name and Email data elements from the Get an Order WooCommerce module, and the other elements from the Iterator.
Here’s how to do it:
Once done, click OK.
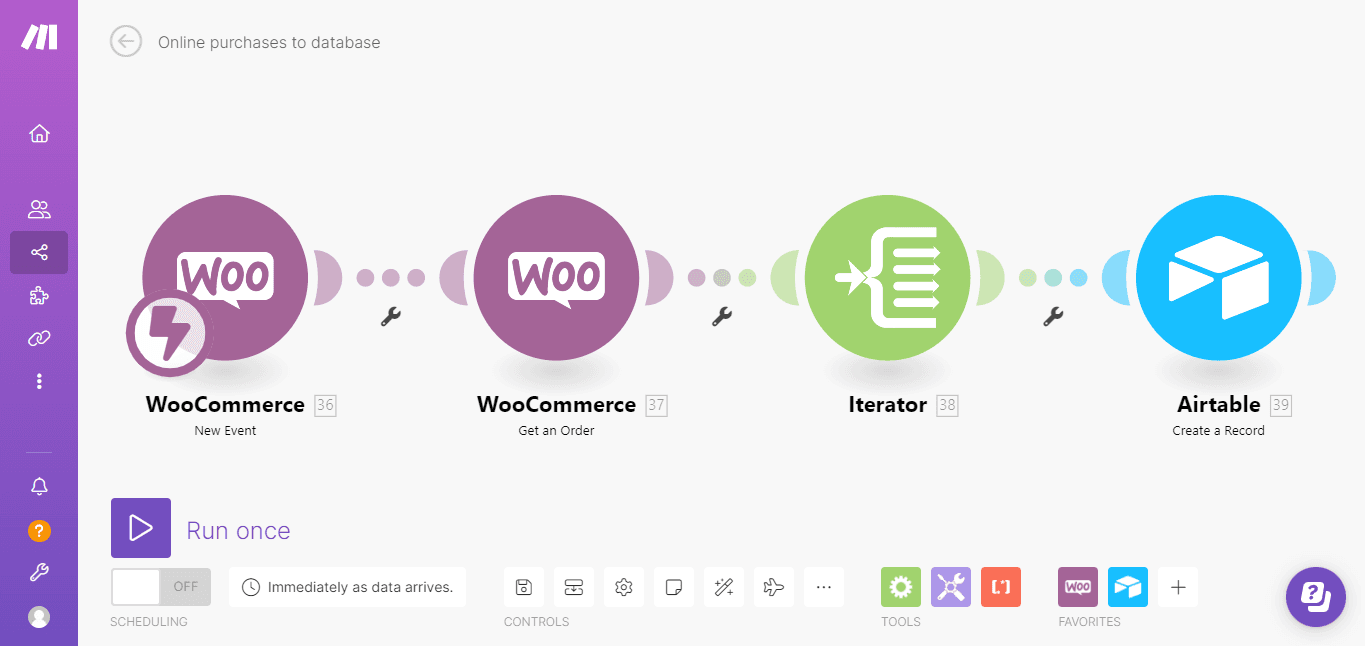
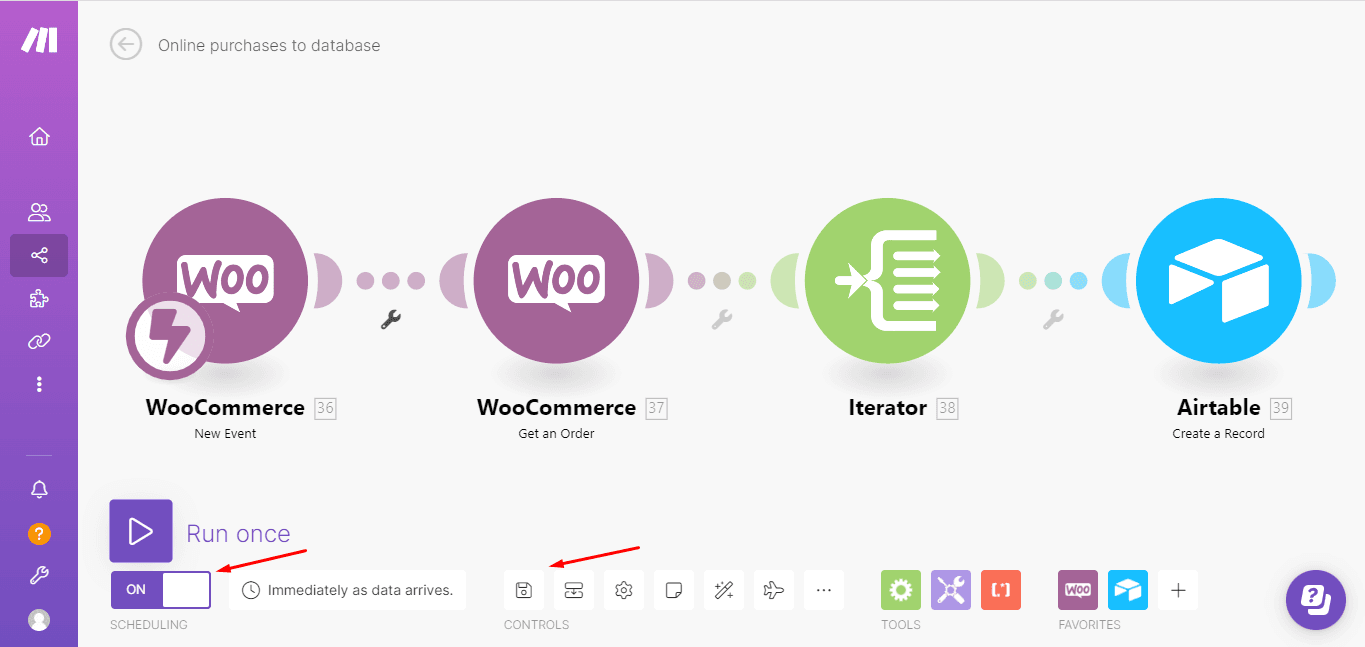
The fully configured scenario should look like this:
Showtime: See how the scenario works, plus a couple of final notes
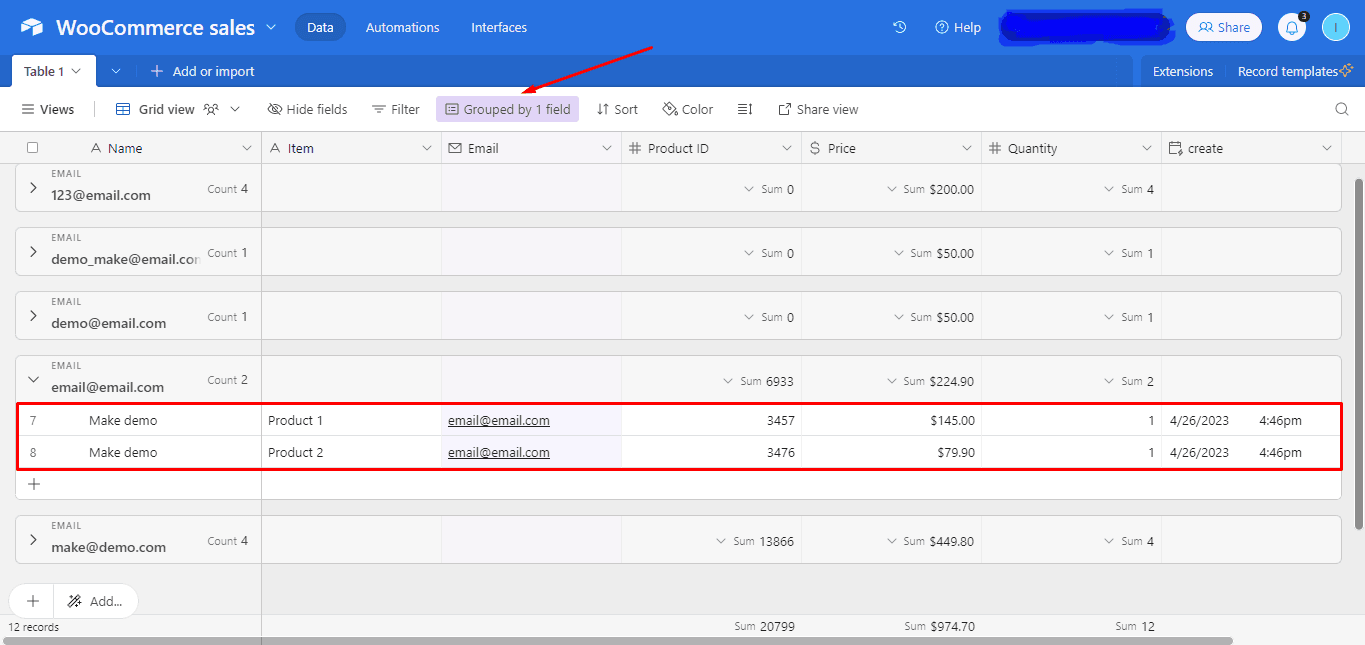
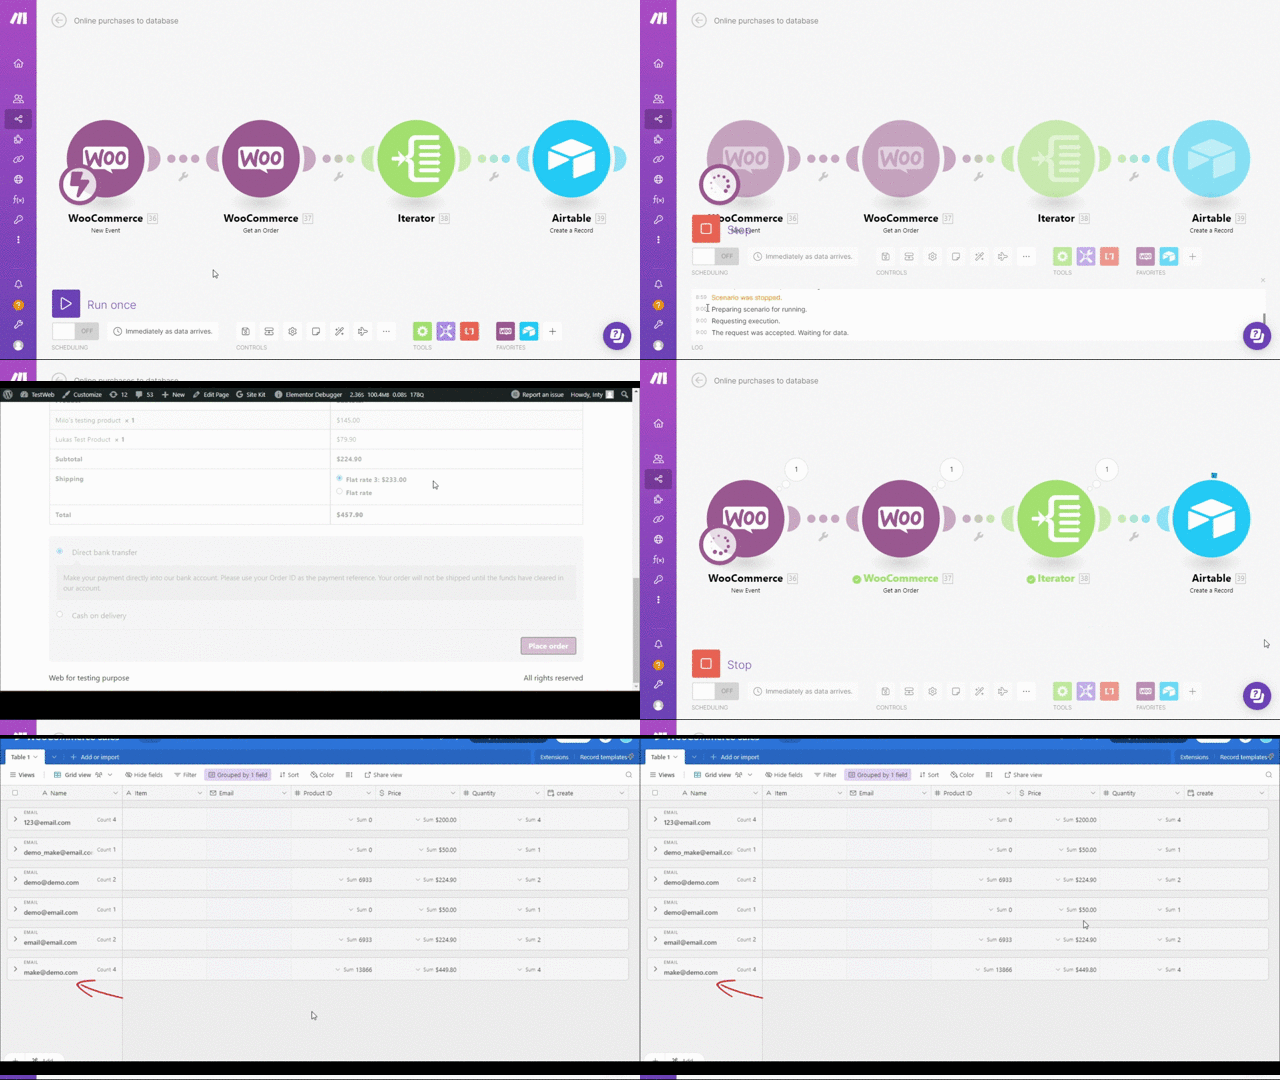
Here are a few entries on our database.
You’ll notice that the entries are grouped by email addresses.
You can use the search function on the top right to search for names as well!
In Make, you can see scenarios execute in real-time, and this is how ours looks like:
Once you’re happy with the outcome, remember to the scenario by hitting the Save button at the bottom of the builder, and then switch the scenario on.
And that’s pretty much it!
Now, every time a customer places an order with your business, the details of the order will be automatically exported and stored in your database.
Ready to bring this to life? Get your Make account, and you’ll have this ready in less than an hour!
Ready to make the automation revolution happen?


