Aug 31, 2021 | 5 minutes
How to Create Your First Revolut Business Automation [Tutorial]
Learn how to easily save Revolut draft payments to a Google Sheets spreadsheet for friction-free record-keeping.

We know how much you love Revolut Business and the digital banking services the “fintech super star” provides. It’s easy to see why: Convenience and ease of use are synonymous with Revolut Business.
Given its popularity and potential, it was only a matter of time before Revolut Business met the most powerful workflow automation tool on the market.
In this use case, we will show you how to enhance the Revolut Business experience by creating an integration with Google Sheets using Make.
Read on!
Automating Revolut Business workflows with Make
Improving a business often translates into improving the processes that keep the wheels spinning. To achieve this in a fast, easy manner, nothing trumps workflow automation, as it leads to:
Time savings
Less errors
Better communication and collaboration
In this article, we’re going to show you how to create your first Make scenario (aka an automated workflow) to improve a simple process involving Revolut Business: Saving draft payments to a Google Sheets spreadsheet for record-keeping purposes.
But before you continue, we are pleased to announce that every Make user is eligible to get two months of the Revolut Grow Plan (worth £25/mo) for free. To access the benefit, all you have to do is sign up using this link.
Back to the above mentioned automation. This is a straightforward task that consumes time when done manually, so we are going to automate it. Plus, it’s a great way to get started with Make, as the automation is simple enough to develop in one quick sitting.
Note: You will need an Make account to create the integration. If you don’t have one yet, please register for free.
Note 2: You will see the word “scenario” thrown around a lot. This is a synonym for “automated workflow”. For more information about basic Make terms, please refer to this page.
Connecting Revolut Business with Google Sheets
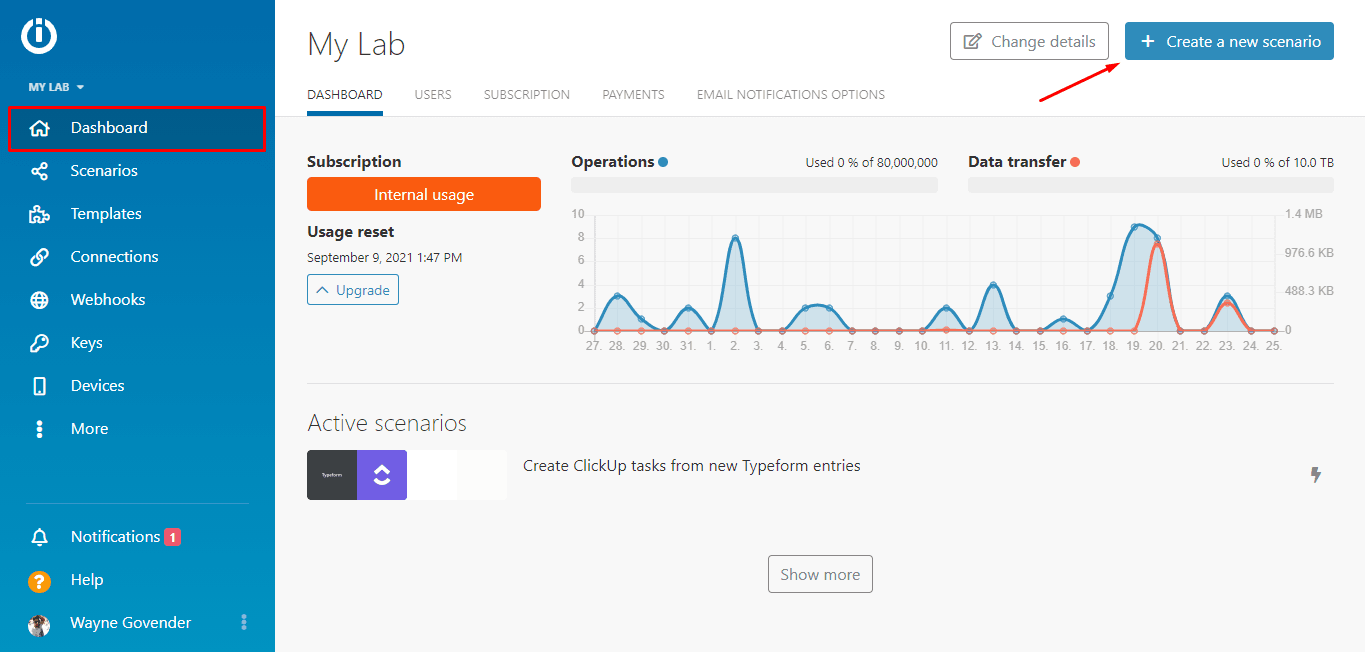
Once you have created an Make account, you’ll be redirected to your dashboard. This is the starting point to creating scenarios, which is what we will do right now.
1. Creating the scenario
The first step to create the scenario is clicking the button on the top right corner of your dashboard.
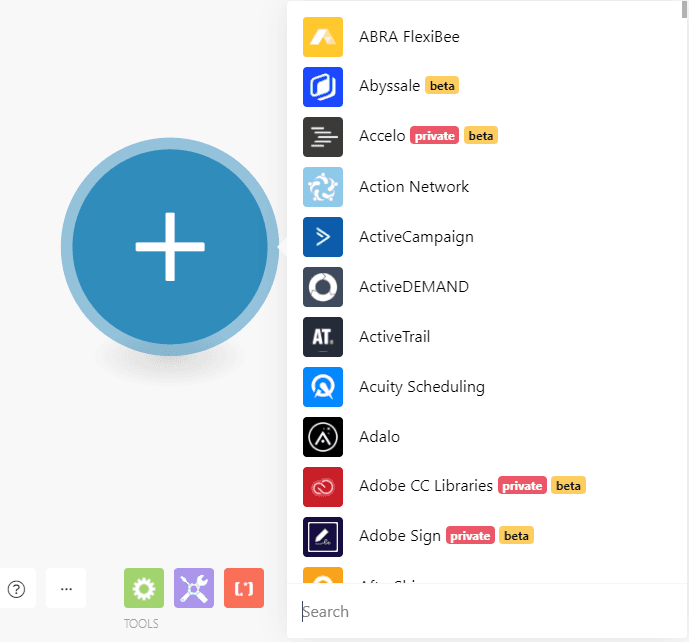
You’ll be taken to the visual scenario builder, which is where the magic happens.
On your screen, just click on the circle and the list of all the available apps on Make will appear.
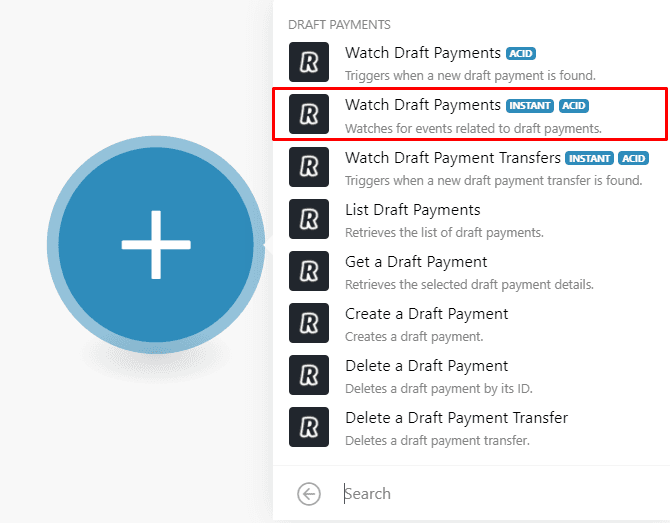
Search for the Revolut Business app and you’ll see the various actions that you can perform with draft payments in Revolut Business.
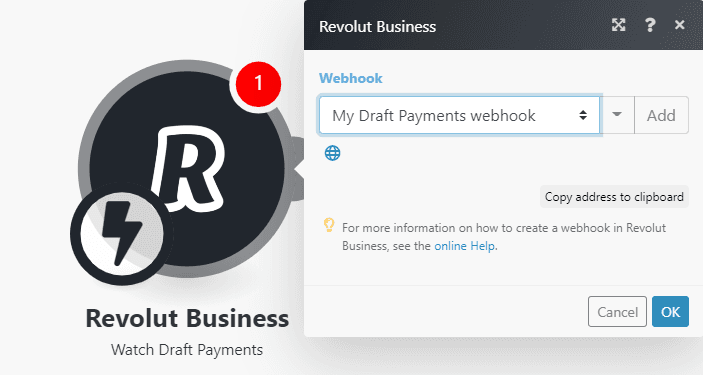
Since you want to automatically send draft payments to a spreadsheet, choose the “Watch Draft Payments” instant module to trigger the scenario.
This module will instantly receive the IDs of the new draft payments as they are created in Revolut Business. These IDs will be used in the second module to get all the info of the payments.
2. Configuring the “Watch Draft Payments” module
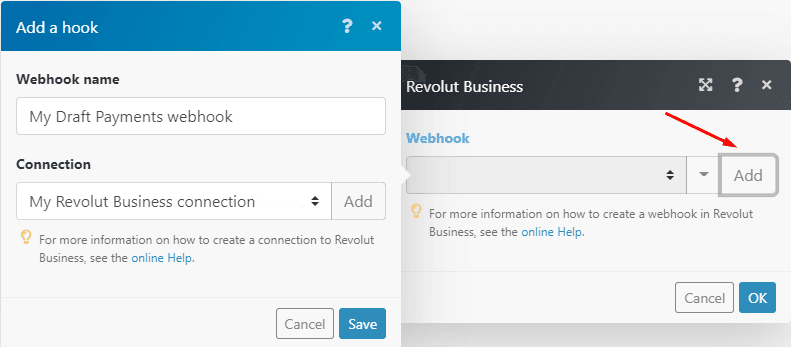
At this point, you will have to connect your Revolut Business account to Make and create a webhook which will be used to instantly receive the payment IDs.
To do it, simply click the “Add” button, log into your account, and approve the Make connection.
After you do that, click “Save” and then “OK” and the module will be configured.
So far, so good. Let’s keep going.
3. Adding and configuring the “Get a draft payment” module
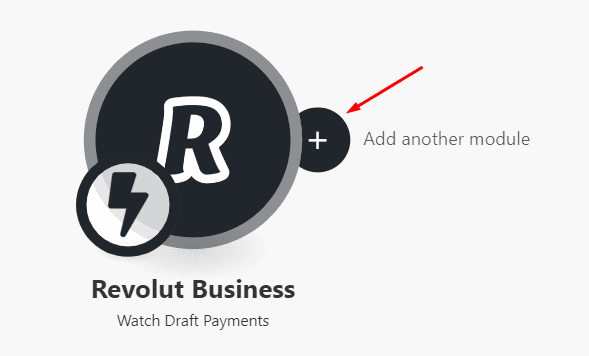
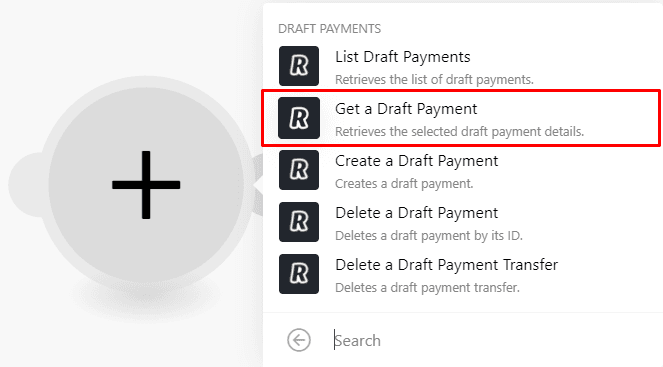
The next step is to add the second Revolut Business module - “Get a draft payment” that will retrieve the details of the payments using the IDs retrieved in the first module. To do this, hover over the module and click the “Add another module” button on the side of it.
Select the module.
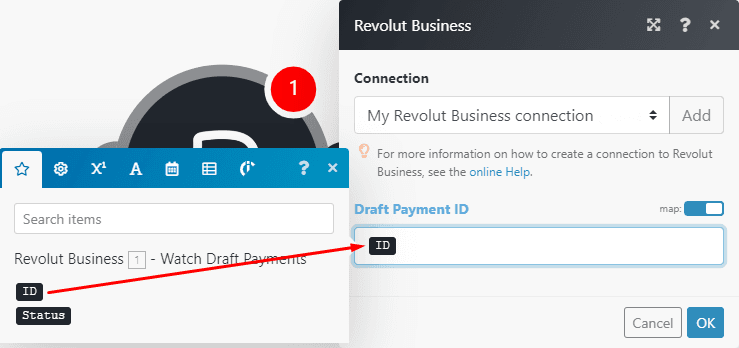
There’s only one thing to do here, simply map (drag and drop) the ID data element from the previous module to the Draft Payment ID field and hit OK.
Now let's add the last module to the scenario.
4. Adding and configuring the “Add a Row” Google Sheets module
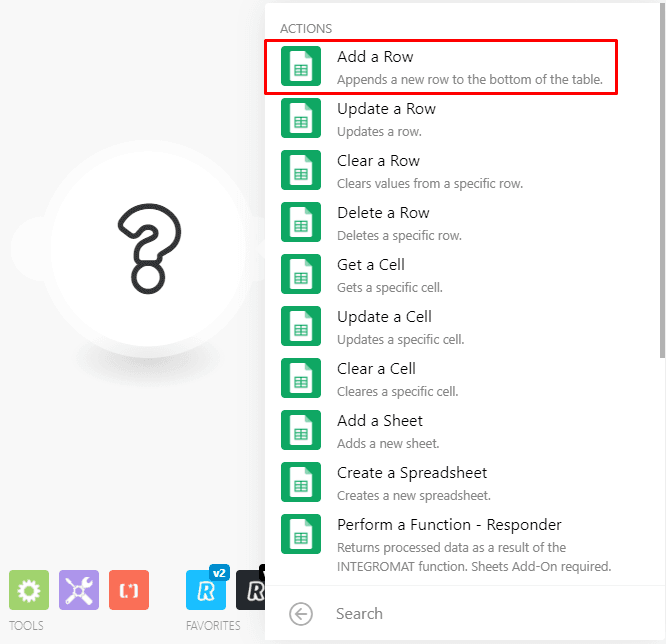
Again, click the “Add another module” button on the second module, search for the Google Sheets app and since the goal is to add the draft payments to a sheet, select the “Add a row’’ module.
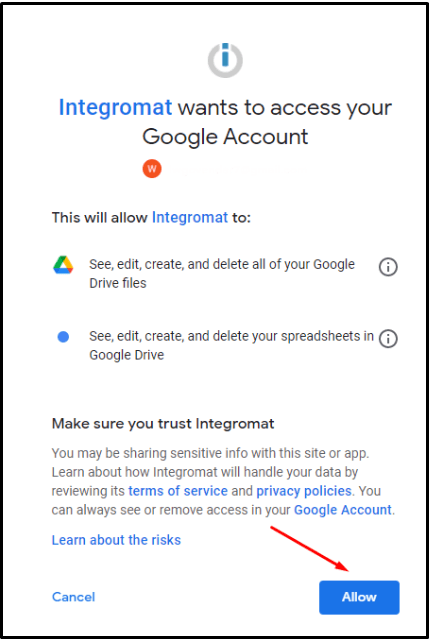
As with the Revolut Business app, you will need to connect your Google account to Make. To do so, follow the same process as before and allow Make access to your account.
Now it’s time to configure the Google Sheets module. Before we proceed, please note that you will need to create a Google Sheets spreadsheet with the following columns:
ID
Status
Amount
Currency
Reference
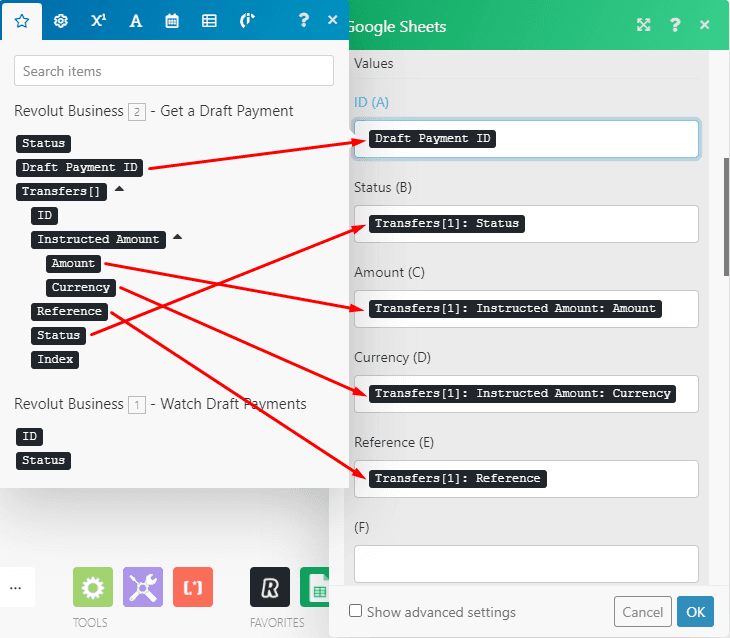
As you can guess, these columns match the data elements that Make will send from the Revolut Business app to the Google Sheets spreadsheet.
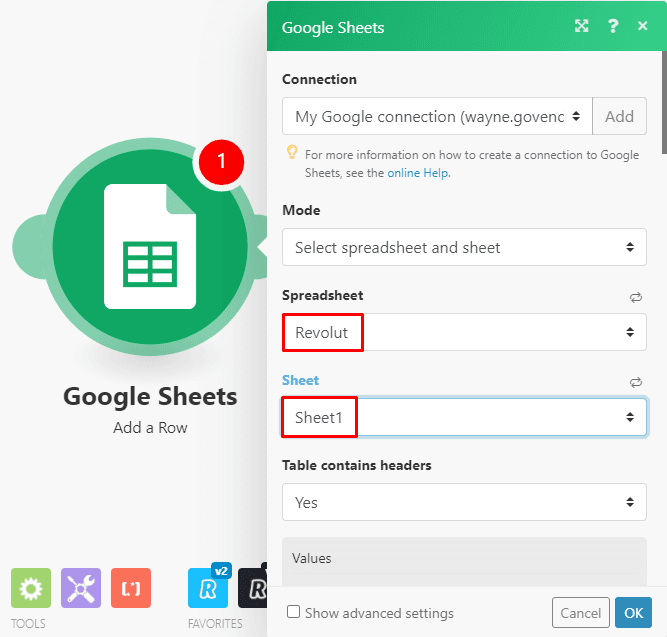
Back to the Google Sheets module. Now that you have created the spreadsheet, go to the module and select the spreadsheet and sheet you will be adding data to.
Now comes the important part.
You will need to map the data elements from the Revolut Business module to the respective fields in your spreadsheet and hit OK.
And just like that, you have configured the Google Sheets module.
Only one step is missing before you can switch the scenario on and fully automate the task of copying draft payments to a spreadsheet.
5. Testing the scenario
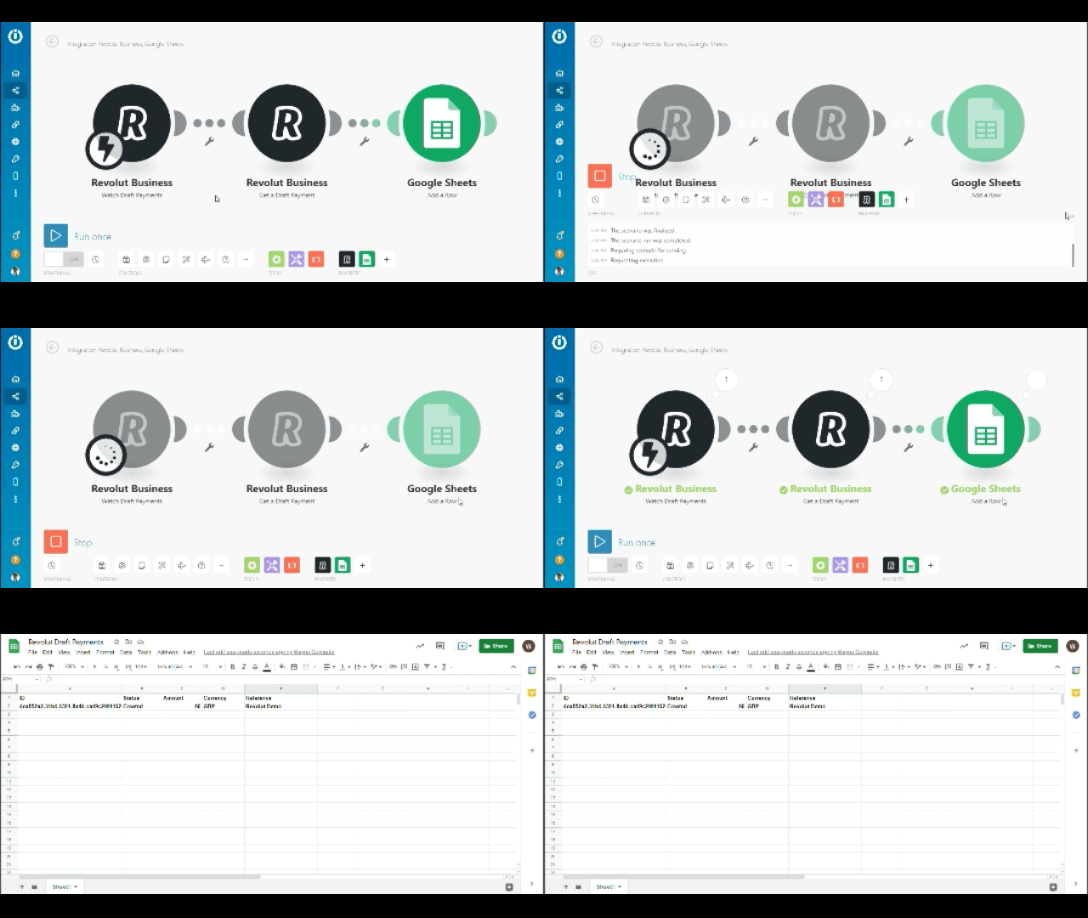
To check whether the automation works or not, hit the Run once button at the bottom left of your screen then head over to Revolut Business and create a draft payment. [a](not shown in the gif below).
If the execution is successful, you’ll see the number “1” appear above the modules, inside a little bubble.
What this bubble tells you is that the draft payment was retrieved, and a row of data was added to the Google Sheet.
Congratulations! You have just successfully created a scenario on Make.
Now you need to save the scenario (by hitting the “Save” icon at the bottom of the visual builder), and then turn the scenario on (by toggling the switch below the ‘Run once’ button).
Conclusion
This quick tutorial is a demonstration of how easy it is to automate a time-consuming task like tracking and backing up your draft payments.
Once you get comfortable with Make, you will notice that bigger, more powerful automations are easily attainable.
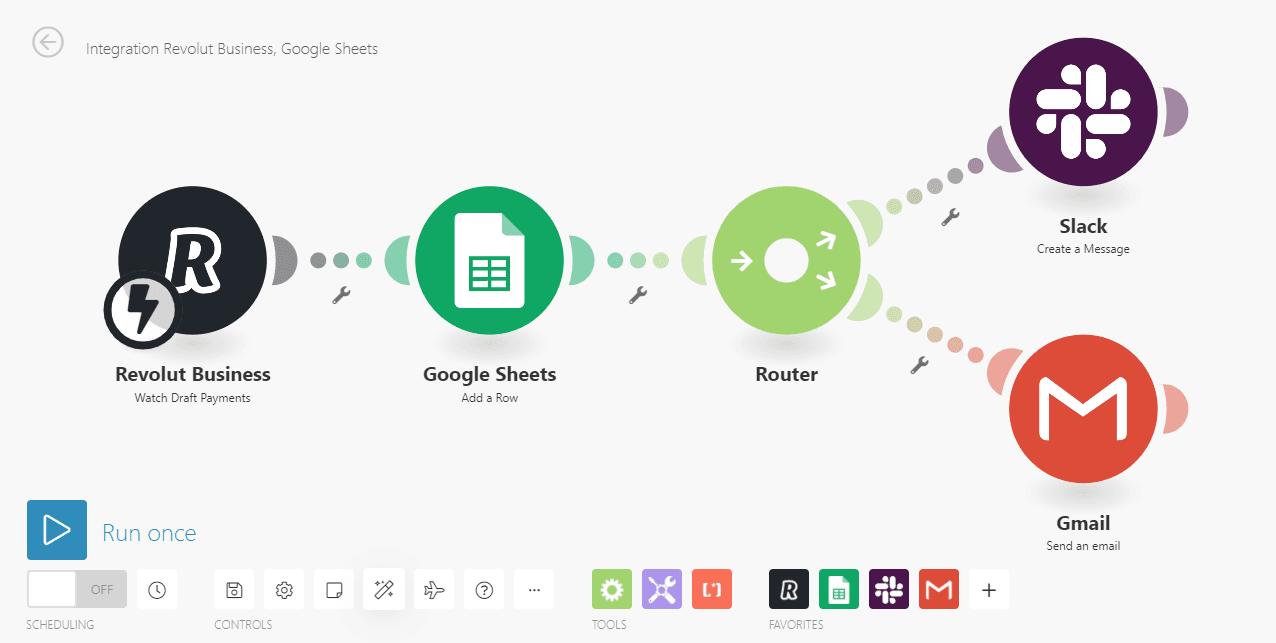
For instance, say that you want to send an email and a notification to someone on Slack as soon as new data is added to the sheet.
To achieve this, simply add these two apps to your scenario, and configure them accordingly.
Now that you know how to automate with Make, it’s a matter of deciding what’s next.
Thankfully, that’s the hardest part of it all.
Happy automating!
Ready to make the automation revolution happen?

Wayne Govender
Solutions Architect at Make who loves all things tech with a focus on workflow automation. Also enjoys fitness and spending too much time on YouTube.

