X (formerly Twitter)
Note
This is the X (formerly Twitter) app documentation using the latest API v2. If you are looking for the API v1.1 of the app documentation, refer to this link.
With the X (formerly Twitter) modules in Make, you can manage posts, direct messages, likes, member lists, followers, and users in your X account.
To use the X (formerly Twitter) modules, you must have an X Developer account. You can create an account at developer.twitter.com.
Refer to the X (Twitter) API documentation for the list of available endpoints.
Caution
Module limits are set by your X subscription package. Refer to the API v2 page of your developer portal or X access levels for more information regarding limits.
Connect X (formerly Twitter) to Make
To establish the connection, you must:
Create a custom application in X (formerly Twitter)
To create an X (formerly Twitter) custom application and retrieve your client credentials:
Log in to the X Developer website.
Click Developer Portal in the upper-right corner of the page.
Click Sign up for a Free Account.
Describe your Make use cases, select all checkboxes, and slick Submit.
X automatically creates a Project and an App within the Project. If you already have an existing app, refer to the Adding an Existing App to the Project section.
Select your app and click Set up under User Authentication Settings.
Select the following options:
In the App Permissions section, select Read, Write, and Direct Messages.
In the Type of App section, select Web App and Automated App or Bot.
In the App Info section, enter the following details:
Callback URI/Redirect URL:
https://www.integromat.com/oauth/cb/twitter2andhttps://www.integromat.com/oauth/cb/twitterWebsite URL:
https://www.integromat.com/oauth/cb/twitter
Click Save and confirm the prompt by clicking Yes.
Copy the Client ID and Client Secret values and store them in a safe place.
You can also find the client credentials in the Keys and Tokens screen.
You will use these values in the Client ID and Client Secret fields in Make.
Note
At the time of this publication, all steps for Create a custom application in X (formerly Twitter) were checked and verified to be accurate. However this may have changed, so please see the X Developer Apps documentation for the most up-to-date directions.
Establish the connection with X (formerly Twitter) in Make
To establish the connection in Make:
Log in to your Make account, add an X (formerly Twitter) module to your scenario, and click the Add button next to the Connection field.
Optional: In the Connection name field, enter a name for the connection.
In the Client ID and Client Secret fields, enter the client credentials retrieved from your custom app.
Click Save.
If prompted, authenticate your account and confirm access.
You have successfully established the connection. You can now edit your scenario and add more X (formerly Twitter) modules. If your connection needs reauthorization at any point, follow the connection renewal steps here.
To add your existing app for connection, ensure that you remove the app from any projects that it is associated with and add the app to this project.
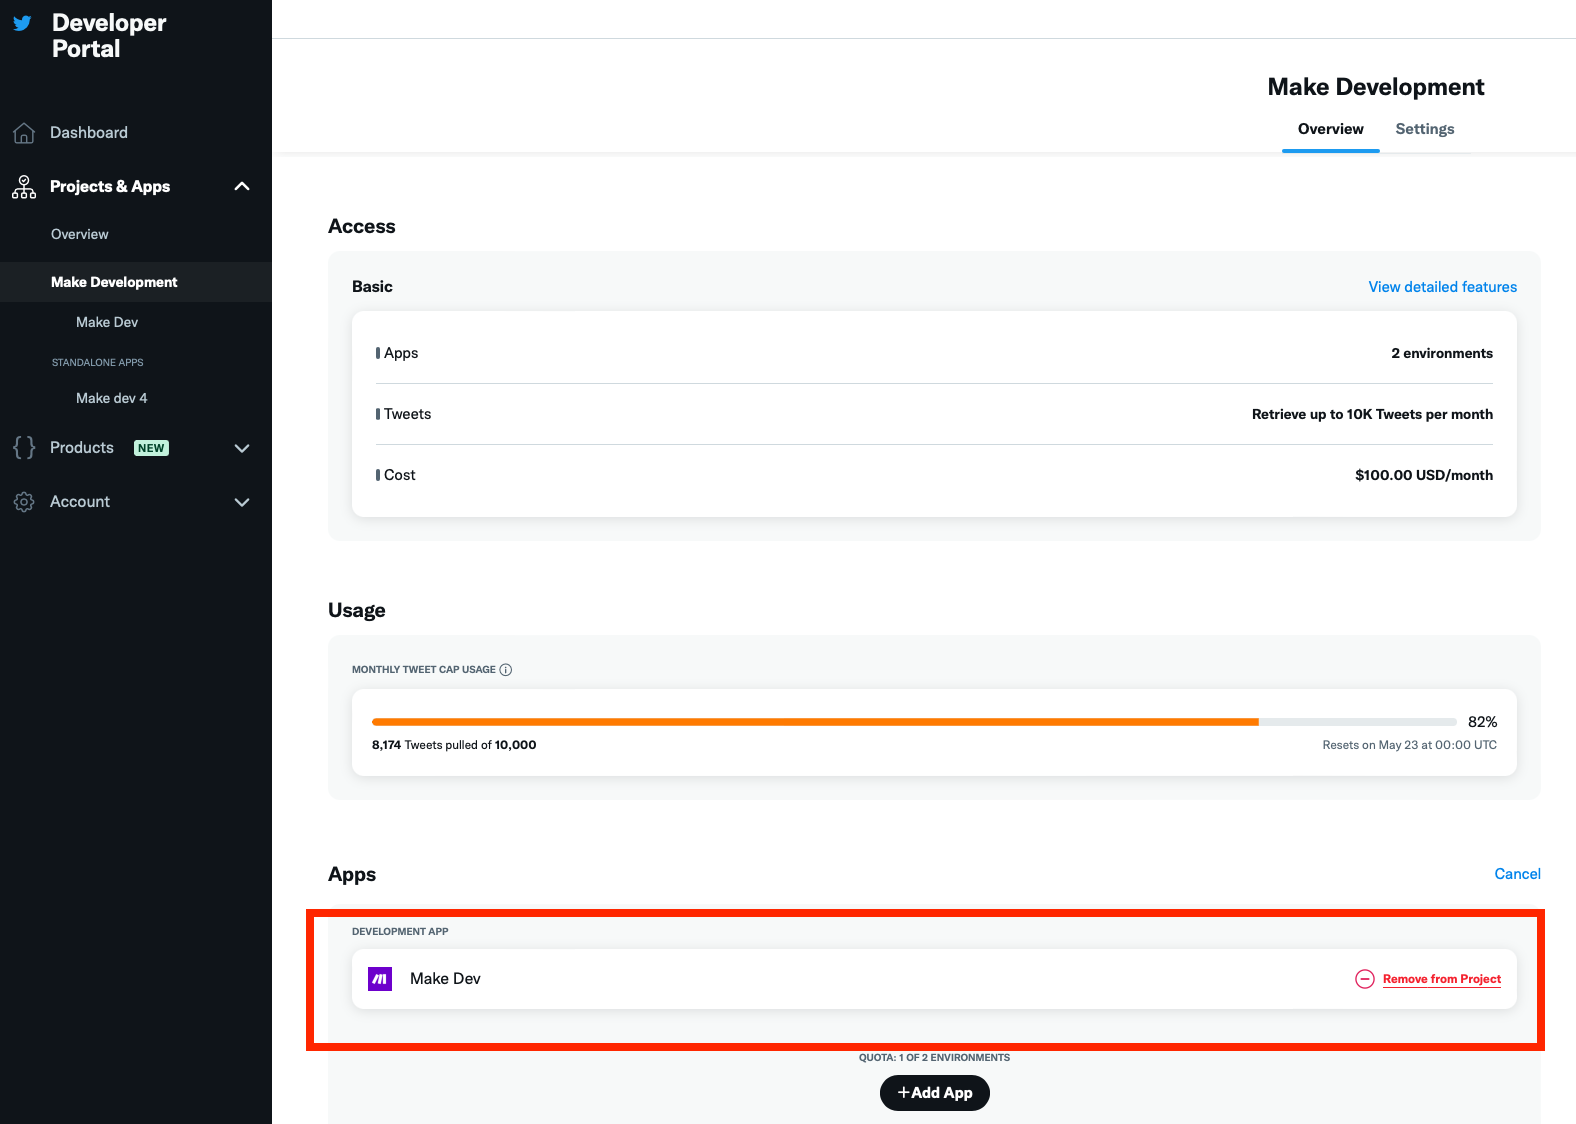
To remove the app from existing projects, go to the project dashboard and click Projects & Apps in the left sidebar.
Click on a project in the left sidebar. You will be taken to that project's Overview screen.
Under the Apps section, click Manage.

Click Remove from project for the app you want to remove.
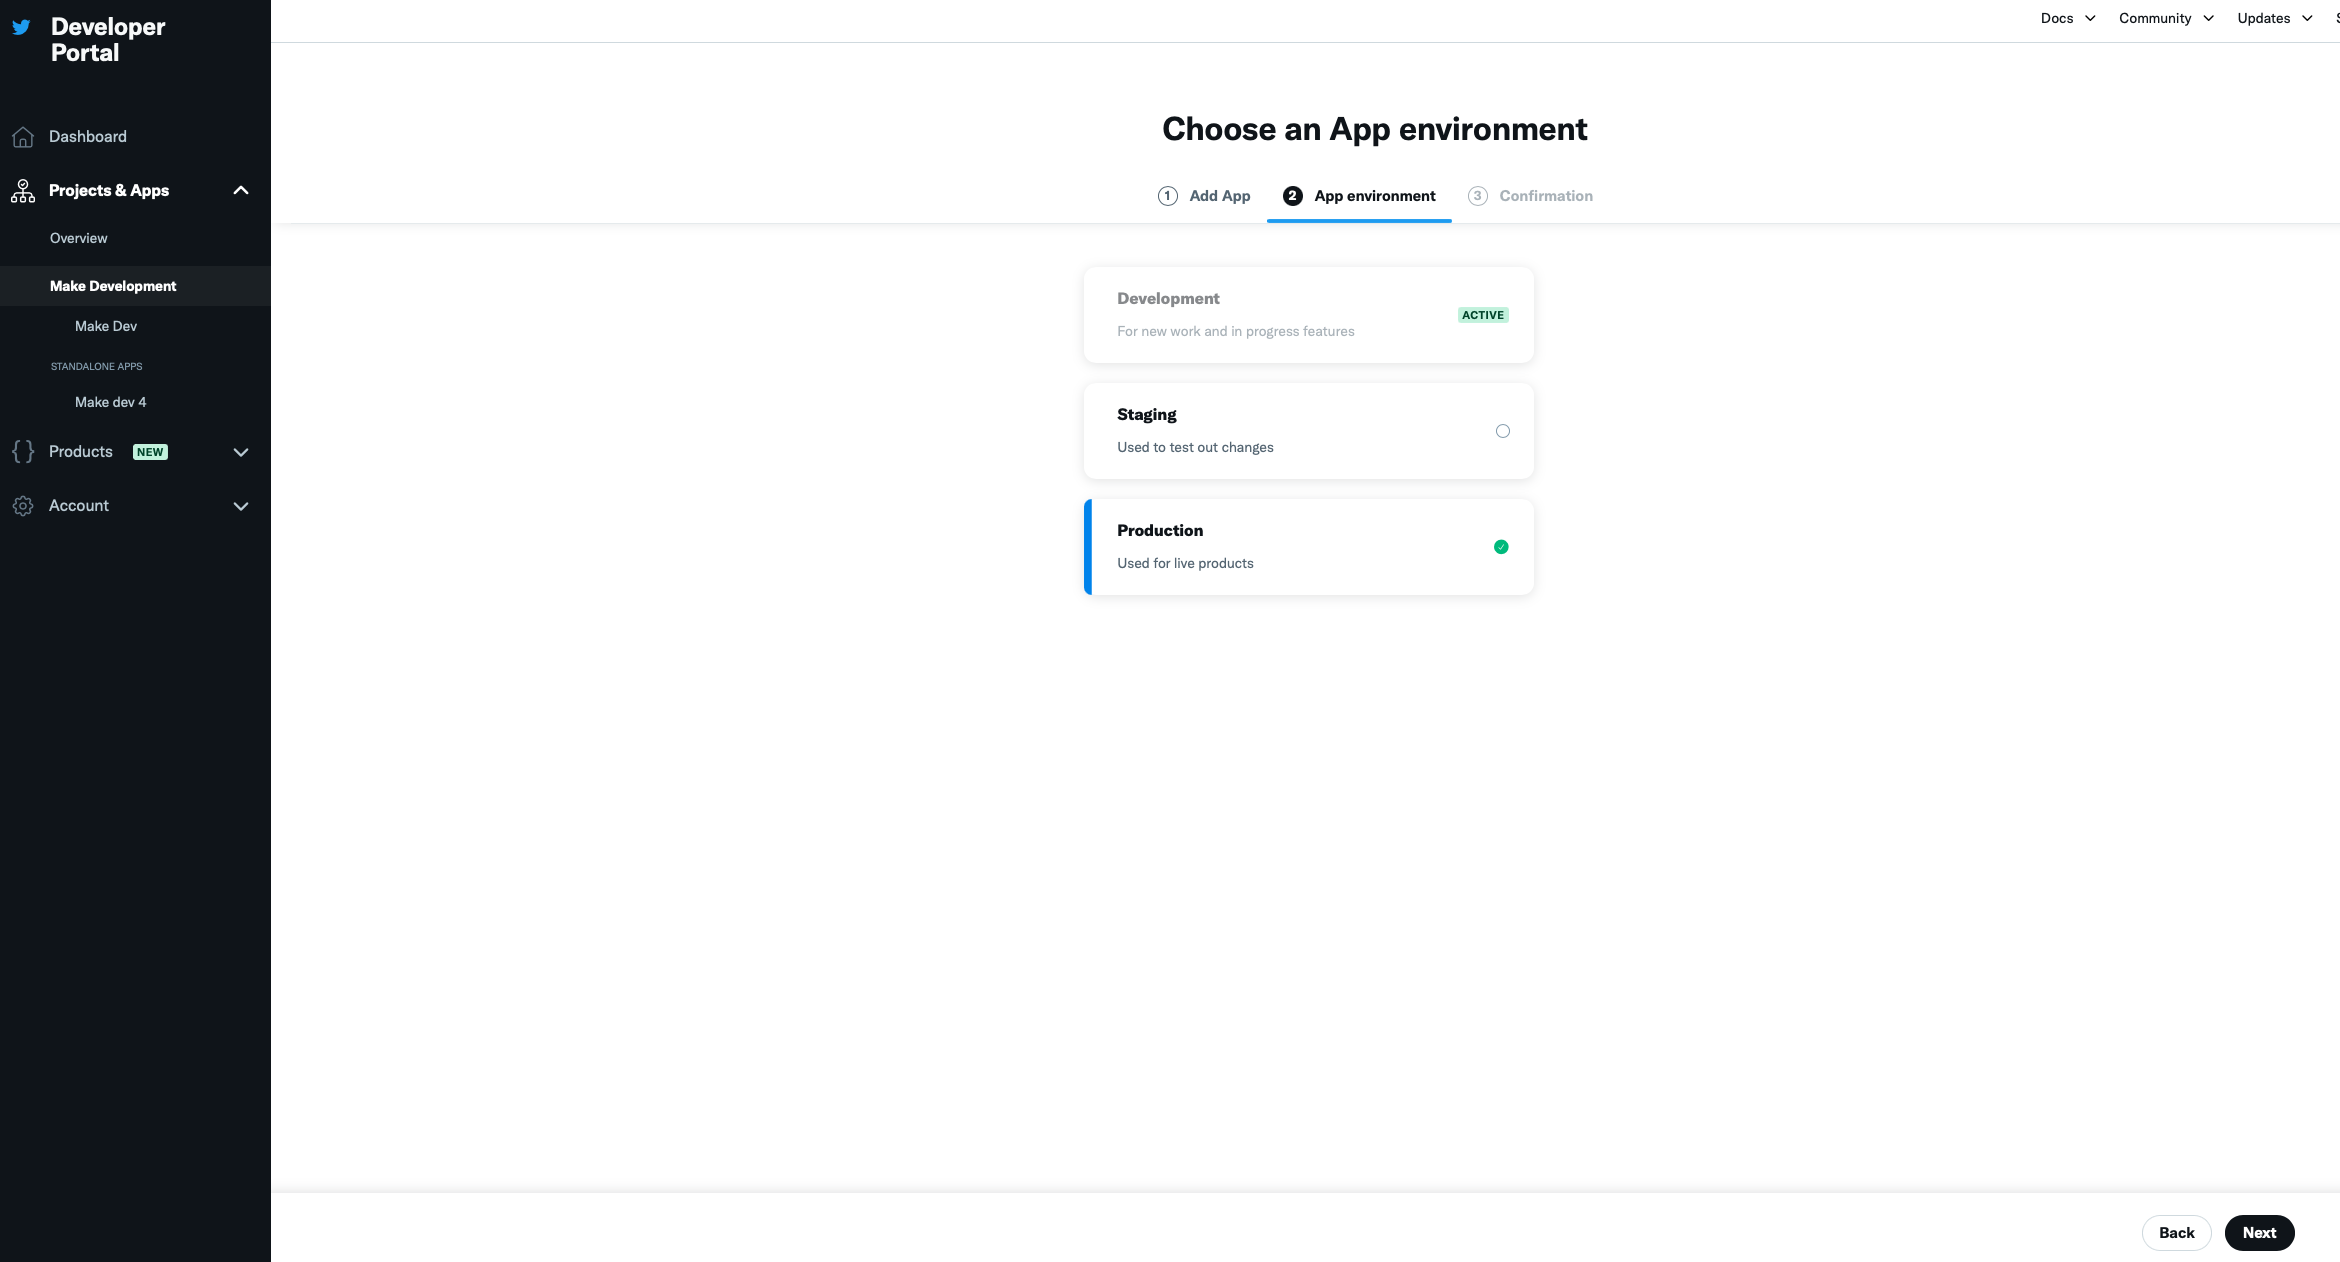
Go to the Project and select Add an existing app.
Select the app you want to add to the project in the Add your App screen.

Select the app environment and click Next.

You will see a confirmation message that the app has been successfully added to the project.
Click App Settings and configure the app as detailed in the Create a custom application in X (formerly Twitter) section.
Build X (formerly Twitter) Scenarios
After connecting the app, you can perform the following actions:
Watch Posts
Watch Posts on a List
Watch Mentions
Search Posts
List User Posts
List Reposters
List Mentions
Create a Post
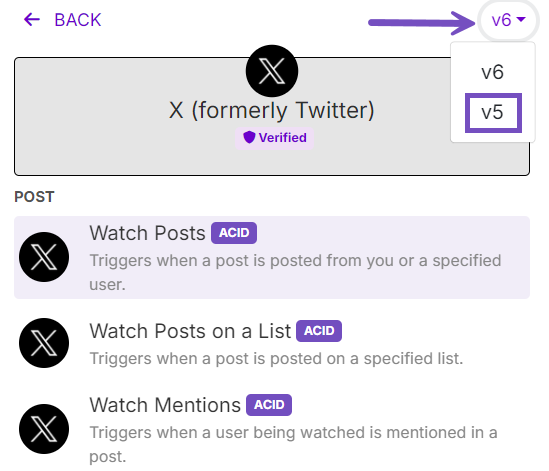
To create a post with media, you can use the Upload a Media module. To find it, in the upper right corner of the module search window, switch the app version to
v5.
Reply to a Post
Get a Post
Delete a Post
Watch Direct Messages
List Direct Messages
List Likes
Add a Member to a List
List Lists
List Followers
Get a User