SupportBee
With SupportBee modules in Make, you can:
watch, search, fetch, create, retrieve, trash, untrash, and delete tickets
watch new agents and customer replies
watch new comments
To get started with SupportBee, create an account at supportbee.com.
Connect SupportBee to Make
To connect SupportBee app, you need to obtain the Domain and API Key values from your SupportBee account and insert them into the SupportBee module scenario.
Log in to your SupportBee account.
Click Profile > API Token. Copy the API Token to a safe place.

Log in to your Make account, insert a SupportBee module scenario and click the Add button next to the Connection field.
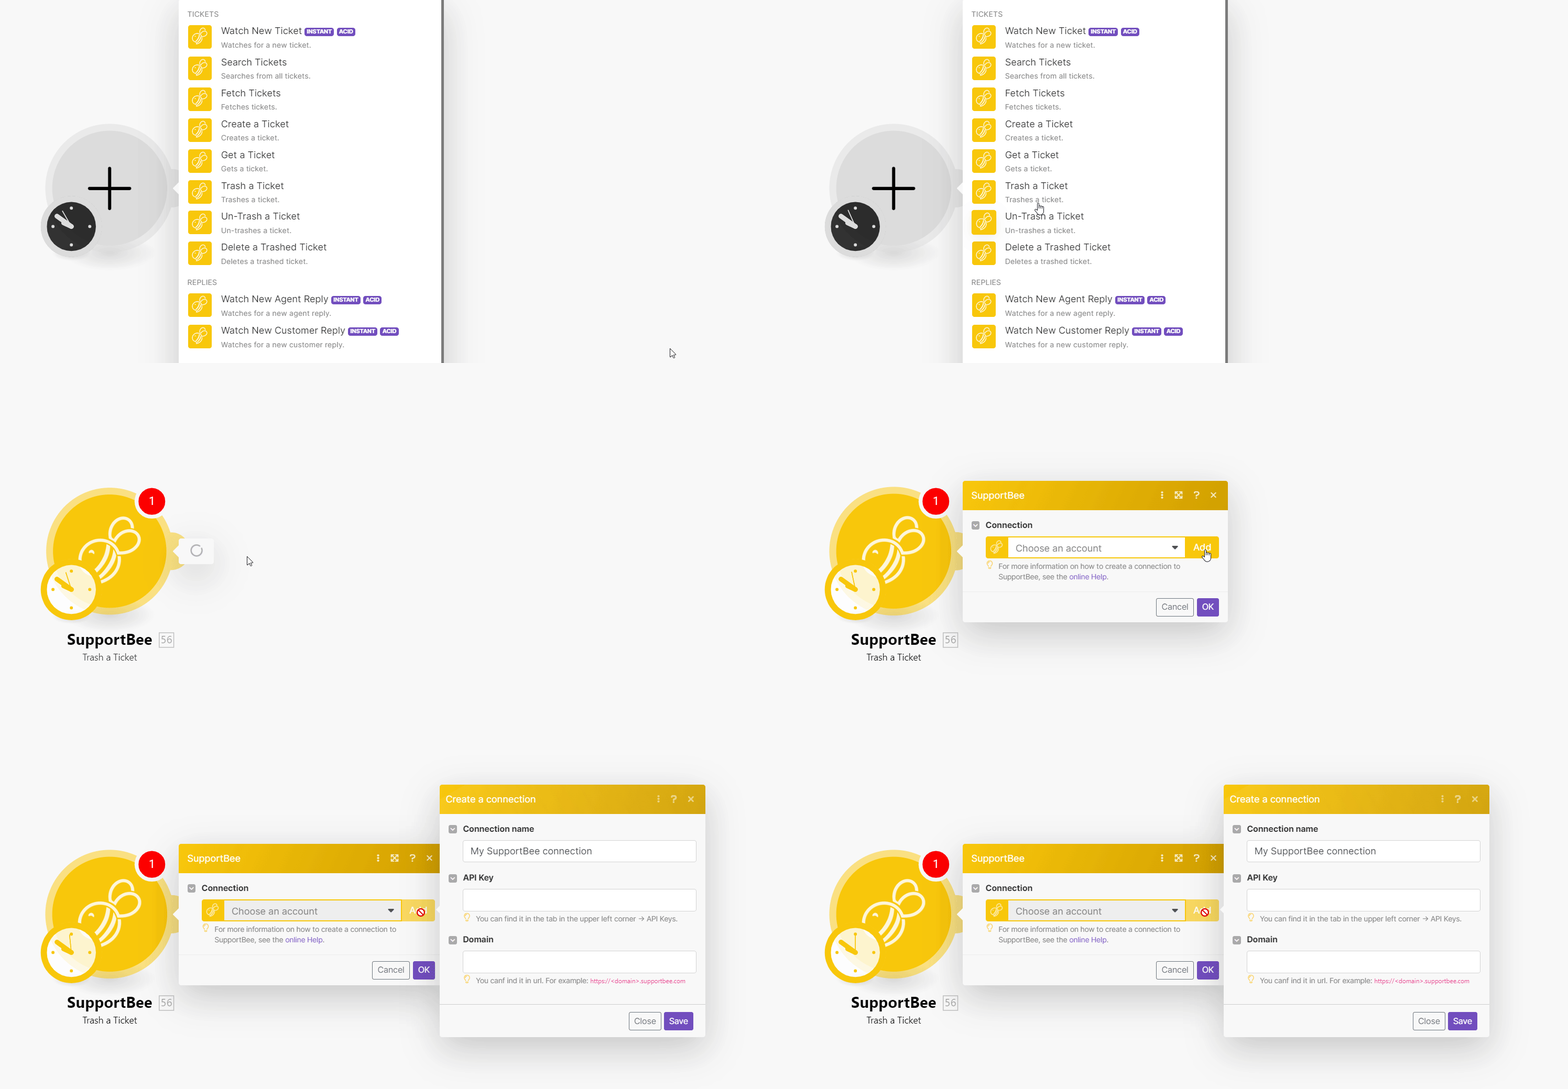
In the Connection name field, enter a name for the connection.
In the Domain field, enter your account domain. For example, if your account URL address is
https://www.xyz.supportbee.com, then your domain isxyz.In the API Key field, enter the details copied in step 2 and click Save.
You have successfully established the connection. You can now begin editing your scenario and adding more SupportBee modules. If your connection needs reauthorization at any point, follow the connection renewal steps here.
Tickets
You can watch, search, fetch, create, retrieve, trash, untrash, and delete tickets using the following modules.
Watches for a new ticket
Webhook name | Enter a name for the webhook. |
See Setting Up Supportbee Webhooks to add webhooks in your Supportbee account.
Searches from all tickets.
Connection | |
Limit | Set the maximum number of tickets Make will return during one execution cycle. The default value is 10. |
See the SupportBee Tickets API reference for entering the field values to search for the tickets that match the specified value.
Fetches tickets.
Connection | |
Limit | Set the maximum number of tickets Make will return during one execution cycle. The default value is 10. |
For field descriptions, see the SupportBee Tickets API reference.
Creates a ticket.
For field descriptions, see the SupportBee Tickets API reference.
Gets a ticket.
Connection | |
Ticket ID | Select or map the Ticket ID whose details you want to retrieve. |
Trashes a ticket.
Connection | |
Ticket ID | Select or map the Ticket ID you want to trash. |
Un-trashes a ticket.
Connection | |
Ticket ID | Select or map the Ticket ID you want to un-trash. |
Deletes a trashed ticket.
Connection | |
Ticket ID | Select or map the trashed Ticket ID you want to delete. |
Replies
You can watch new agents and customer replies using the following modules.
See Setting Up Supportbee Webhooks to add webhooks in your Supportbee account.
Watches for a new agent's reply.
Webhook name | Enter a name for the webhook. |
Watches for a new customer reply.
Webhook name | Enter a name for the webhook. |
Comment
You can watch new comments using the following modules.
Watches for a new comment.
Webhook name | Enter a name for the webhook. |
See Setting Up Supportbee Webhooks to add webhooks in your Supportbee account.
Other
You can call APIs using the following module.
Performs an arbitrary authorized API call.
Note
For the list of available endpoints, refer to the SupportBee API documentation.
Connection | |
URL | Enter a path relative to |
Method | GET to retrieve information for an entry. POST to create a new entry. PUT to update/replace an existing entry. PATCH to make a partial entry update. DELETE to delete an entry. |
Headers | Enter the desired request headers. You don't have to add authorization headers; we already did that for you. |
Query String | Enter the request query string. |
Body | Enter the body content for your API call. |
Example of use - Fetch Tickets
The following API call fetches tickets from your account.
URL: /tickets
Method: GET
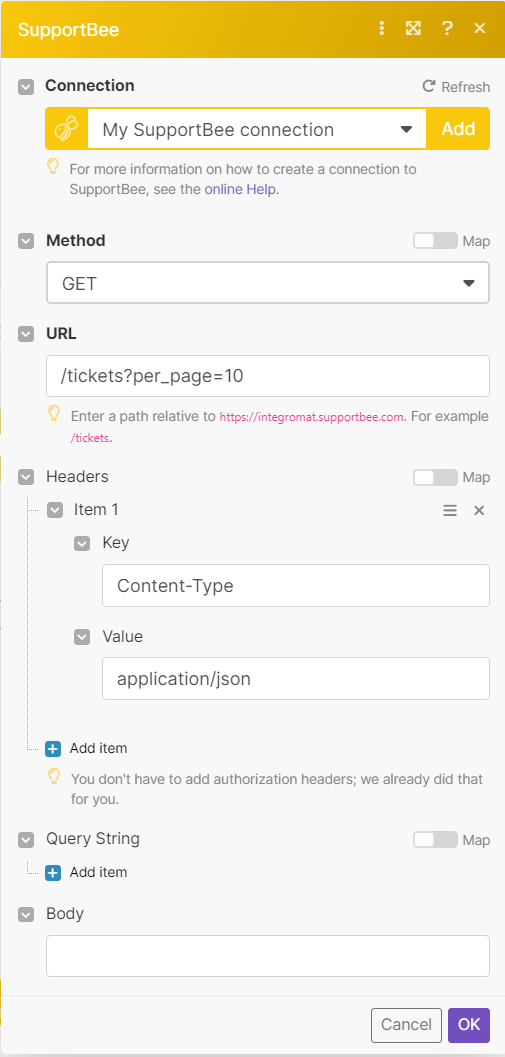
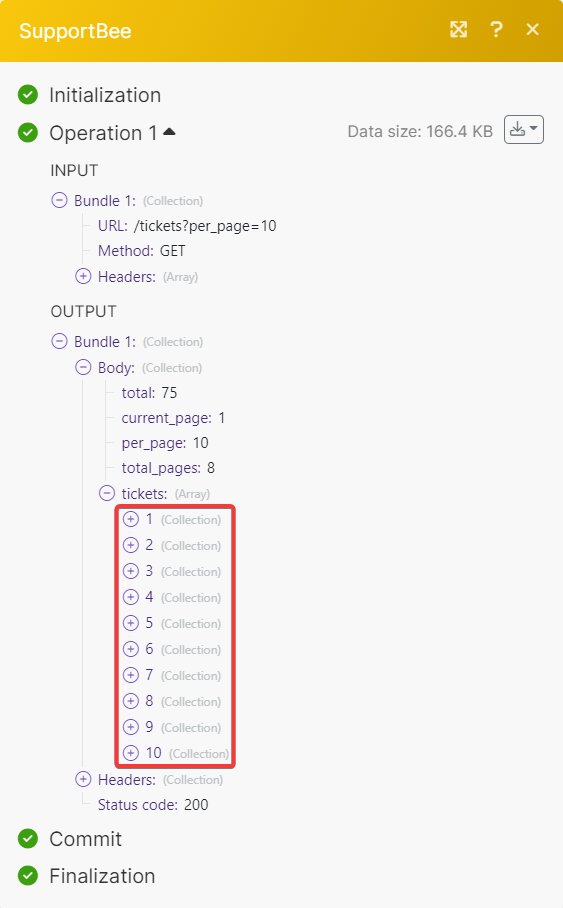
Matches of the search can be found in the module's Output under Bundle > Body > tickets.
In our example 10 tickets were returned:
Setting Up Supportbee Webhooks
To set up the supportbee webhooks:
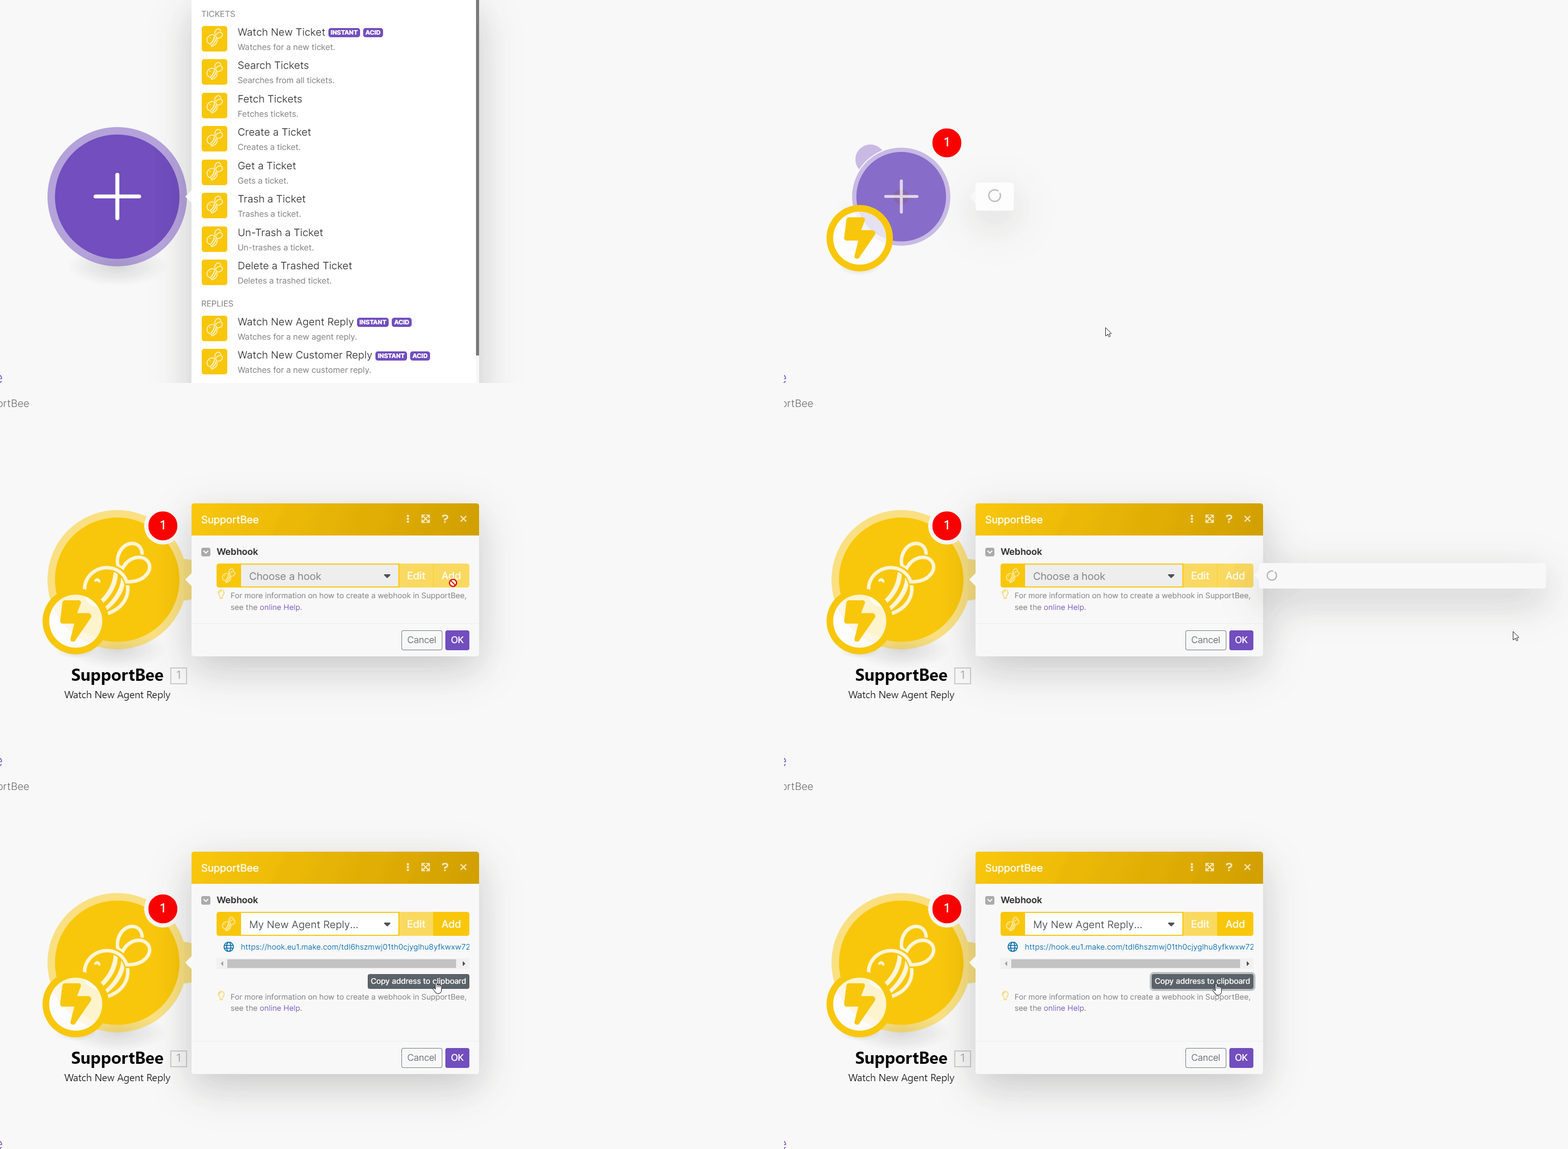
Open any Watch module, enter a name for the webhook, click Save and copy the URL address to your clipboard.
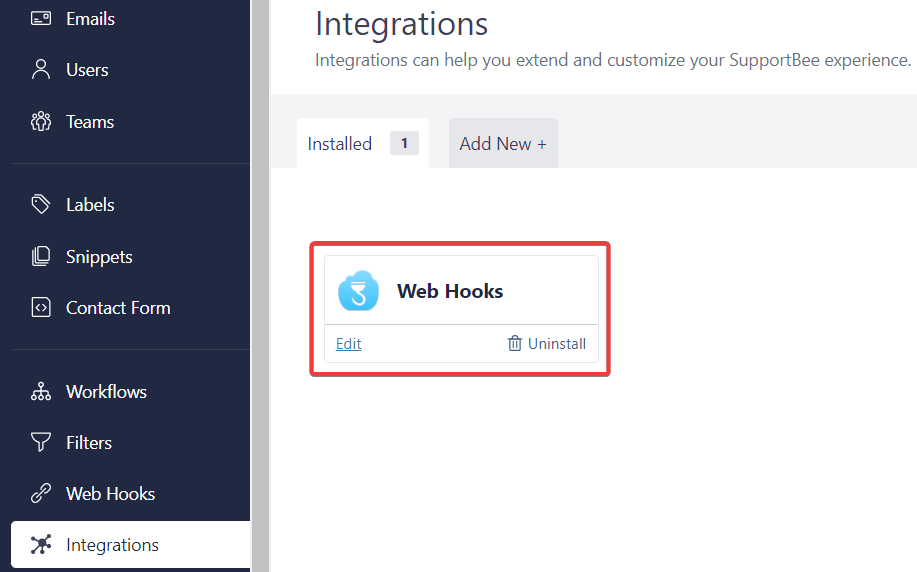
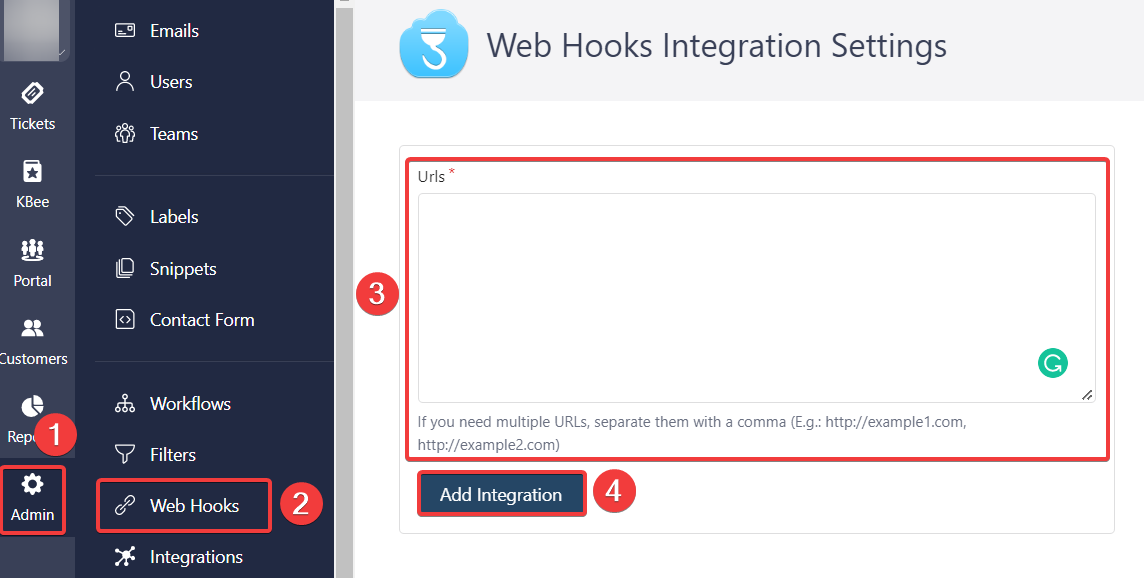
Log in to your Supportbee account, and click Admin > Web Hooks.
In the URL field, enter the URL address copied in step 1 and click Add Integration.
You have successfully set up the webhooks.
