RescueTime
The RescueTime modules allow you to watch, start, end, daily summary reports, alerts, FocusTime sessions, and generate an analytic report in your RescueTime account.
Getting Started with RescueTime
Prerequisites
A RescueTime account
In order to use RescueTime with Make, it is necessary to have a RescueTime account. If you do not have one, you can create a RescueTime account at rescuetime.com/signup/solo/pro.
Connecting RescueTime to Make
To connect your RescueTime account to Make you need to obtain the API Key from your RescueTime account and insert it in the Create a connection dialog in the Make module.
1. Go to Make and open the RescueTime module's Create a connection dialog.
2. In the Connection name field, enter a name for the connection and click Continue.
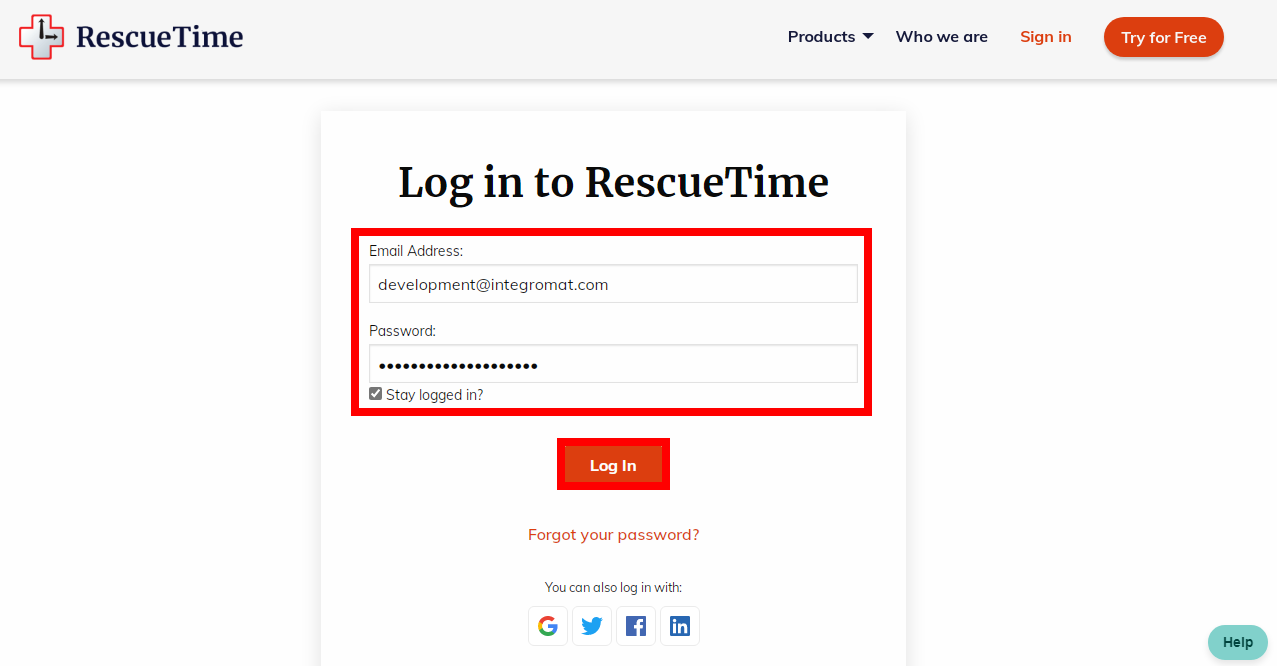
3. Enter your RescueTime credentials and click Login.
4. Confirm the access by clicking Authorize.
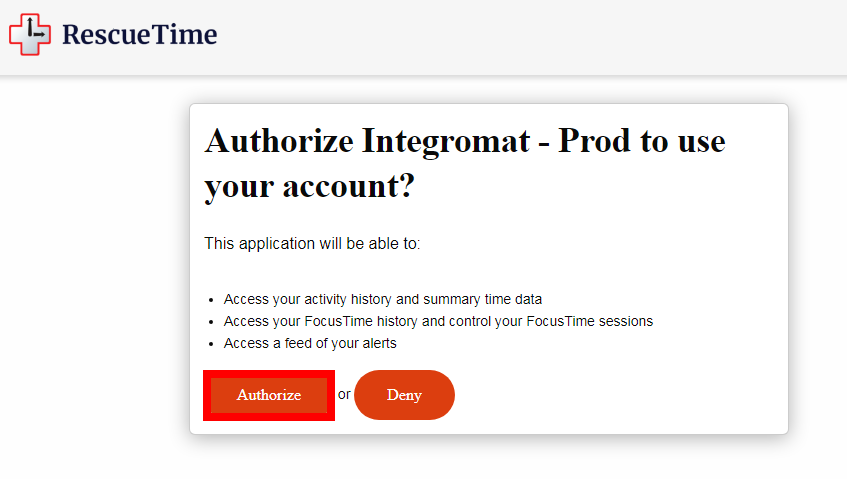
The connection has been established.
Triggers by the new daily summary report.
Required Permissions: time_data
Connection | |
Limit | Set the maximum number of daily summary reports Make should return during one scenario execution cycle. |
Triggers by user-defined alerts. Only for RescueTime Premium users.
Required Permissions: alert_data
Connection | |
Triggers only for a specific alert | (Optional) Select the option if you want to receive alerts only for specific alerts:
|
Limit | Set the maximum number of alerts Make should return during one scenario execution cycle. |
Triggers by started or ended FocusTime Sessions. Only for RescueTime Premium users.
Required Permissions: focustime_data
Connection | |
Feed Type | Select the session type:
|
Limit | Set the maximum number of alerts Make should return during one scenario execution cycle. |
Starts a FocusTime session. Only for RescueTime premium users.
Required Permissions: focustime_data
Connection | |
How long do you want to focus? | Select the option to choose the session time:
|
Duration in Minutes | Enter the duration of the session in minutes. The duration must be a multiple of 5, or else it will be rounded off to the nearest 5 minutes. Must be higher than or equal to 5. |
Ends a FocusTime session. Only for RescueTime premium users.
Required Permissions: focustime_data
Creates an offline time record.
Required Permissions: focustime_data
Connection | |
Start Time | Enter the start date/time for the offline time record in the YYYY-MM-DD HH:MM:SS format. A UNIX timestamp is also acceptable. |
End Time | Enter the end date/time for the offline time record in the YYYY-MM-DD HH:MM:SS format. A UNIX timestamp is also acceptable. |
Activity Name | Enter the name of the activity. For example, |
Activity Details | Enter the details of the activity. A maximum of 255 characters is allowed. |
Triggers by new highlighted events. Only for RescueTime premium users.
Required Permissions: highlight_data
Connection | |
Limit | Set the maximum number of events Make should return during one scenario execution cycle. |
Creates a highlight event. Only for RescueTime premium users.
Required Permissions: highlight_data
Connection | |
Highlight Date | Enter the date of the event. |
Description | Enter the details of the event. |
Source Label | Enter an appropriate label for the event. |
Generates an analytic report with various scopes of data.
Required Permissions: time_data
Connection | |
Perspective | Select the X-axis value for generating the analytic report:
|
Unit of Interval | Select the measuring unit of the value:
|
Group By | Select the option to group the data:
|
Source Type | Select the source type for the data:
|
Begin Date | Enter the start date for the data from which you want to generate the report. |
End Date | Enter the start date for the data until which you want to generate the report. |
Name of Overview, Category, Application, or Website | Enter the name of the specific overview, category, application, or website. If it is a website, enter only the domain name. For example, |
Name of the Document or Activity | Enter the name of the document or activity to record for the currently active application. |
Schedule or Time Filter ID | Enter the Schedule ID or Time ID to filter the results. |
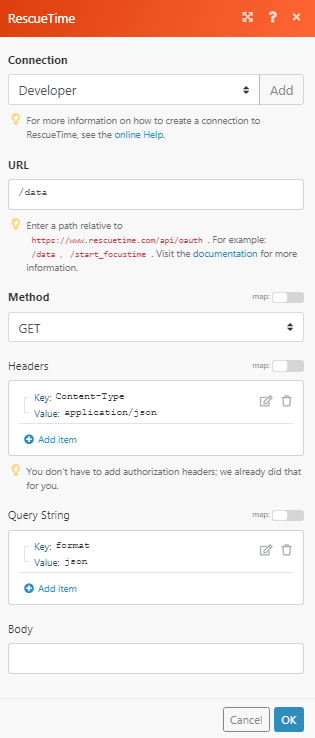
Performs an arbitrary authorized API call.
Connection | |
URL | Enter a path relative to For the list of available endpoints, refer to the RescueTime API Documentation. |
Method | Select the HTTP method you want to use: GET to retrieve information for an entry. POST to create a new entry. PUT to update/replace an existing entry. PATCH to make a partial entry update. DELETE to delete an entry. |
Headers | Enter the desired request headers. You don't have to add authorization headers; we already did that for you. |
Query String | Enter the request query string. |
Body | Enter the body content for your API call. |
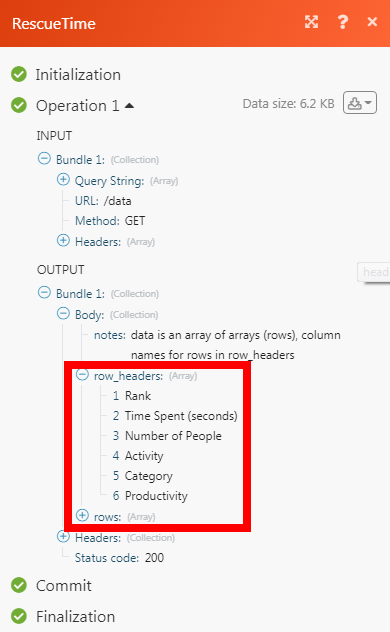
The following API call returns all the data from your RescueTime account:
URL:/data
Method:GET
Query String:Key: format Value: json
Matches of the search can be found in the module's Output under Bundle > Body. In our example, the data details were returned: