SegMetrics
With the SegMetrics modules, you can add, update and delete the contact, tag, order, and subscription in your SegMetrics account.
To get started with the SegMetrics, create an account at segmetrics.io
Note
The module dialog fields that are displayed in bold (in the Make ,scenario not in this documentation article) are mandatory!
Connect Segmetrics with Make
To connect the SegMetrics app with the Make:
Log in to your SegMetrics account.
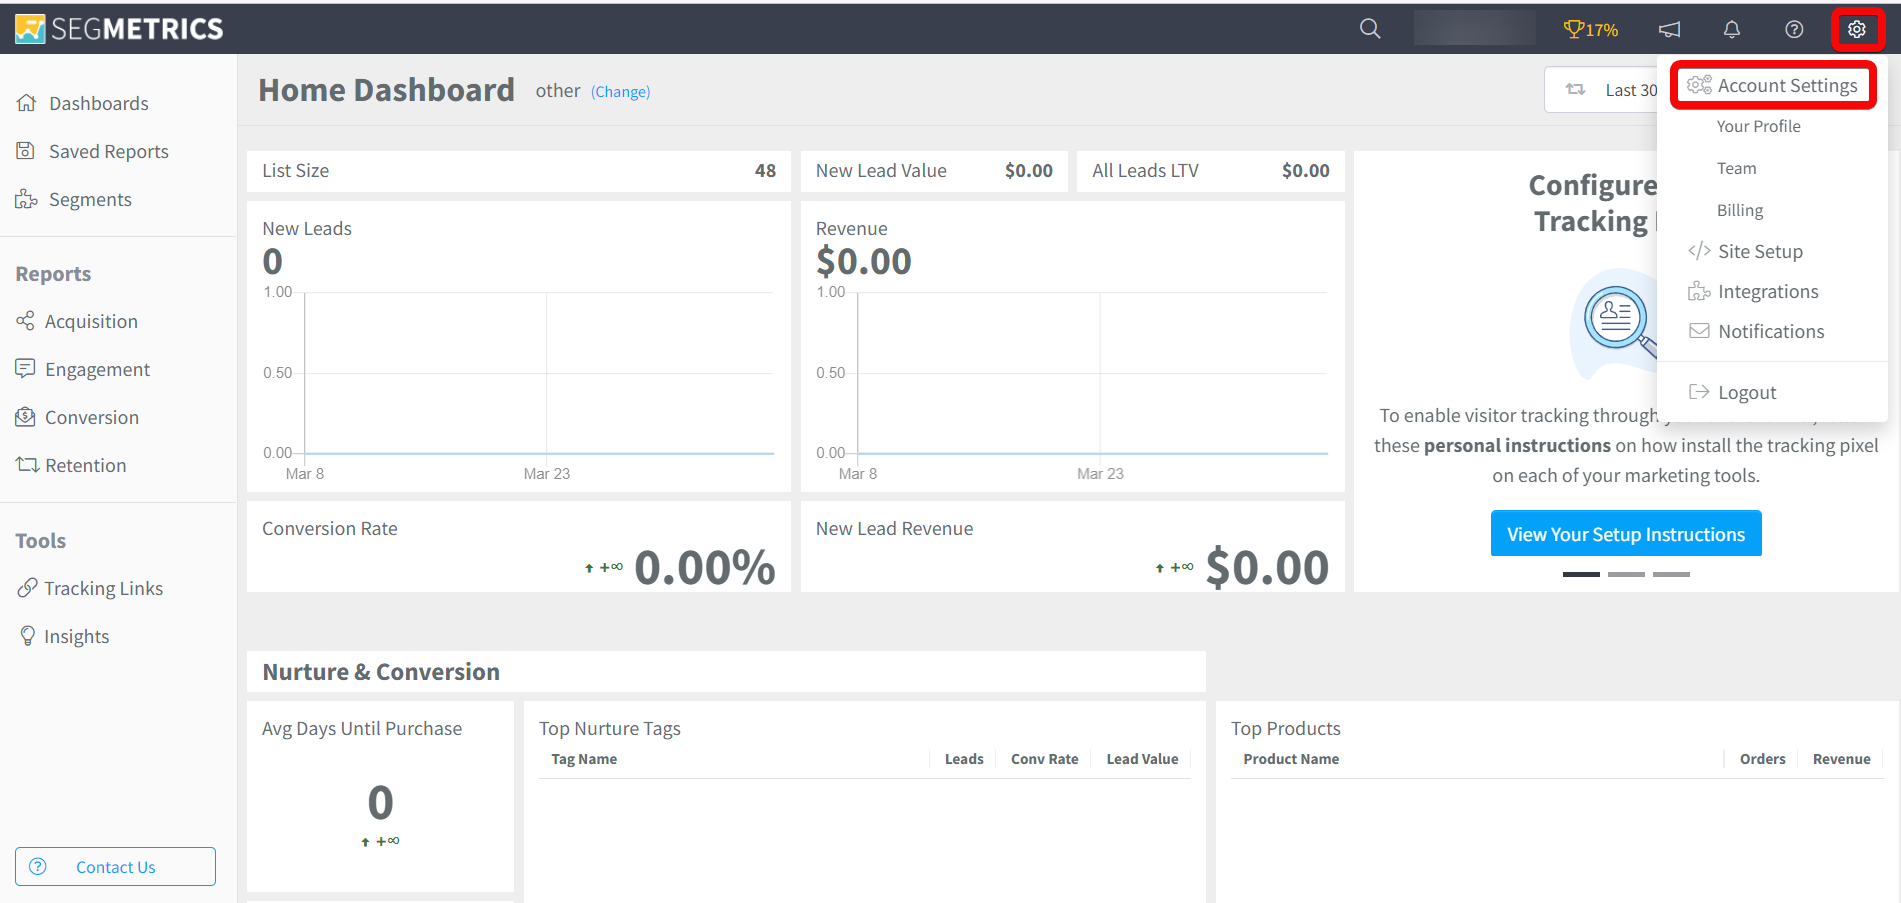
Click Settings > Account Settings. Copy the Account ID to a safe place.
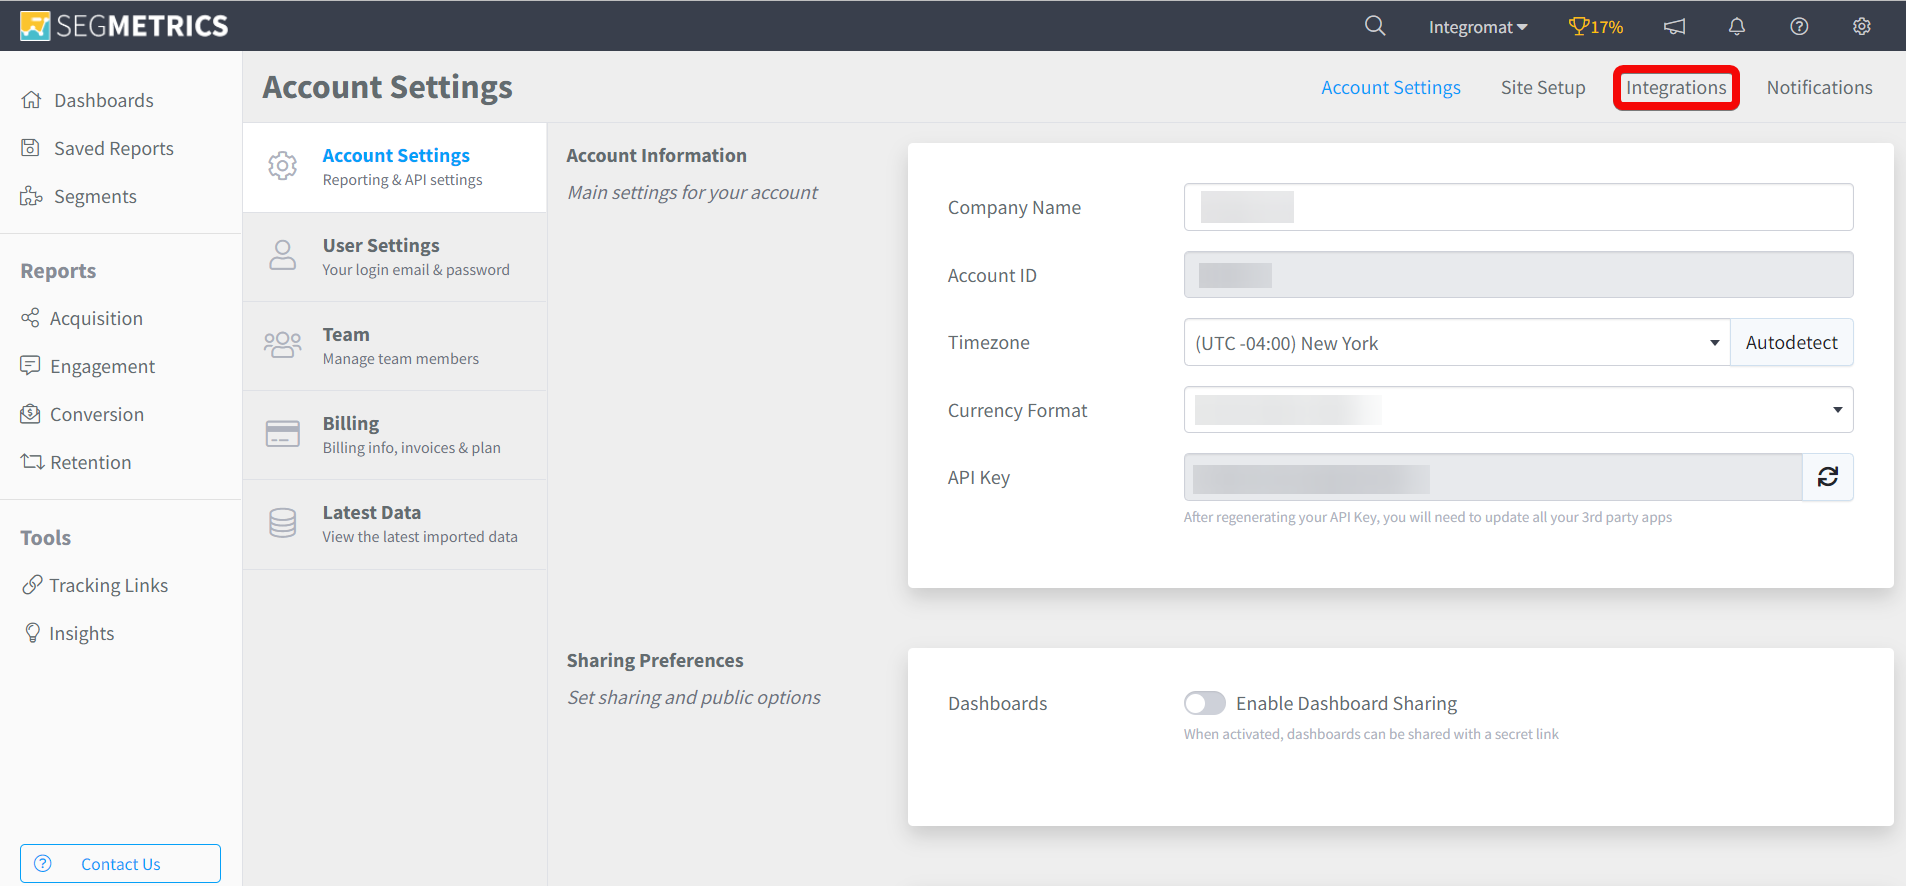
Click Integrations.
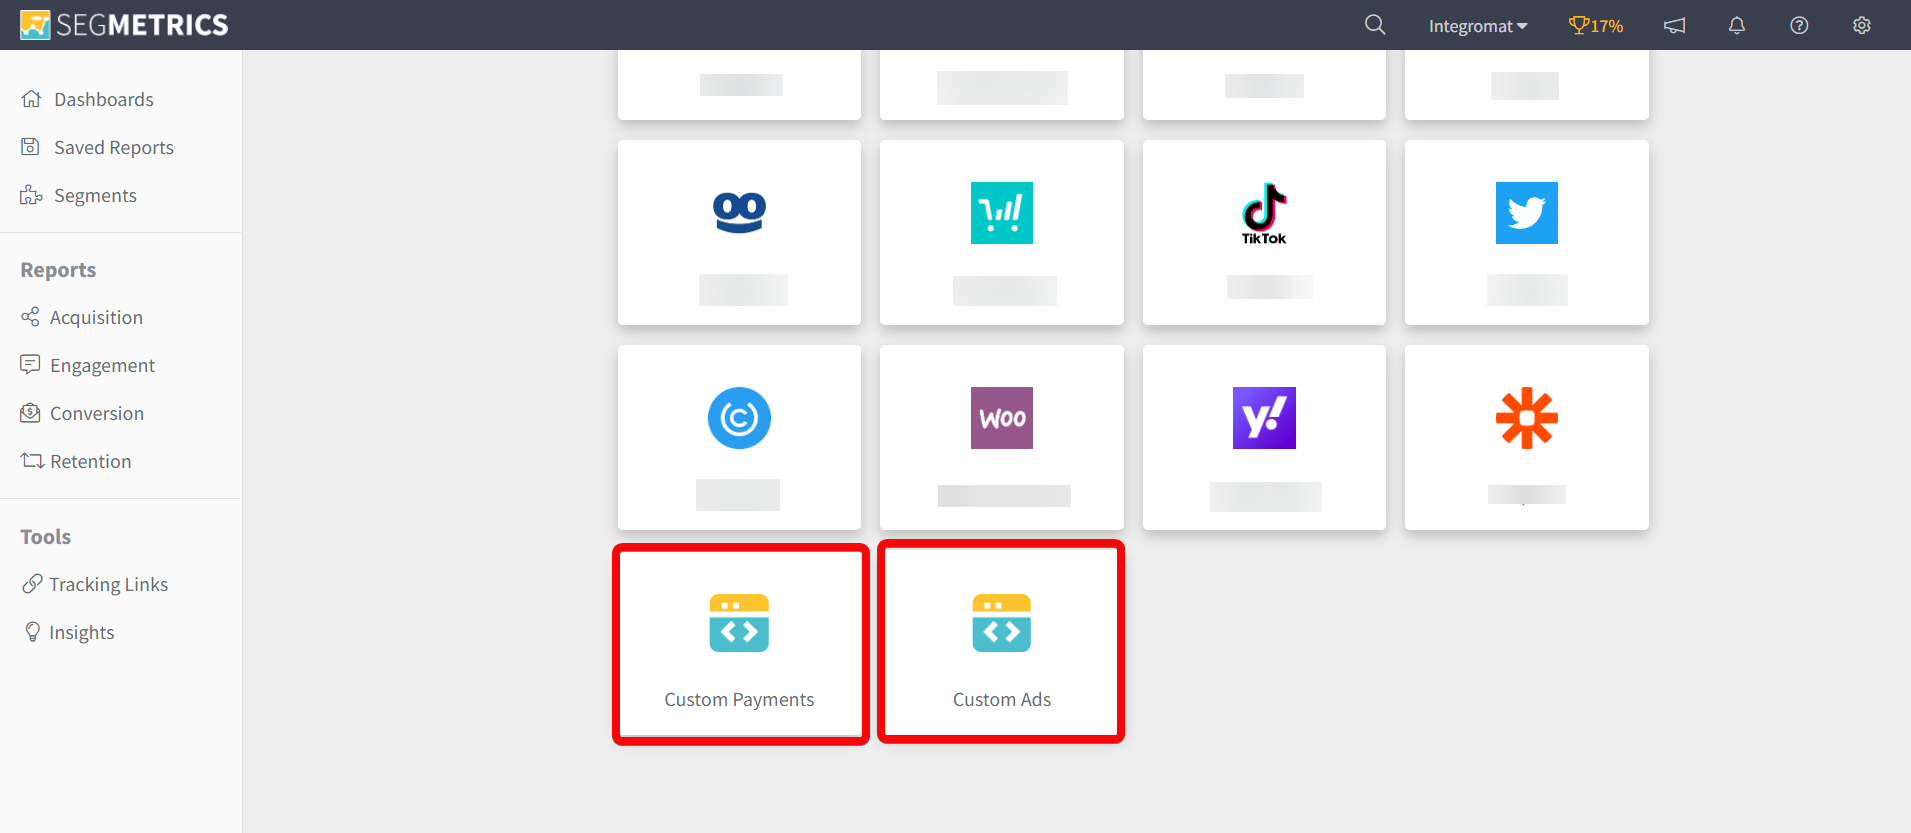
Select the kind of integration you want to make either custom payments or custom Ads.
Enter a name for the integration and click Create Your Custom Integration.
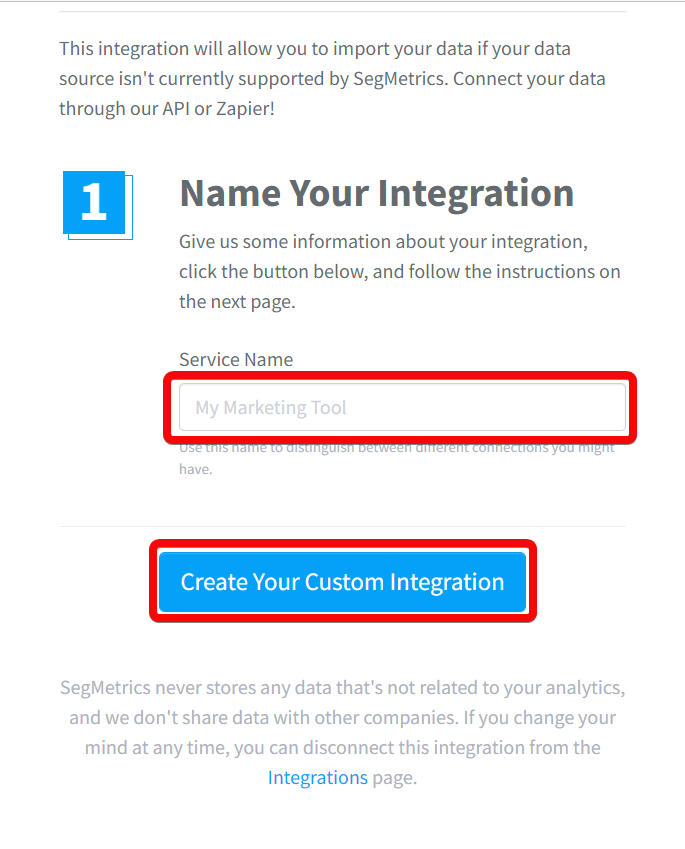
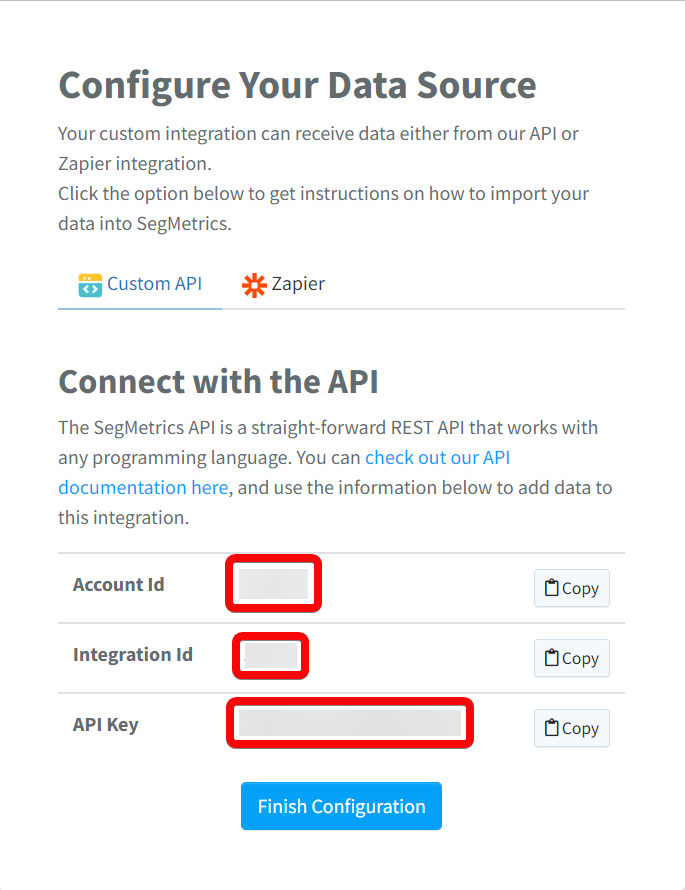
Copy the Account ID, Integration ID, and API Key details to a safe place.
Log in to your Make and add a module from the SegMetrics into a Make scenario.
Click Add next to the Connection field.
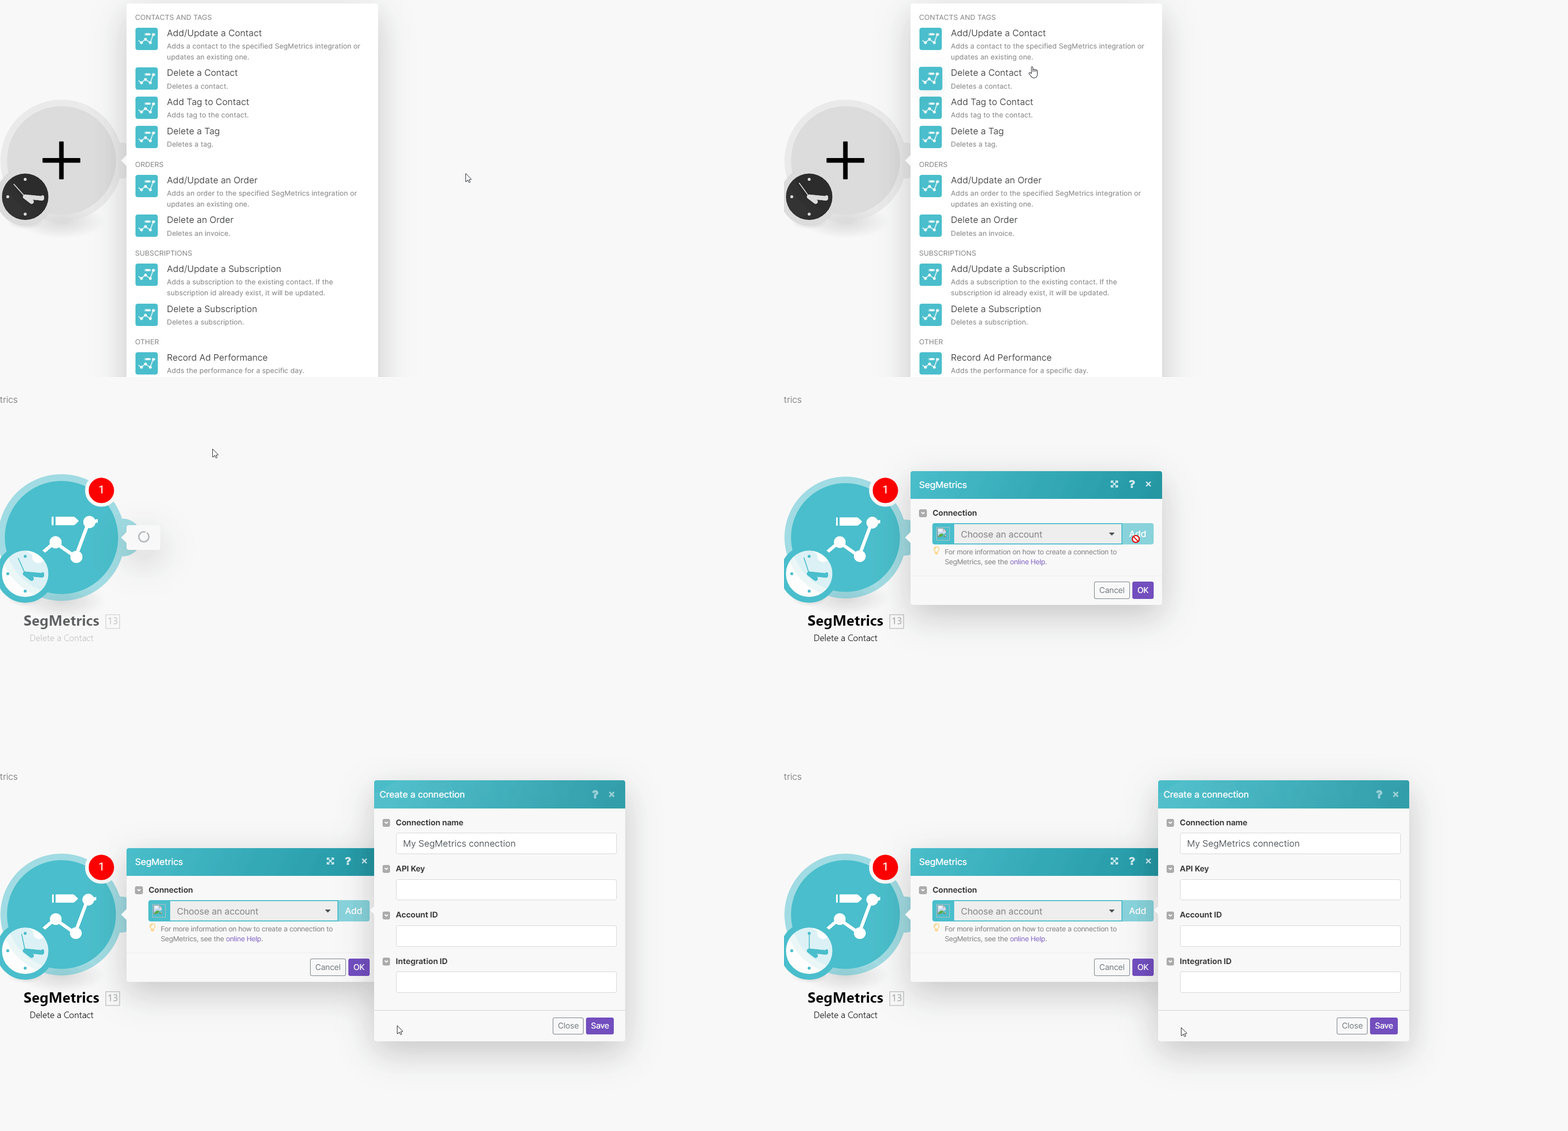
In the Connection name field, enter a name for the connection.
In the API Key, Account ID, and Integration ID fields, enter the details copied in steps 2 and 6 respectively, and click Save.
You have successfully connected the SegMetrics app with Make and can now build scenarios.
Contacts and Tags
You can add, update, and delete the contacts, and contact tags using the following modules.
Adds a contact to the specified SegMetrics integration or updates an existing one.
Connection | |||||
Contact Email Address | Enter (map) the contact's email address to add or update. | ||||
Date Created | Enter (map) a date on which the contact was created. See the list of supported date and time formats. | ||||
First Name | Enter (map) the contact's first name of the contact. | ||||
Last Name | Enter (map) the contact's last name of the contact. | ||||
Status | Select or map the contact's status of the contact:
| ||||
Tags | Enter (map) the tag name or Tag ID associated with the contact. | ||||
Custom Fields | Enter the custom fields. You can enter multiple custom fields.
|
Deletes a contact.
Connection | |
Contact ID or Email | Enter (map) the Contact ID or the contact's email address you want to delete. |
Adds a tag to the contact.
Connection | |
Update by Email or Contact ID | Select or map a method to add a tag to contact:
|
Email Address | Enter (map) the contact's email address to which you want to add a tag. |
Contact ID | Enter (map) the Contact ID to which you want to add a tag. |
Tags | Enter (map) the tag name or Tag ID associated with the contact. You can multiple tags. |
Deletes a tag.
Connection | |
Contact ID | Enter (map) the Contact ID whose tags you want to delete. |
Enter (map) the contact's email address whose tags you want to delete. | |
Tags | Enter (map) the tags you want to delete. You can add multiple tags. |
Orders
You can add, update, and delete the order using the following modules.
Adds an order to the specified SegMetrics integration or updates an existing one.
Connection | |||||||
Email Address | Enter (map) the contact's email address to add or update an order. | ||||||
Invoice ID | Enter (map) the Invoice ID of the order to update. | ||||||
Paid | Enter (map) the amount paid in cents towards the order. | ||||||
Amount | Enter (map) invoice total amount in cents towards the order. | ||||||
Created Date | Enter (map) the date of the invoice. See the list of supported date and time formats. | ||||||
Items | Add the invoice item details. You can multiple invoice items.
| ||||||
Refunded | Enter (map) whether the invoice is refunded. |
Deletes an invoice.
Connection | |
Invoice ID | Enter (map) an order Invoice ID you want to delete. |
Subscriptions
You can add, update, and delete the subscriptions.
Adds a subscription to the existing contact. If the subscription id already exists, it will be updated.
Connection | |
Email Address | Enter (map) the contact's email address whose subscription details you want to add or update. |
Contact ID | Enter (map) the Contact ID whose subscription details you want to add or update. |
Subscription ID | Enter (map) the Subscription ID to add or update. |
Amount | Enter (map) the subscription total amount in cents. |
Product ID | Enter (map) the Product ID to which the subscription applies. |
Start Date | Enter (map) the subscription's start date and time. See the list of supported date and time formats. |
Last Bill Date | Enter (map) the subscription's last billed date and time. See the list of supported date and time formats. |
Billing Cycle | Select the frequency of the subscription to be billed:
|
Frequency | Enter (map) the number of intervals (specified in the billing cycle) between subscription billings. For Example, if the billing cycle is monthly and the frequency is 3 then bills every 3 month |
Quantity | Enter (map) the quantity of the plan to which the customer is subscribed. The default value is 1. |
Trial End Date | Enter (map) the subscription end date if it's a trial. See the list of supported date and time formats. |
End Date | Enter (map) a date at which the subscription will automatically get canceled. See the list of supported date and time formats. |
Canceled Date | Enter (map) a cancellation date if the subscription has been canceled. See the list of supported date and time formats. |
Deletes a subscription.
Connection | |
Subscription ID | Enter (map) a Subscription ID you want to delete. |
Other
You can call APIs and record ad performance using the following modules.
Adds the performance for a specific day.
Connection | |||||
AD | Enter (map) the details of the ad to which you want to add the performance. You can add multiple ads.
| ||||
AD Campaign | Enter (map) the details of the ad campaign. You can add multiple ad campaigns.
| ||||
AD Set | Enter (map) the details of the ad sets. You can add multiple ad sets.
| ||||
AD Spend | Enter (map) the amount spent on the ad for a day in Cents. | ||||
Date | Enter (map) the date to which the clicks, spend, and impressions apply to. See the list of supported date and time formats. | ||||
Impressions | Enter (map) the number of impressions on the ad for a day. | ||||
Clicks | Enter (map) the number of clicks on the ad for a day. |
Performs an arbitrary authorized API call.
Connection | |
URL | Enter a path relative to NoteFor the list of available endpoints, refer to the SegMetrics API documentation |
Method | GET to retrieve information for an entry. POST to create a new entry. PUT to update/replace an existing entry. PATCH to make a partial entry update. DELETE to delete an entry. |
Headers | Enter the desired request headers. You don't have to add authorization headers; we already did that for you. |
Query String | Enter the request query string. |
Body | Enter the body content for your API call. |
Example of use - Add a Contact
The following API call adds the contact in your SegMetrics account:
URL:
/request
Method:
GET
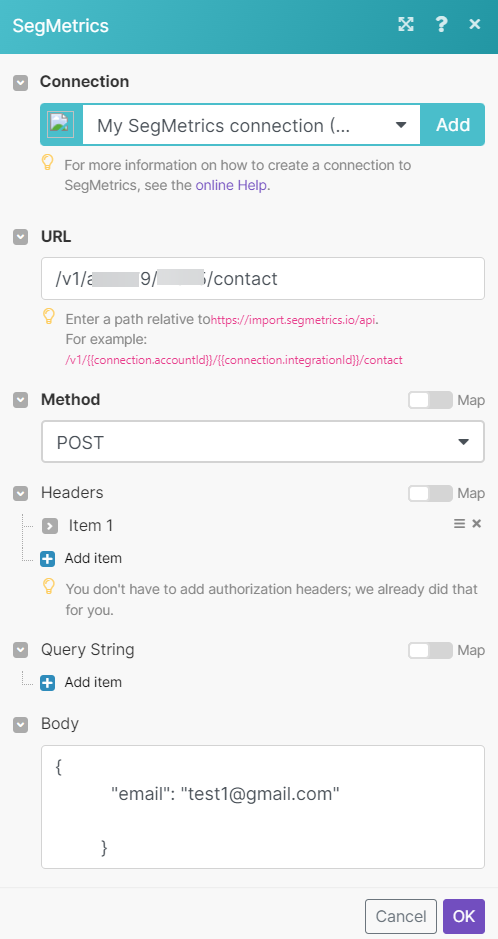
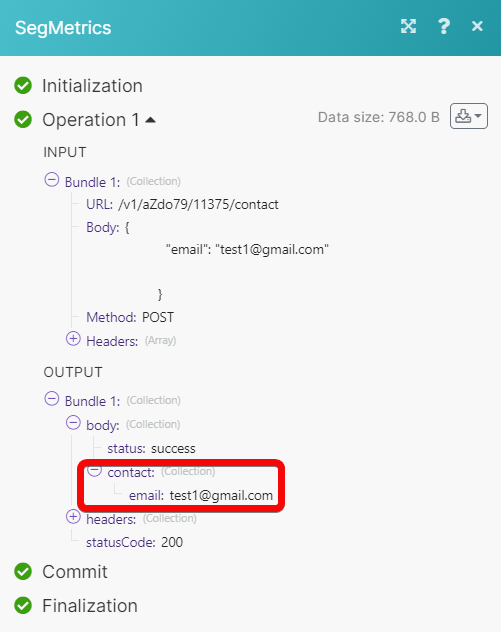
Matches of the search can be found in the module's Output under Bundles > Body > contact. In our example, specified contact was added:
