Gmail
With Gmail modules in Make, you can manage the emails, email labels, and attachments in your Gmail account.
To use the Gmail modules, you must have a Gmail account. You can create an account at myaccount.google.com.
Refer to the Gmail API documentation for a list of available endpoints.
Note
Make's use and transfer of information received from Google APIs to any other app will adhere to Google API Services User Data Policy.
Connect Gmail to Make
Important
To connect an email ending in @gmail or @googlemail, you need to create a custom OAuth client in the Google Cloud Platform and get your project client credentials to establish the connection in Make.
There are two procedures to establish the connection in Make depending on credentials you provide:
Default credentials provided by Make. Use the option if your company has a paid subscription to Google Cloud Platform and uses a custom domain name for Gmail: for example,
[email protected]. Proceed to establishing the connection in your Make scenario where you can skip the step 3.Your custom credentials. You only have restricted access to Gmail API which doesn't allow using default credentials provided by Make. You need to create a custom OAuth client in Google Cloud Platform:. Use the option if:
You don't have a subscription to Google Cloud Platform, use a free Google Account, and have your email address ending with
@gmailor@googlemail.You use a paid Google Account, and you want to have more control of what the Gmail app in Make is able to do. You need to gain the
serviceusage.services.enablepermission. If you don’t have this permission, ask the Google Cloud Platform Project Owner or Project IAM Admin to grant it to you.
Proceed to creating a custom OAuth client in Google Cloud Platform, and then establish a connection in your Make scenario where you need to follow all the steps.
Create and configure a Google Cloud Platform project for Gmail
To connect to Make using your own client credentials, you can create and configure a project in the Google Cloud Platform.
Important
You need to follow the procedure if you use an email address that ends with @gmail or @googlemail.
Create a Google Cloud Platform project for Gmail
To create a Google Cloud Platform project:
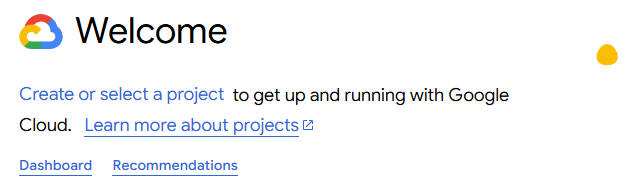
Log in to the Google Cloud Platform using your Google credentials.
On the welcome page, click Create or select a project > New project. If you already have a project, proceed to the step 5.
Enter a Project name and select the Location for your project.
Click Create.
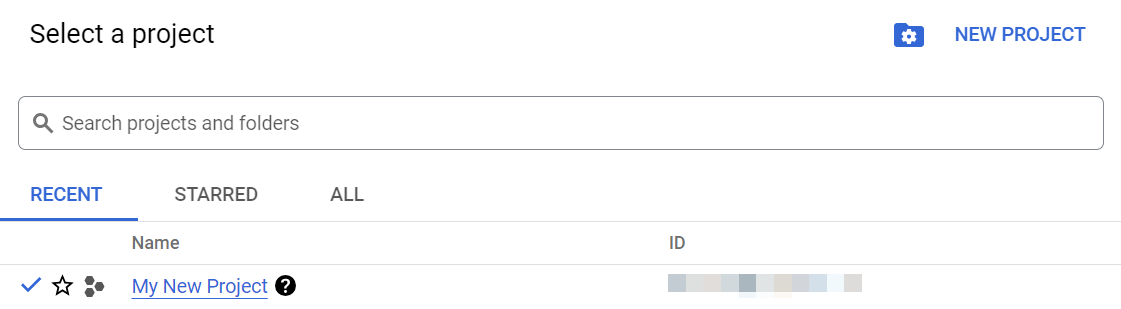
In the top menu, check if your new project is selected in the Select a project dropdown. If not, select the project you just created.
Note
To create a new project or work in the existing one, you need to have the serviceusage.services.enable permission. If you don’t have this permission, ask the Google Cloud Platform Project Owner or Project IAM Admin to grant it to you.
Enable APIs for Gmail
To enable the required APIs:
Open the left navigation menu and go to APIs & Services > Library.
Search for the following API: Gmail API
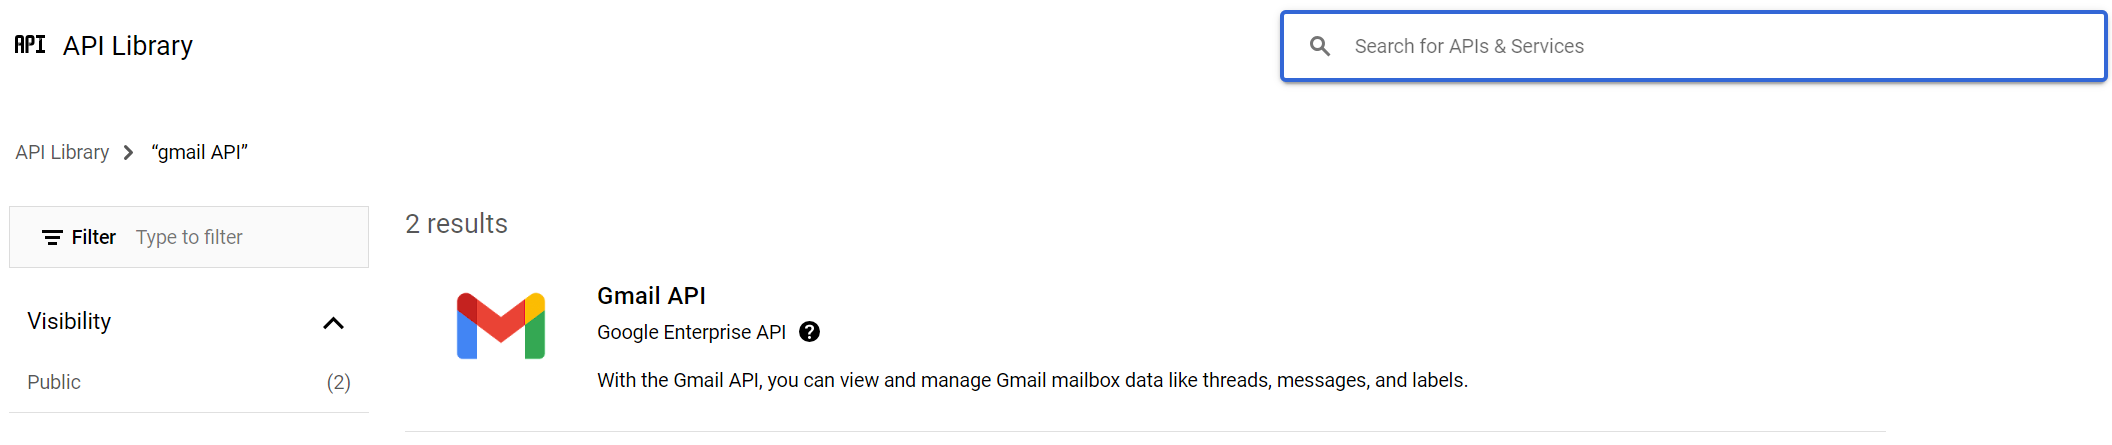
Click Gmail API, then click Enable. If you see the Manage button instead of the Enable button, you can proceed to the next step: the API is already enabled.
Configure your OAuth consent screen for Gmail
To configure your OAuth consent screen:
In the left sidebar, click Google Auth Platform.
Note
If you don't see Google Auth Platform in the left sidebar, click View all products at the top of it, then pin Google Auth Platform to the sidebar.

Click Get Started.
In the Overview section, under App information, enter Make as the app name and provide your Gmail address. Click Next.
Under Audience, select External. Click Next.
For more information regarding user types, refer to Google's Exceptions to verification requirements documentation.
Under Contact Information, enter your Gmail address and click Next.
Under Finish, agree to the Google User Data Policy.
Click Continue > Create.
Click Create OAuth Client.

In the Branding section, under Authorized domains, add
make.comandintegromat.com. Click Save.Optional: In the Audience section, add your Gmail address on the Test users page, then click Save and continue if you want the project to remain in the Testing publishing status. Read the note below to learn more about the publishing status.
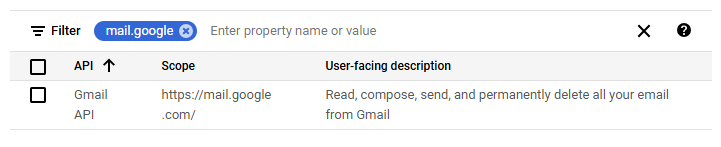
In the Data Access section, click Add or remove scopes, add the following scopes:
https://mail.google.comhttps://www.googleapis.com/auth/userinfo.emailYou can add scopes using:
A table with filters:
A window to manually enter scopes:
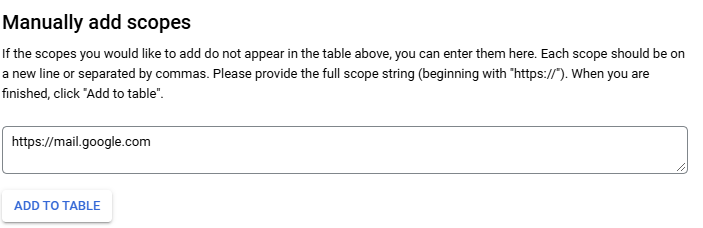
Click Update.
Click Save.
Note
Publishing Status
Testing: If you keep your project in the Testing status, you will be required to reauthorize your connection in Make every week. To avoid weekly reauthorization, update the project status to In production.
In production: If you update your project to the In production status, you will not be required to reauthorize the connection weekly. To update your project's status, go to the Google Auth Platform, the Audience section, and click Publish app. If you see the notice Needs verification, you can choose whether to go through the Google verification process for the app or to connect to your unverified app. Currently connecting to unverified apps works in Make, but we cannot guarantee the Google will allow connections to unverified apps for an indefinite period.
For more information regarding the publishing status, refer to the Publishing status section of Google's Setting up your OAuth consent screen help.
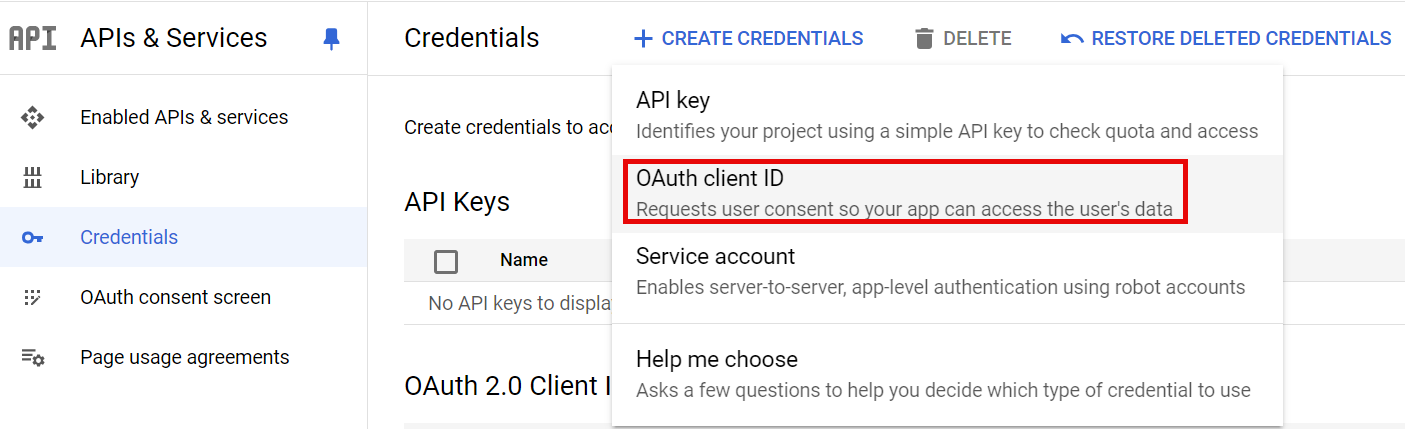
Create your Gmail client credentials
To create your client credentials:
In Google Auth Platform, click Clients.
Click + Create Client.
In the Application type dropdown, select Web application.
Update the Name of your OAuth client. This will help you identify it in the platform.
In the Authorized redirect URIs section, click + Add URI and enter the following redirect URI:
https://www.integromat.com/oauth/cb/google-restricted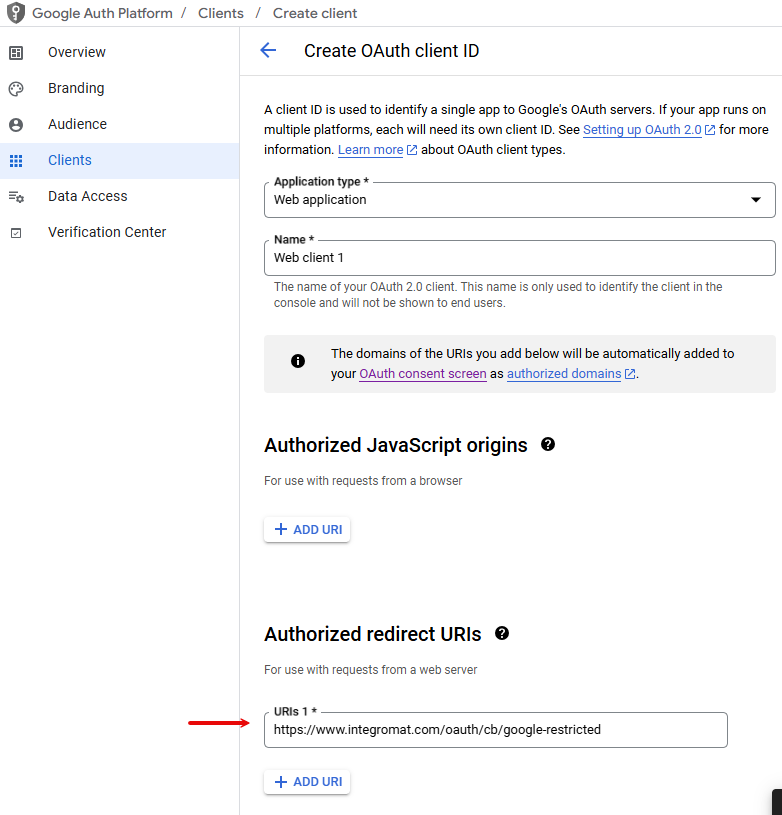
Click Create.
Click the OAuth 2.0 Client you created, copy your Client ID and Client secret values, and store them in a safe place.

You will use these values in the Client ID and Client Secret fields in Make.
Establish the connection in Make
Log in to your Make account, add a Gmail module to your scenario, and click Create a connection.
Optional: In the Connection name field, enter a name for the connection.
Optional for Gmail users with non-
@gmailor@googlemaildomains: Switch on the Show advanced settings toggle and enter your Client ID and Client secret that you created in the previous section. For more information, see the Create and configure a Google Cloud Platform project for Gmail section above.Click Sign in with Google.
If prompted, authenticate your account, grant all requested permissions, and confirm access.
You have successfully established the connection. You can now edit your scenario and add more Gmail modules. If your connection requires reauthorization at any point, follow the connection renewal steps here.
Build Gmail Scenarios
After connecting the app, you can perform the following actions:
Triggers
Triggers when a new email is received to be processed according to specified criteria.
Connection | |
Folder | Select the email folder you want to watch. |
Filter type | Select Simple filter to filter emails by selecting criteria, or Gmail filter to filter emails by entering the query. |
Criteria | Select the option to filter watched emails by. |
Query | Use the Gmail search syntax. To search for messages containing an icon of a specific color, use the following search query:
|
Sender email address | Enter the email addresses that you want to filter emails by. |
Subject | Enter the characters string in the email subject that you want to filter emails by. |
Search phrase | Enter the characters string in the email subject or body that you want to filter emails by. |
Mark email message(s) as read when fetched | Select whether you want to mark retrieved emails as read. |
Maximum number of results | Set the maximum number of results that Make will work with during one cycle. |
Actions
Copies an email or a draft into a selected folder.
Connection | |
Folder | Select the email source folder that contains an email you want to copy. |
Destination folder | Select the email destination folder where you want to copy an email to. |
Email ID (UID) | Enter the ID of the email you want to copy. To get the Email ID (UID), use the Email > Get Emails module. You will see the value in the output. |
Creates a new draft and adds it to a selected folder.
Connection | |||||
Folder | Select the folder you want to add a draft to. | ||||
To | Enter the recipient's email address. | ||||
Subject | Enter the email draft subject. | ||||
Content | Enter the email message body. You can use HTML tags. | ||||
Attachments |
| ||||
Copy recipient | Enter the copy recipient's email address. (CC:) | ||||
Blind copy recipient | Enter the blind copy recipient's email address. (BCC:) |
Removes an email or a draft from a selected folder.
Connection | |
Gmail Message ID | Enter the ID of the message you want to delete. To get the Gmail Message ID, use the Gmail > Watch Emails module. You will see the value in the output. |
Permanently | Select whether you want to move the email to the thrash folder or to permanently delete it. |
Marks an email or a draft in a selected directory as read by setting the "Read" flag.
Connection | |
Folder | Select the folder that contains the email you want to mark as Read. |
Email ID (UID) | Enter the ID of the email you want to copy. To get the Email ID (UID), use the Email > Get Emails module. You will see the value in the output. |
Marks an email in a selected directory as read by setting the "Unread" flag.
Connection | |
Folder | Select the folder that contains the email you want to mark as Unread. |
Email ID (UID) | Enter the ID of the email you want to copy. To get the Email ID (UID), use the Email > Get Emails module. You will see the value in the output. |
Modifies labels on the specified email message.
Connection | |
Gmail Message ID | Enter the ID of the message whose labels you want to modify. To get the Gmail Message ID, use the Gmail > Watch Emails module. You will see the value in the output. |
Labels to add | Select the labels you want to attach to the email. |
Labels to remove | Select the labels you want to detach from the email. |
Moves a chosen email to a selected folder.
Connection | |
Folder | Select the email source folder that contains an email you want to move. |
Destination folder | Select the email destination folder where you want to move an email to. |
Email ID (UID) | Enter the ID of the email you want to copy. To get the Email ID (UID), use the Email > Get Emails module. You will see the value in the output. |
Sends a new email.
Connection | |||||||
From | Enter a custom sender email address. There are two options for entering:
| ||||||
To | Enter the recipient's email address. | ||||||
Subject | Enter the email subject. | ||||||
Content | Enter the email message body. You can use HTML tags. | ||||||
Attachments |
| ||||||
Copy recipient | Enter the copy recipient's email address. (CC:) | ||||||
Blind copy recipient | Enter the blind copy recipient's email address. (BCC:) |
Iterators
Iterates through received attachments.
Source module | Select another Gmail module whose output contains attachments you want to iterate. |
Common Problems
Here you can find solutions for the most common issues when working with Gmail in Make.
Error 400: Failed to Verify a Connection
Your connection has expired and is no longer valid. You need to reauthorize the connection every seven days.
This error affects non-Google Workspace accounts. For more details, please refer to Google OAuth documentation.
Due to Google's updated security policy, unpublished apps can only have a 7-day authorization period. After the OAuth security token expires, the connection is no longer authorized and any module relying on it will fail.
Solution
Option 1:
To avoid weekly reauthorization, you can update the publishing status of your project.
If you update your project to the In production status, you will not be required to reauthorize the connection weekly.
Change the status of your project by following these steps:
Log in to the Google Cloud Platform using your Google credentials.
Navigate to the Oauth consent screen.
Click the Publish app button next to your app.
If the Needs verification message appears, choose whether to go through the Google verification process for the app or to connect to your unverified app. Currently connecting to unverified apps works in Make, but we cannot guarantee the Google will allow connections to unverified apps for an indefinite period.
For more information regarding publishing statuses, refer to the Publishing status section of Google's Setting up your OAuth consent screen help and our Community page.
Option 2
If you keep your project in the Testing status, you will be required to reauthorize your connection in Make every week.
Reauthorize your Google connection by following these steps:
Log in to Make.
Go to Connections.
Find your Google connection and click the Reauthorize button.
Note
To prevent the expiration of your Google connection, we suggest you to reauthorize the connection every week.
Error 403: Access Denied
You didn't add a test user for your project in Google Cloud Platform, and the project has the Testing status. You need to add the email address associated with the Google account you want to connect with Make as a Test user.
Log in to the Google Cloud Platform using your Google credentials.
Go to APIs & Services > OAuth consent screen.
Under Test users, + Add Users and enter an email of a user that you want to create a connection for.
Click Save.
Error 403: Access Not Configured
The Gmail API was disabled in the Google Cloud Platform. You need to enable it again.