ClickFunnels 2.0
With ClickFunnels 2.0 modules in Make, you can monitor the contacts, orders, form submissions, and manage the contacts, and orders in your ClickFunnels 2.0 account.
To use the ClickFunnels 2.0 modules, you must have a paid ClickFunnels 2.0 account. You can create an account at clickfunnels.com.
Refer to the ClickFunnels 2.0 API documentation for a list of available endpoints.
Connect ClickFunnels 2.0 to Make
To create a connection and use the ClickFunnels 2.0 modules, you first need to create a platform application in ClickFunnels. For more details, refer to the ClickFunnels Getting Started documentation.
Make provides two ways to connect the ClickFunnels 2.0 app:
To obtain your client credentials from your ClickFunnels 2.0 account:
Log in to your ClickFunnels 2.0 account.
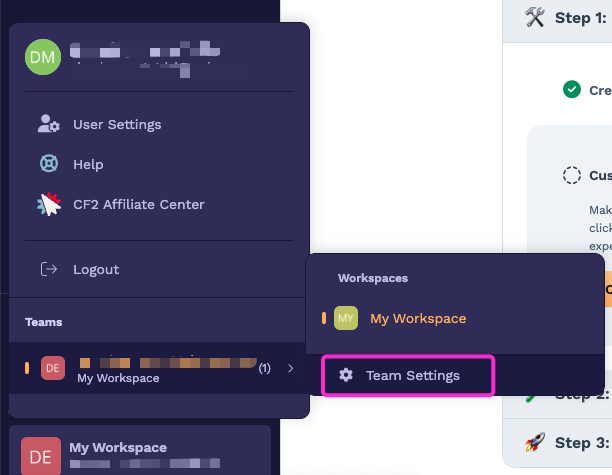
In the bottom left, click your Workspace name > Team name > Team Settings.
In the left sidebar, click Developer Portal.
Click on the name of your platform application.
Copy the Client ID and Client Secret values shown and store them in a safe place.
Log in to your Make account, add a ClickFunnels 2.0 module to your scenario, and click Create a connection.
Note: If you add a module with an
instanttag, click Create a webhook, then Create a connection.In the Connection type field, select ClickFunnels
Optional: In the Connection name field, enter a name for the connection.
In the Client ID and Client Secret fields, enter the credentials copied in Step 5.
Click Save.
You have successfully established the connection. You can now edit your scenario and add more ClickFunnels 2.0 modules. If your connection requires reauthorization at any point, follow the connection renewal steps here.
To obtain your API key from your ClickFunnels 2.0 account:
Log in to your ClickFunnels 2.0 account.
In the bottom left, click your Workspace name > Team name > Team Settings.
In the left sidebar, click Developer Portal.
Click on the name of your platform application.
In the API Access Tokens field, click Provision New Access Token, enter a description, and click Create Access Token.
Enter a description and click Create Access Token.
Copy the API token value shown and store it in a safe place.
Log in to your Make account, add a ClickFunnels 2.0 module to your scenario, and click Create a connection.
Note: If you add a module with an
instanttag, click Create a webhook, then Create a connection.In the Connection type field, select ClickFunnels 2.0 API Key.
Optional: In the Connection name field, enter a name for the connection.
In the API Key field, enter the API key copied above.
Enter your subdomain name in the Subdomain field For example:
https://<subdomain>.myclickfunnels.com/account/workspaces/<workspace_id>.In the Workspace ID field, enter the ID of your workspace. For example:
https://<subdomain>.myclickfunnels.com/account/workspaces/<workspace_id>.Click Save.
You have successfully established the connection. You can now edit your scenario and add more ClickFunnels 2.0 modules. If your connection requires reauthorization at any point, follow the connection renewal steps here.
Build ClickFunnels 2.0 Scenarios
After connecting the app, you can perform the following actions:
Watch contacts
Watch orders
Watch form submission
Search contacts
Get a contact
Create a Contact
Update a Contact
Create or update a contact
Redact a contact
Delete a contact
Search orders
Get an order
Update an order
Make an API Call